B
Barry RochaJul 29, 2025
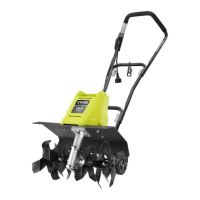
What to do if my Ryobi RY46501B motor fails to start?
- KKeith PerezJul 29, 2025
If the motor on your Ryobi Tiller fails to start when you depress the switch trigger, there could be a couple of reasons. First, ensure the power cord is properly plugged in. A loose connection can prevent the motor from starting, so make sure it's securely plugged in. Also, check your household circuit breaker. If it has tripped, reset it to restore power to the tiller.