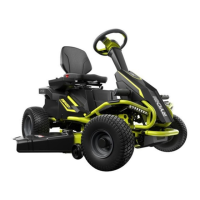
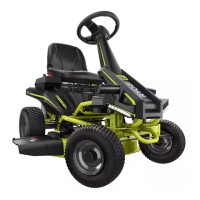
6
BLADE ENGAGE KNOB
The blade engage knob activates or stops the cutting
blades. Pull up the blade engage knob to activate the
cutting blades. Push down the knob to stop the cutting
blades.
BRAKE PEDAL
The brake pedal slows down or stops the product.
CHARGER
The charger recharges the batteries of the mower. It has
a keyhole hanging feature for convenient, space-saving
storage. When hanging by the keyhole slots, use at least
one additional screw in the hole in the mounting fl ange to
secure in place. Always mount the charger in such a way
that the LED status lights are visible while charging.
DECK HEIGHT ADJUSTMENT LEVER
The deck height adjustment lever raises or lowers the
cutting deck.
HEADLIGHT BUTTON
The headlight button turns ON and OFF the headlights.
LOW SPEED CUT BUTTON
The low speed cut button prolongs battery run time when
the cutting load requirement is low.
LOW SPEED DRIVE BUTTON
The low speed drive button limits the speed of the mower
when you are operating in tight spaces or no slopes. This
setting is also useful for inexperienced users when they are
fi rst learning to operate the mower.
MEDIA STORAGE
The media holders provide a convenient place to store your
mobile phone or MP3 player when charging with the USB
port.
MULCH COVER
The mulch cover covers the side discharge chute, which
allows the mower blade to cut and recut for fi ner clippings.
PARKING BRAKE
The parking brake locks the product in the brake position.
POWER SWITCH WITH START KEY
The power switch turns ON and OFF the product. The
start key must be inserted before the switch can be
operated. When the key is in the accessory position, the
power switch is also used to power optional manufacturer-
approved mower accessories.
SAFETY INTERLOCK SYSTEM
The safety interlock system stops the blades if the operator
leaves the mower while the blades are running.
Test the system before each use to ensure it is working
correctly.
a. Position the mower on a level surface.
b. Engage the parking brake.
c. Position the drive levers in the neutral position.
d. Push down the blade engage knob.
e. Insert the start key and turn the key to the ON position.
f. Pull the blade engage knob to activate the blades.
g. Briefly stand up but do not get off the mower.
The blades should stop within 5 seconds. If the blades do
not stop, contact an authorised service centre.
Do not operate the mower until the safety interlock system
has been repaired.
SEAT ADJUSTMENT LEVER
The seat adjustment lever moves the seat to the preferred
position.
USB PORT
The USB charging port provides charging power of 5 V
DC at up to 2 A for your cell phone, MP3 player, or other
USB devices. Check the manual of your device for specifi c
charging requirements.
Connect one end of a USB cable (not provided) to your
device and the other end to the USB charging port on the
product to charge your device.
NOTE: The USB port is powered only when the start key is
in the ON position.
WARNING
Attempting to charge devices rated more than 2 A could
damage the USB charging port and the mower. Always
close the USB cover when not in use to prevent trapping
debris in the port.
WARNING
Never use headphones or any electronic device, such
as a smart phone or tablet, while operating the product.
A lapse in concentration while operating the product
could result in serious personal injury to the operator or
a bystander.
GENERAL MOWING TIPS
■ Keep the mower blades sharp.
■ For a healthy lawn, always cut off one-third or less of
the total length of the grass.
■ When mowing large areas, start by turning to the right
so that clippings discharge away from shrubs, fences,
and driveways. After one or two rounds, mow in the
opposite direction, making left hand turns until finished.
■ Mow so that discharged clippings exit in the direction of
the lawn area that has already been cut.
■ When cutting heavy grass, reduce speed for more
effective cutting and a proper discharge of the clippings.
■ Do not cut wet grass. Wet grass sticks to the underside
of the deck and prevent proper bagging or mulching of
grass clippings.
■ New or thick grass may require a narrower cut or a
higher cutting height.
■ Keep the mower deck and side discharge chute clean.
Remove grass clippings, leaves, dirt, and any other
accumulated debris before and after each use. Do not
spray the product with a garden hose to clean.




 To Next Page