23
R
einstall the TOP key blank in the Right vise jaw with about 1/32” gap between the bottom shoulder of the
key and the left-edge of the vise jaw.
Install the BOTTOM key blank in the left vise jaw-flip up the machine’s full function key gauges and
carefully top shoulder gauge the left key to the key in the right-hand vise jaw.
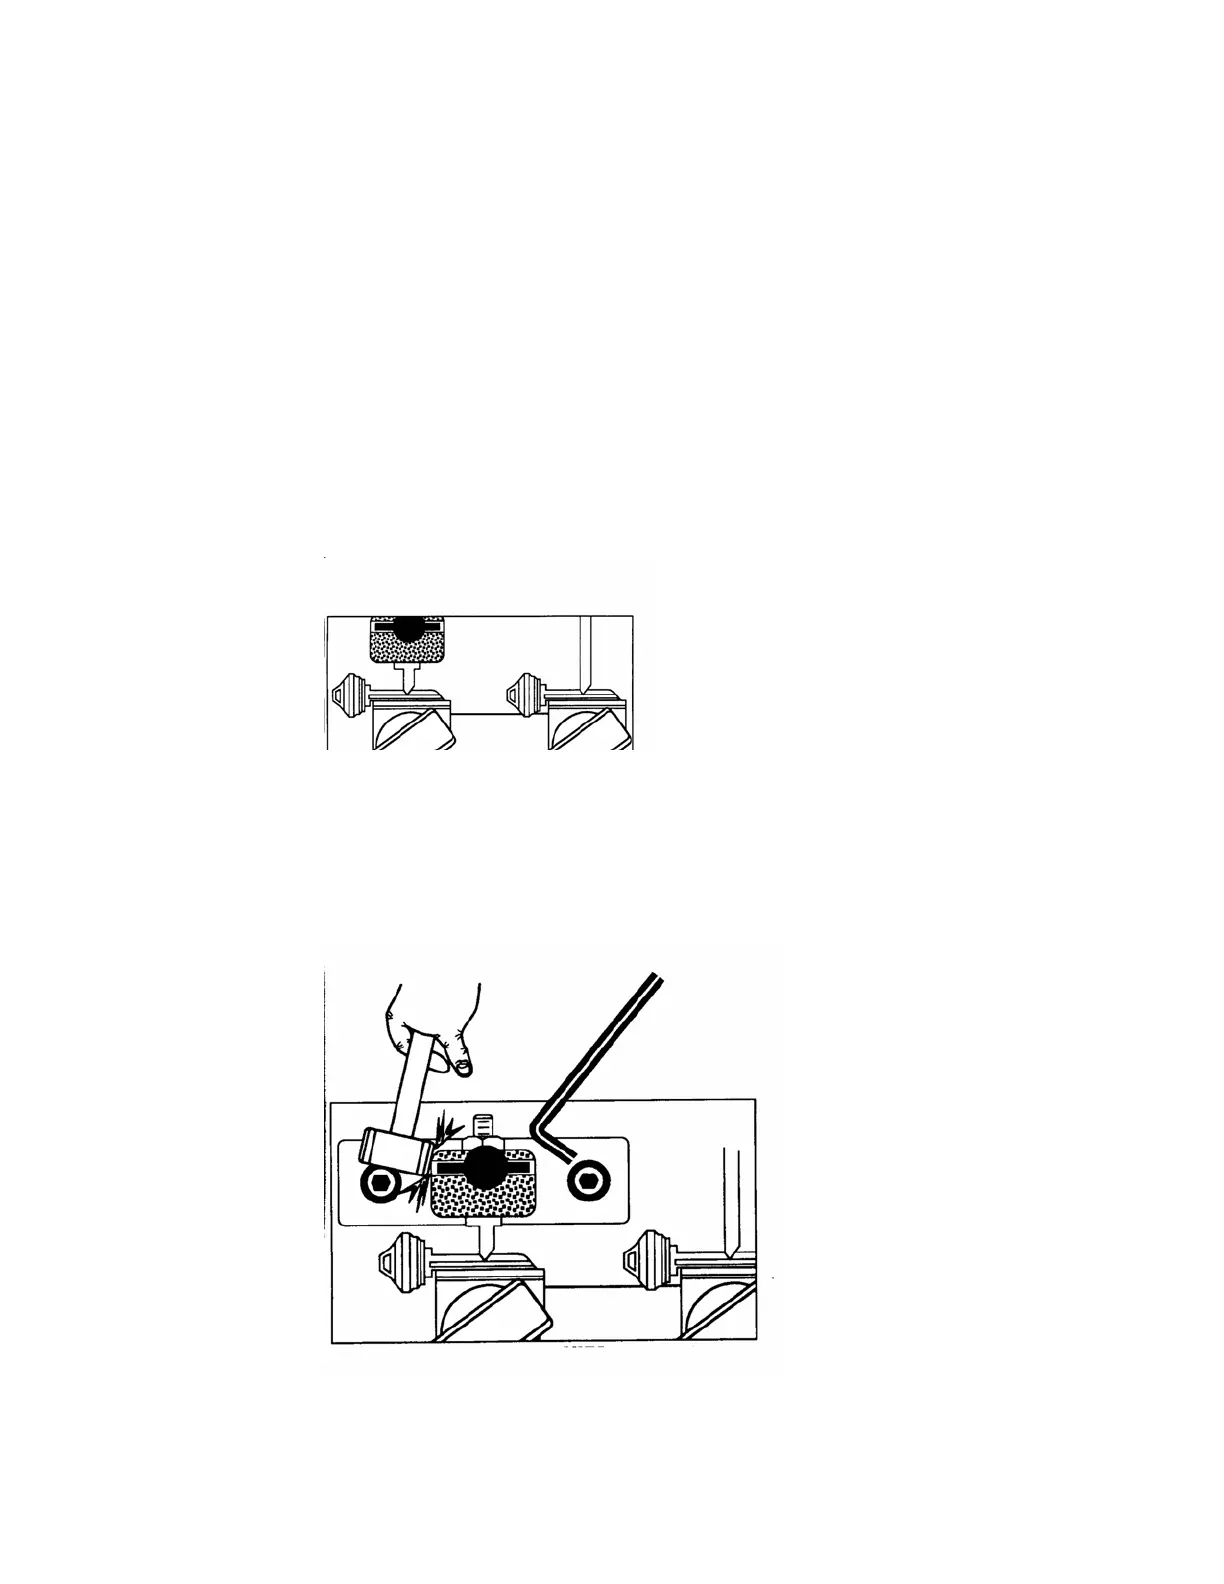
Carefully release the carriage and align the left-hand key blank’s “V” cut in the machine’s stylus the “V”
cut in the key blank in the right-hand vise jaw should “fall” into place around the “V” profile of the cutter
wheel. See figure 21.
Use your hands to carefully turn the cutter wheel BACKWARDS to verify that the cutter wheel’s teeth do
not touch the “V” cut in the left-hand key blank. If it is and the cutter wheel not turn backwards by hand,
or the cutter wheel teeth “tick” the “V” cut in the right hand key blank-then spacing needs to be adjusted.
Verify that the stylus is completely seated in the “V” cut in the left-hand key blank. If it is and the cutter
wheel will not turn Backwards by hand, or the cutter wheel teeth “tick” the “V” cut in the right-hand key
blank- then spacing needs to be adjusted.
Fi
gure 21
Loosen the two 1/ 4”-20 Screws securing the stylus holder in place using your 3/16” Allen Hex
Wrench-Retighten the two screws with LIGHT pressure on the two screws to keep the stylus
holder in place so you can’t move it with gentle to moderate tapping with your small plastic
mallet. See figure 22 below.
Figure 22