5
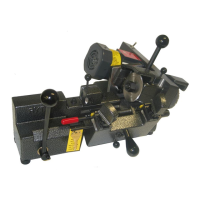
3.Mounting the Machine
Mounting the m
achine. Drill two oversized ½” holes in your bench top to mount your machine. Use ½”-
13 bolts from your local hardware store. Carefully turn the machine up side down and measure the spacing
of the two tapped holes on the bottom of your machine (be careful) not to set the machine on the power
switch). Turn the machine right side up and place the machine where you want it on your workbench.
Mark the bench and drill your holes.
4.Cutting Standard Keys
A)
Stylus is rotated to the vertical (Center) position. Cutter head is rotated and locked in the ve
rtical
(cent
er) positi
on.
B
) Most key clamping requirements use the standard top jaw configuration. Top jaw can be fli
pped over
for “st
ep” jaw requirements –to make deeper cuts in small keys
.
C
) Keys are always gauged with the full—function flip-up key gauges. We do not recommend bottom
shoulder gauging because key blank manufactures do not always ma
intain a reliable correlation
between bottom
and top shoulder positions on the key blanks they ma
ke.
D)
Always remember to flip down your key gauges before cutting a key. Failure to do so may damage th
e
key
gauge and key gauge shaft with the cutter wheel
.
E)
Always cut keys from Bow-to-Tip. NEVER MAKE YOUR FIRST CUT FROM TIP-TO-BOW.
The RY256 is specially designed to cut most cylinder keys and U.S. and Foreign automotive keys by
operating the machine’s “stick-shift” lever SMOOTHLY from RIGHT-to-LEFT. The key will be
cut properly starting at the Bow and ending at the Tip of the key. It is O.K. to make a “clean-up” cut
back to the bow of the key ONLY
after the key has already been cut.
Note: If an excessi
ve amount of key blank material is removed on the clean up cut (second cut) y
our
cut
ter may need replacing or sharpeni
ng.
5. Cutting Medeco Lever-1 Keys
W
hen cutting Medeco Level-1 keys the machine’s stylus is rotated and the cutter head is rotated and
Locked in position (Left or Right or Center) in accordance with the specific cut being made on the
key.
NEVER duplicate across the entire Medeco key in one pass in any cutter position-Left or Right or
Center.
Each cut must be “profiled” or traced individually-one cut at a time.
A)
Stylus is rotated to the vertical (Center) position. Cutter head is rotated and locked in the ve
rtical
(Cen
ter) position. Cutter head is rotated and locked in the vertical (center) position.
B) Most keys clamping requirements use the standard top jaw configuration. If your Medeco key
has a
deep cut you will have to flip over the “step” j
aw and clamp it in place before clam
ping the key. You
 Loading...