T
Tanya RogersSep 5, 2025
What to do if there is a low water level in the air break of my Saeco Atlante 500?
- KKatrina WadeSep 5, 2025
Check the water network connection or fill in the water tank.
What to do if there is a low water level in the air break of my Saeco Atlante 500?
Check the water network connection or fill in the water tank.
What to do if the group gearmotor movement is not detected in my Saeco Atlante 500 Coffee Maker?
If the group gearmotor movement is not detected, check the brew group gearmotor and/or the positioning microswitches.
What to do if the nozzle arm movement is not detected in my Saeco Coffee Maker?
If the nozzle arm movement is not detected, check the nozzle arm, including the mechanism's free movement and the positioning microswitch.
What to do if the stirrer expeller movement is not detected in my Saeco Coffee Maker?
If the stirrer expeller movement is not detected, check the stirrer expelling mechanism and the sugar dispensing device, including the motor and microswitch.
What does 'Flowmeter pulses not detected' mean on my Saeco Coffee Maker?
If the flowmeter pulses cannot be read during instant product brewing, the error is only visible as a warning in the error log. If the reading is not possible during coffee brewing, warning LOW_WATER_FLOW(22) and then error 22 will be reported, and coffee (or freshbrew) will not be available.
What to do if the cup release movement is not detected in my Saeco Coffee Maker?
If the cup release movement is not detected, check the cup dispenser. Note that the vending machine can still dispense beverages without cups.
| Brand | Saeco |
|---|---|
| Model | Atlante 500 |
| Category | Coffee Maker |
| Language | English |
Provides an overview of the manual's purpose and manufacturer information.
Explains symbols used throughout the manual for warnings and information.
Installation guidelines and important notes for maintenance personnel.
Defines the vending machine's purpose and operational limits.
Explains how to identify the machine using its data plate.
Overview of safety compliance and design regulations.
Lists forbidden actions and compulsory safety practices.
Defines roles and responsibilities for safe operation.
Describes safety switches and their functions.
Highlights potential dangers like scalding and improper use.
Procedures for safely unloading and moving the vending machine.
Guidelines for storing the vending machine if not immediately installed.
Critical warnings regarding installation environment and placement.
Steps for unpacking the machine and identifying its contents.
Instructions for assembling feet and removing transport supports.
Guidance on fitting stirrers of various lengths.
Instructions for adjusting stirrer guides for different stirrer sizes.
Steps for applying product labels to the keypad.
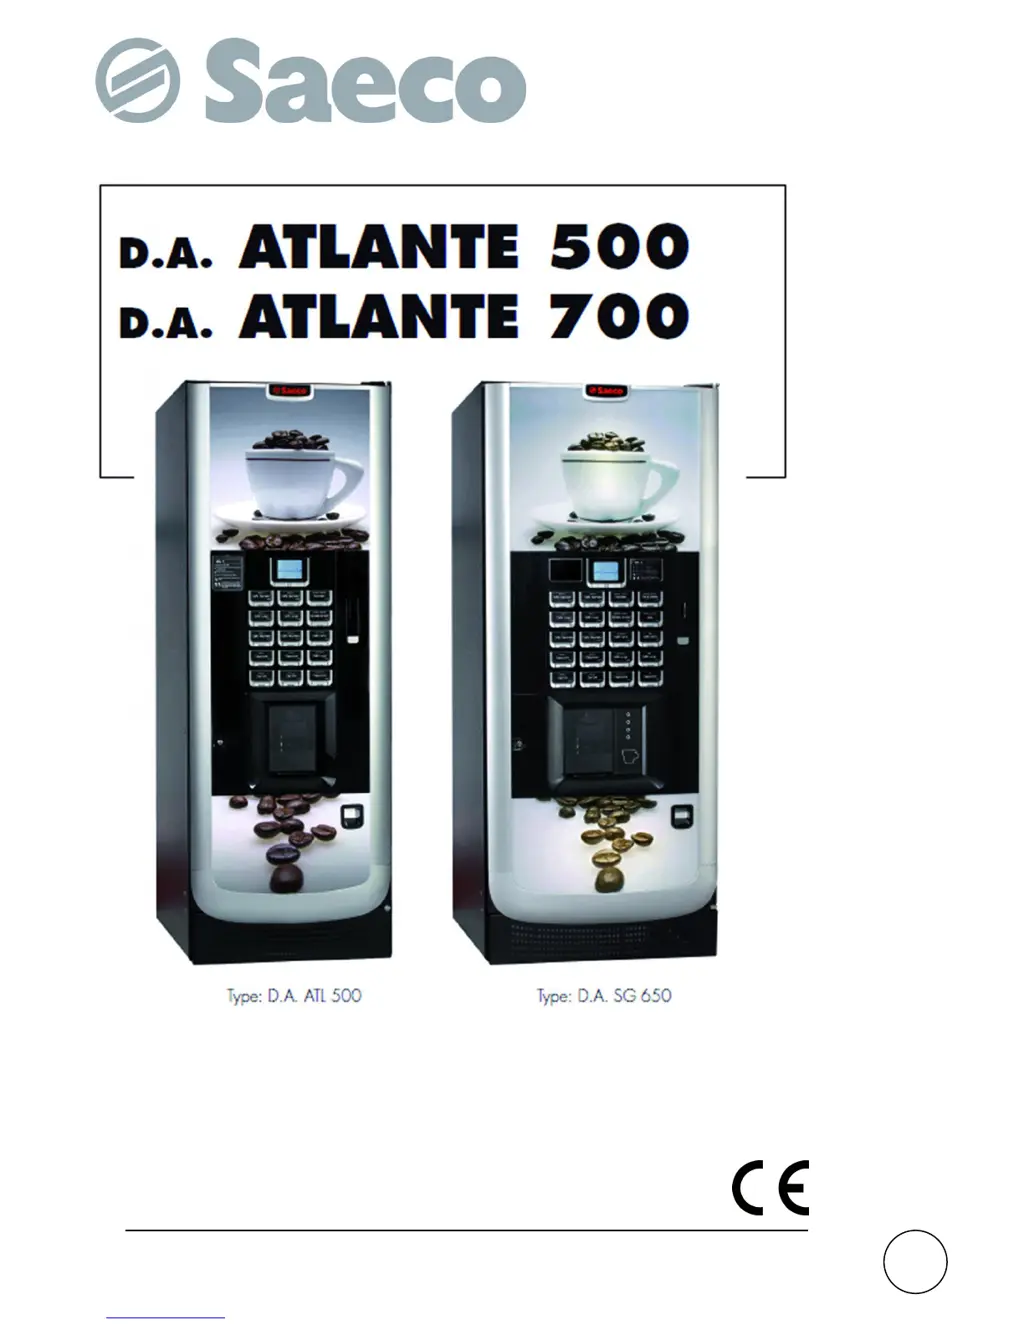
Displays the standard button layout for the Atlante 500 Instant.
Displays the standard button layout for the Atlante 700 Instant.
Displays the standard button layout for the Atlante 500 (1 grinder).
Displays the standard button layout for the Atlante 700 (1 grinder).
Displays the standard button layout for the Atlante 500 (2 grinders).
Displays the standard button layout for the Atlante 700 (2 grinders).
How to fit instruction plates for the Atlante 500.
How to fit instruction plates for the Atlante 700.
Instructions for correctly installing the coffee grounds bag.
Guidance on installing various payment systems.
Steps for connecting the machine to the water supply.
Instructions for connecting the machine to the electrical power supply.
Describes the function of the machine's display screen.
Explains the functions of the machine's keypad buttons.
Details the function of keys during normal operation.
Identifies the keys on the CPU electronic card for technicians.
Explains the functions of the 5-button quick control keypad.
Describes the function of the machine's display screen.
Explains the functions of the machine's keypad buttons.
Details the function of keys during normal operation.
Identifies the keys on the CPU electronic card for technicians.
Refers to the 5-button keypad explanation in Chapter 6.
Lists product configurations for machine containers.
Lists product configurations for the Instant version containers.
Lists product configurations for the Single Grinder version.
Lists product configurations for the Double Grinder version.
Steps for filling instant product containers.
Instructions for refilling the sugar container.
Steps for filling coffee bean containers.
Explains dose calibration levels for the machine.
Details adjusting the coffee dose by moving levers.
Instructions for calibrating the coffee grinder settings.
Adjusting water flow for instant product dispensing.
Guidance on using appropriate stirrers and their installation.
Instructions for loading cups into the dispenser.
Steps for initial machine power-up and self-diagnosis.
Details the self-diagnosis phase and initial warming.
Process for automatically filling the instant product boiler.
Procedures for manually filling the coffee boiler.
Hygiene procedures for parts touching food/drink.
Explains keys used for navigating menus and confirming settings.
Structure and access details for the programming menu.
Step-by-step guide to enter the programming menu.
Detailed list of menu items and their functions.
Continuation of the programming menu structure and functions.
Explains system management items and boiler temperature settings.
Explains energy saving, rinsing, and pre-grinding settings.
Explains brew group preheating, cooling, and clock settings.
Explains cup management and sugar dispensing settings.
Explains sugar time, water for sugar, and pre-selection settings.
Explains pre-selection messages and audit device settings.
Explains password, display contrast, and arm backward settings.
Explains system info, payment systems, coin, and banknote validator settings.
Explains MDB settings, coin/card recharge, and change policies.
Explains MDB slave address, max credit, and product setup.
Explains beverage sequence, coffee quantity, and instant product settings.
Explains cold beverage, cup inclusion, sugar, and beverage test settings.
Explains price table and beverage price association settings.
Explains differentiated prices and card payment settings.
Explains free beverage settings, snack slave configurations, and food mode.
Explains temperature settings, defrost, and photoelectric cell functions.
Explains capacity control, unit enabling, and unit codes.
Provides an example of unit code assignment and faulty motor handling.
Table linking payment channels to systems.
Table showing sugar dispensing effects based on preselection.
Table defining coin channel values and their meaning.
Summary of statistics, prices, capacity, and error reporting.
How to enter the maintenance menu using the P2 key.
Lists menu items for maintenance and statistics.
Explains error log, rinsing time, and water filter functions.
Explains calibrations, boiler operations, and statistics.
Explains snack functions, log table, and temperature logging.
Using the P3 button to induce machine ready status or free product dispensing.
Using the P4 button to restart the vending machine management programme.
Conditions and steps for selecting and dispensing beverages.
Information on connecting and selecting snack products.
General guidelines for cleaning and maintaining the machine.
Procedures for routine cleaning and maintenance tasks.
A table outlining daily, weekly, and monthly cleaning tasks for components.
Instructions for removing and cleaning the drip tray.
How to replace the coffee ground bag.
Steps to empty and clean the fluid discharge tank.
Instructions for cleaning the coffee brew group.
Steps to clean the instant product dispenser and mixer.
Instructions for removing and cleaning the fan and dispensing outlet.
How to operate the dispensing outlet locking lever.
Procedures for cleaning coffee bean hoppers and other containers.
Steps for cleaning soluble product canisters and sugar containers.
How to clean the dispensing arm and its hoses.
Monthly cleaning of the coffee grinder.
How to clean the sugar dispensing channel.
How to clean the stirrer channel.
Accessing internal components for non-scheduled maintenance.
How to use the programming key for data transfer.
Procedures for updating the vending machine's software.
Explains error codes, consequences, and recommended interventions.
Lists further error causes and recommended interventions.
Lists further error causes and recommended interventions.
Lists further error causes and recommended interventions.
Operations required when moving the machine to a new site.
Procedures for storing the machine for long inactive periods.
Information on proper disposal of the product according to EU directives.