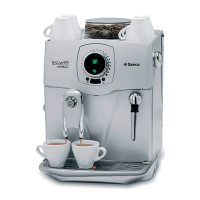
Do you have a question about the Saeco Incanto Rondo and is the answer not in the manual?
Emphasizes consulting instructions, following standards, and disconnecting power before repairs.
Mandates insulation and dielectric rigidity tests for Rondò models after repair completion.
Instructions on how to initiate the test mode by pressing specific buttons and switching on the machine.
Checks gearmotor rotation and pump operation with the potentiometer set to MINIMUM.
Verifies gearmotor rest position and boiler resistance absorption with potentiometer set to MEDIUM.
Ensures correct coffee grinder operation and checks its noise level using Button 3.
Table correlating LED status with microswitch activation and potentiometer positions.
Details the functions indicated by LED 4 (fixed/flashing) and LED 5 (flashing) during test mode.
Disconnect the grinder motor wiring by cutting clips and removing the black circular clip.
Detach the power and sensor cables for the grinder motor from the control card.
Loosen the three screws holding the grinder mechanism using a Phillips screwdriver.
Loosen the four screws that attach the grinder motor flange.
Remove the sensor from its seat by pressing the anchoring tab.
Use a small screwdriver to remove the sensor support from the flange seat.
Carefully disconnect the power cables leading to the grinder motor.
Remove the protective rubber cap located on the grinder motor flange.
Fit the rubber cap onto the flange of the new grinder motor.
Align and insert the sensor assembly onto the new motor flange.
Push the sensor firmly into its seat and press against the flange to lock it.
Connect the black wire to the negative (-) terminal and the white wire to the positive (+).
Disassemble the toothed wheel using specified keys if the gearwheel ring is damaged.
Insert the new gearwheel ring, couple it with the gear, and secure with washer and locknut.
Secure the nut on the brass pin shaft using 7 mm and 10 mm keys.
Apply the specified grease ('Interflon fin food grease 2') to the entire gearwheel ring.
Distribute the grease evenly and generously over the entire toothed wheel.
Adjusts coffee dose via potentiometer R26 on the electronic card, requiring Service Centre.
Table correlating voltage, grinder pulses, and resulting coffee dose in grams.
Turn R26 anticlockwise to increase dose (122 pulses); clockwise to decrease (80 pulses).
Addresses faults like slow delivery or no delivery, recommending coarser grinding or filling the water circuit.
| Pump Pressure | 15 bar |
|---|---|
| Programmable | Yes |
| Removable Brew Group | Yes |
| Adjustable Coffee Strength | Yes |
| Adjustable Coffee Temperature | Yes |
| Cup Height Adjustment | Yes |
| Coffee Input | Coffee beans, Ground coffee |