EasyManua.ls Logo

Safavieh Outdoor Curacao CPT1010A User Manual

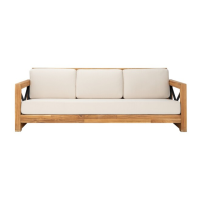
Safavieh Outdoor Curacao CPT1010A
4 pages
To Next Page IconTo Next Page
Page #1 background imageLoading...
Page #1 background image
NOTICE
* Please make sure that you have all parts indicated before you begin assembly of this item
* This item should be assembled on a soft surface to prevent scratching the finish during assembly
* This item may require periodic tightening
Part List and Hardware List
A
B
C
D
E
Leg Side Frame
Back Frame
Seat frame
Allen key
1X
1X
2X
3X
PIECE DESCRIPTION PICTURE QUANTITY
Model# CPT1010A
Product Dimensions:84.8" W x 36.2" D x 30.4" H
CARE AND MAINTENANCE
Store outdoor furniture indoors or cover well when not in use.
Remove wooden furniture from standing water. Dust regularly with small brush or vacuum
Spills should be taken care of immediately before they harden or
stain with a slightly dampened sponge.
LG4
Screw
F
G
H
Cushion Seat
Cushion Back
Bolt
M8X45
3X
4X
6X
2X
chair
M7X90
Question and Answer IconNeed help?

Do you have a question about the Safavieh Outdoor Curacao CPT1010A and is the answer not in the manual?

Safavieh Outdoor Curacao CPT1010A Specifications

General IconGeneral
CategoryOutdoor Furnishing
TypeOutdoor Rug
MaterialPolypropylene
StyleContemporary
WeaveMachine Woven

Summary

Care and Maintenance

General Care Instructions

Store outdoor furniture indoors or cover well. Remove from standing water. Dust regularly. Clean spills immediately.

Assembly Notice

Verify all parts before assembly. Assemble on a soft surface. Periodic tightening may be required.

Part List and Hardware

Component Identification

Lists parts A-H including frames, cushions, screws, bolts, and Allen key with quantities and descriptions.

Assembly Instructions

Step 1: Attach Back and Seat Frames

Attach Back Frame (A) to Seat Frame (B) using Screw (F) and Allen Key (H).

Step 2: Insert Leg Side Frames

Insert Leg Side Frames (C) to Seat Frame (B) using Bolt (G) and Allen Key (H).

Step 3: Continue Frame Assembly

Continue using Bolts (G) to secure the back frame (A) with the Allen Key (H).

Step 4: Place Cushions

Place Back Cushion (D) and Seat Cushion (E) onto the assembled chair.

Step 5: Final Usage Caution

Caution: This chair is only to be used on a flat, level surface.
Related product manuals