Check the Needle Bar Height
1� Check that the needle is installed properly (p� 32)�
2� Remove the left end cover of the sewing
machine as shown (p� 55, 13)�
3� Manually lower the needle bar (A) to its lowest position�
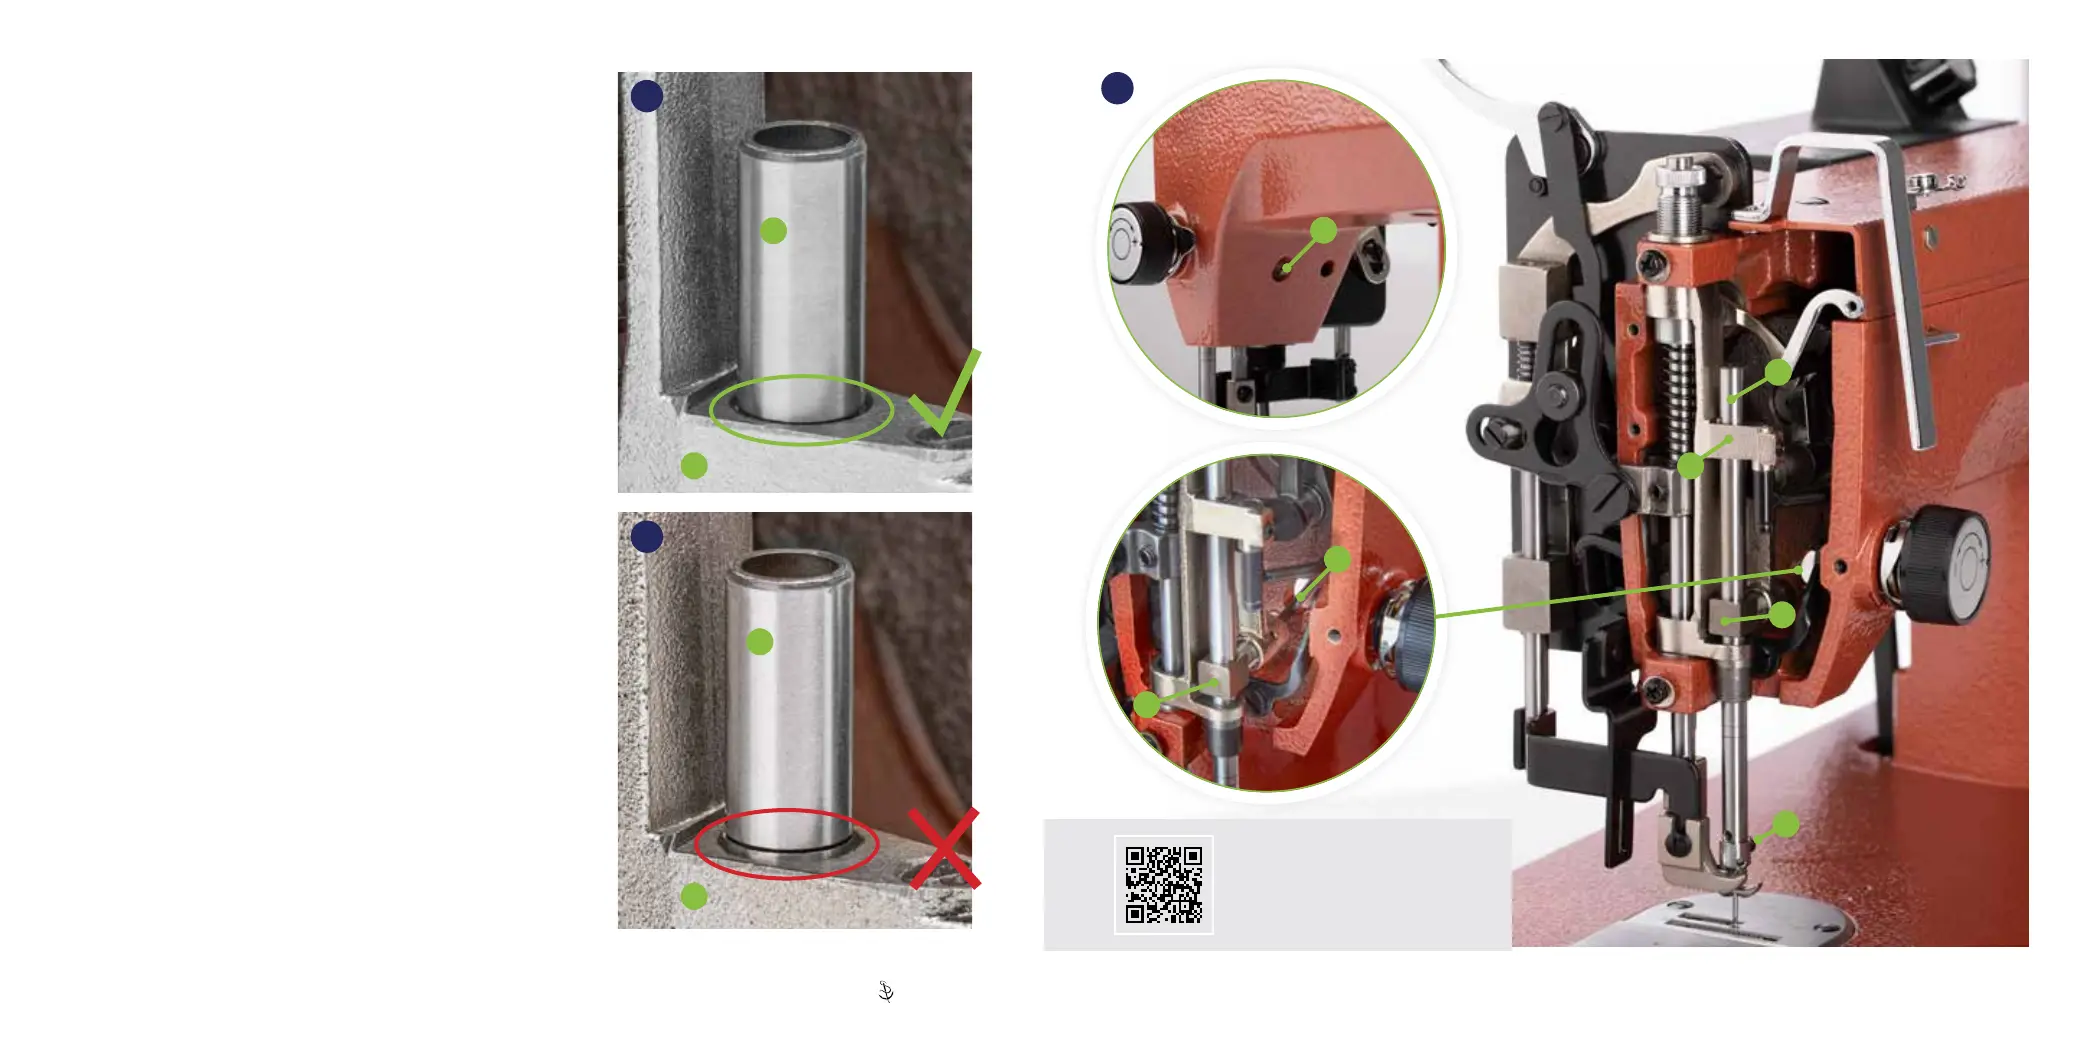
4� We mark the proper height of the needle bar for your machine by
putting a score on the needle bar� Check to see if the mark just
disappears under the top surface of the upper needle bar guide (B)�
If aligned properly, the needle bar is set correctly�
Proceed to check the rotational timing (p� 47)� If
not, continue to adjust the needle bar height�
Adjust the Needle Bar Height
1� Manually operate the machine to move the needle bar to the bottom
of its stroke (all the way down)�
2� Unlock the needle bar from the drive collar (C) by loosening the set
screw that can be accessed through a hole in the machine casting
(D)� Use a 2�5mm hex key to loosen�
3� With the needle bar at the bottom of its stroke, reposition the needle
bar so the score on the needle bar just disappears under the top
surface of the upper needle bar guide (B)� Gently twist the needle
bar up or down to position the mark, making sure the screw that
secures the needle is facing the inside of the sewing machine arm
(E)� Tighten the drive collar set screw very tightly� Ensure needle is
properly oriented after adjustment (p� 32)�
If your Ultrafeed is still not performing properly after adjusting the
needle bar height, proceed to check the rotational timing (p� 47)�
A
Ultrafeed Timing
A
64
65
D
E
66
BB
B
D
C
A
C
Scan to watch a video on how
to adjust machine timing�
45 | Sailrite�com Ultrafeed
®
LS Guidebook | 46