7
car radio and MP3/WMA player
VB 4100
Figure 2.Figure 1.
MAIN FEATURES
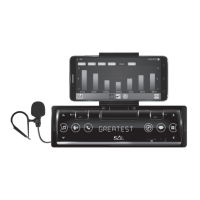
• FM / BT / MP3 / WMA / USB / SD / AUX • Sensitive touchscreen with clock • Display is tting to the vehicle’s dashboard • Customizable 7-color
display • Wireless BT connection • Listening to music from mobile phone, tablet • Controlling the mobile device's music player • Making phone
conversation without touching the phone • Making phone conversation hands-free • Built-in, sensitive microphone • Answering calls / ending calls/
rejecting calls • 18 FM memories • Manual or automatic station seeking and storing • Playing modes: introducing songs, repeating, random playing •
Handling folders • Tone, loudness and EQ sound settings • 4 x 45 W Hi-Fi speaker output • 3,5 mm AUX input for portable appliances • 4 x RCA socket to
connect amplier or subwoofer • Remote controller (CR2025, 3 V button cell, included)
INSTALLATION
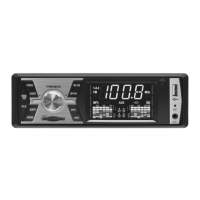
CONTROL BUTTONS, CONNECTORS
1. AUX 3,5 mm stereo socket
2. MIC built-in microphone for callings
3. IR remote controller receiver
4. VOL+ volume / settings
5.
VOL-
volume / settings
6.
MUTE / POWER
mute / switch o
7. SELECT / LOUD sound settings/ tone
8.
APS /
changing band / station seeking / playing
9. CH- / FOLDER- broadcast / folder stepping
10. CH+ / FOLDER+ broadcast / folder stepping
11. MODE changing mode
12. CLOCK clock / time setting
13.
tuning / stepping / ending calls
14.
tuning / stepping / answering calls
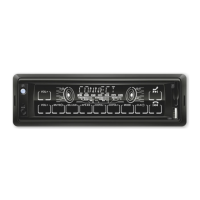
15. SD SD card slot
16. USB USB socket
17. ANTENNE DIN antenna socket
18. 4 x RCA stereo audio output
19. ISO PAIR power supply and speaker connectors
Before using the product for the rst time, please read the instructions for use below and
retain them for later reference. The original instructions were written in the Hungarian
language. This appliance may only be used by persons with impaired physical, sensory
or mental capabilities, or lacking in experience or knowledge, as well as children from the
age of 8, if they are under supervision or have been given instruction concerning use of the
appliance and they have understood the hazards associated with use. Children should not
be allowed to play with the unit. Children may only clean or perform user maintenance on
the appliance under supervision. After unpacking the unit, conrm that it has not been
damaged during transit. Keep the packaging away from children if it contains plastic bags
or other potentially hazardous components.
RESETTING THE UNIT
The microprocessor data requires resetting in situations where the power supply is
lost or the unit (including its display) acts erratically. In order to do so, pull out the
connector plug from the rear of the unit for at least 30 seconds.
SWITCHING ON OR OFF
To switch on the unit, touch any of the keys, it means any place on the right or left
side of the display or the bottom lane. The middle part of the display – alphanumeric
display – is not touch-sensitive. To switch o the unit, hold the MUTE/POWER button
for 2 seconds. By brief touching of this same button, it will switch o and back on the
speakers. MUTE label is visible at that time on the display.
• Later on, it will automatically switch to the most recently used function after being
switched on unless the external storage device has been removed in the meantime.
• Since voltage surges can occur when the vehicle’s engine is started, only turn on the unit
after the engine has been started. Turn o the unit before stopping the engine.
AUDIO AND DISPLAY SETTING
Use the VOL+/VOL- buttons to set the desired volume: VOL 00 – 63. Holding it longer,
the control is continuous.
Press SELECT/LOUDNESS buttons briey and repeatedly, till the volume or tune
functions to be desired appear on the screen. After you can modify setting with VOL+/
VOL- buttons.
Available sound settings: VOL: volume / BASS: bass tone / TREBLE: treble tone /
BALANCE: left-right channel / FADER: front-rear channels / LOUDNESS: on/o /
NORMAL EQ – POP-CLASSIC-JAZZ-FLAT-ROCK sounds / STEREO: FM radio stereo-mono
shifting / AUTO display: automatic colour changing or optional colour COL1…COL7
• EQ ON (POP, CLASSIC…): in switched on EQ mode, the traditional high-low (TREBLE,
BASS) equalizer is not available.
• EQ NORMAL (EQ OFF): in order to use treble-bass equalizer, switch the EQ settings to
normal position (o)
• Holding SELECT/LOUDNESS button for 2 seconds, the LOUDNESS function can be
switched on or o. See further details below!
• AUTO display: colour of the screen backlight is changing automatically. Colour can
be set manually by selecting one of COL1…COL7 versions. It is recommended to select
such colour which is similar to the vehicle dashboard’s backlight. At night driving, it is
advisable to use a lower brightness.
• STEREO: MONO setting is recommended by reception of noisy broadcasts for ones which
are far away.
• The setting options for each function can only be displayed after selecting the correct
mode.
PHYSIOLOGICAL TONE ADJUSTMENT
The human ear perceives less of low and high frequency sounds at smaller volume. By
turning LOUDNESS function on, at low volume, automatic tone adjustment depending
on volume, will correct this eect. It is recommended to switch o this function at higher
volume, since it may cause distorted sound.
• The larger the volume, the less noticeable eect on the automatic tone correction.
SETTING THE CURRENT TIME
Switch on the unit, then touch the CLOCK button briey to display the clock. Touch CLOCK
button for 2 seconds before it would disappear, and time displaying will start ashing. Set
the number of hours with VOL+/VOL- buttons, then after touching CLOCK button again,
step forward to set the minutes. While the minute displaying is ashing set it as described
previously. Finally wait for 5 seconds to nalize setting and exit.
• If you are waiting for more than 5 seconds idly during settings, the unit will exit that
menu.
• Current time is visible faintly on the display, when the unit is switched o.
• When the unit is switched on, current time can be displayed by brief touching of CLOCK
button, which is visible for 5 seconds.
SELECTION OF DATA SOURCE
You can select the desired data source by repeated brief pressing of MODE button. Available
options: radio – USB – SD – AUX: ∅3,5 mm external input - wireless BT connection.
• Desired signal source cannot be activated, if it is not available. For example there is no
USB or SD storage connected, where the adequate MP3/WMA les are available.
• If there is external unit connected to USB and SD slot at the same time, then USB or
SD option can be selected with MODE button. Basically SD card is recommended to use,
because of its safe location.
• After connecting external data sources, tracks from the last inserted one will be played.
• Being switched on again, playing of last listened track will continue, if the connected
device has not been removed in the meantime.
 Loading...