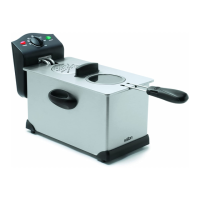
HOW TO USE
1. Place the Fryer on a at heatproof surface, close to a 120 volt wall
outlet.
2. Smear the inner face of the Viewing Window with a small amount of
vegetable oil to prevent condensation forming and to enable the
cooking process to be checked.
3. Pour 800 ml – 1.2 litres of oil into fryer. Peanut, soya or other
high quality vegetable oil is recommended. Ensure that the oil level
is maintained between the MIN and MAX markings on the inside of
the Fryer. NOTE: Do not use the Fryer without oil. The Fryer will
be damaged and the warranty will be voided, if heated dry.
4. Place the Lid on the Fryer.
5. Connect the magnetic end of the cord into the Deep Fryer socket (see
the instructions on page 3 “Safety Release Power Cord”, paragraph 2)
then plug into the wall outlet.
6. Adjust the Temperature Control Knob to the required temperature and
the Indicator Light will come on.
7. Preheat until the Indicator Light goes out. NOTE: the Indicator Light
will turn on and off during the cooking cycle to maintain the preset
temperature.
8. Prepare the food to be cooked. Cut food into uniform size pieces so
they will cook evenly. Pat food dry before cooking. NOTE: Adding
wet foods to cooking oil will cause oil to splatter or foam.
9. Open the Lid.
10.Attach the Basket Handle to the Wire Mesh Basket (see Care &
Cleaning section)
11.Place food to be cooked in the Basket. NOTE: Do not exceed 2/3 of
the Frying Basket capacity. If using frozen food, do not use more than
½ the Frying Basket capacity.
12.Lower the Frying Basket into the oil, with the Handle facing the front
of the Fryer.
13.Place the Lid on the Fryer. The Basket Handle will t into the grooves
on the Lid so that it closes properly.
14.Take note of the time and refer to the Frying Time Table. Please note
that these cooking times are only a guide and the exact cooking time
will depend on the size of pieces being cooked and the temperature of
the food.
15.Check food from time to time by looking through the Viewing Window.
5