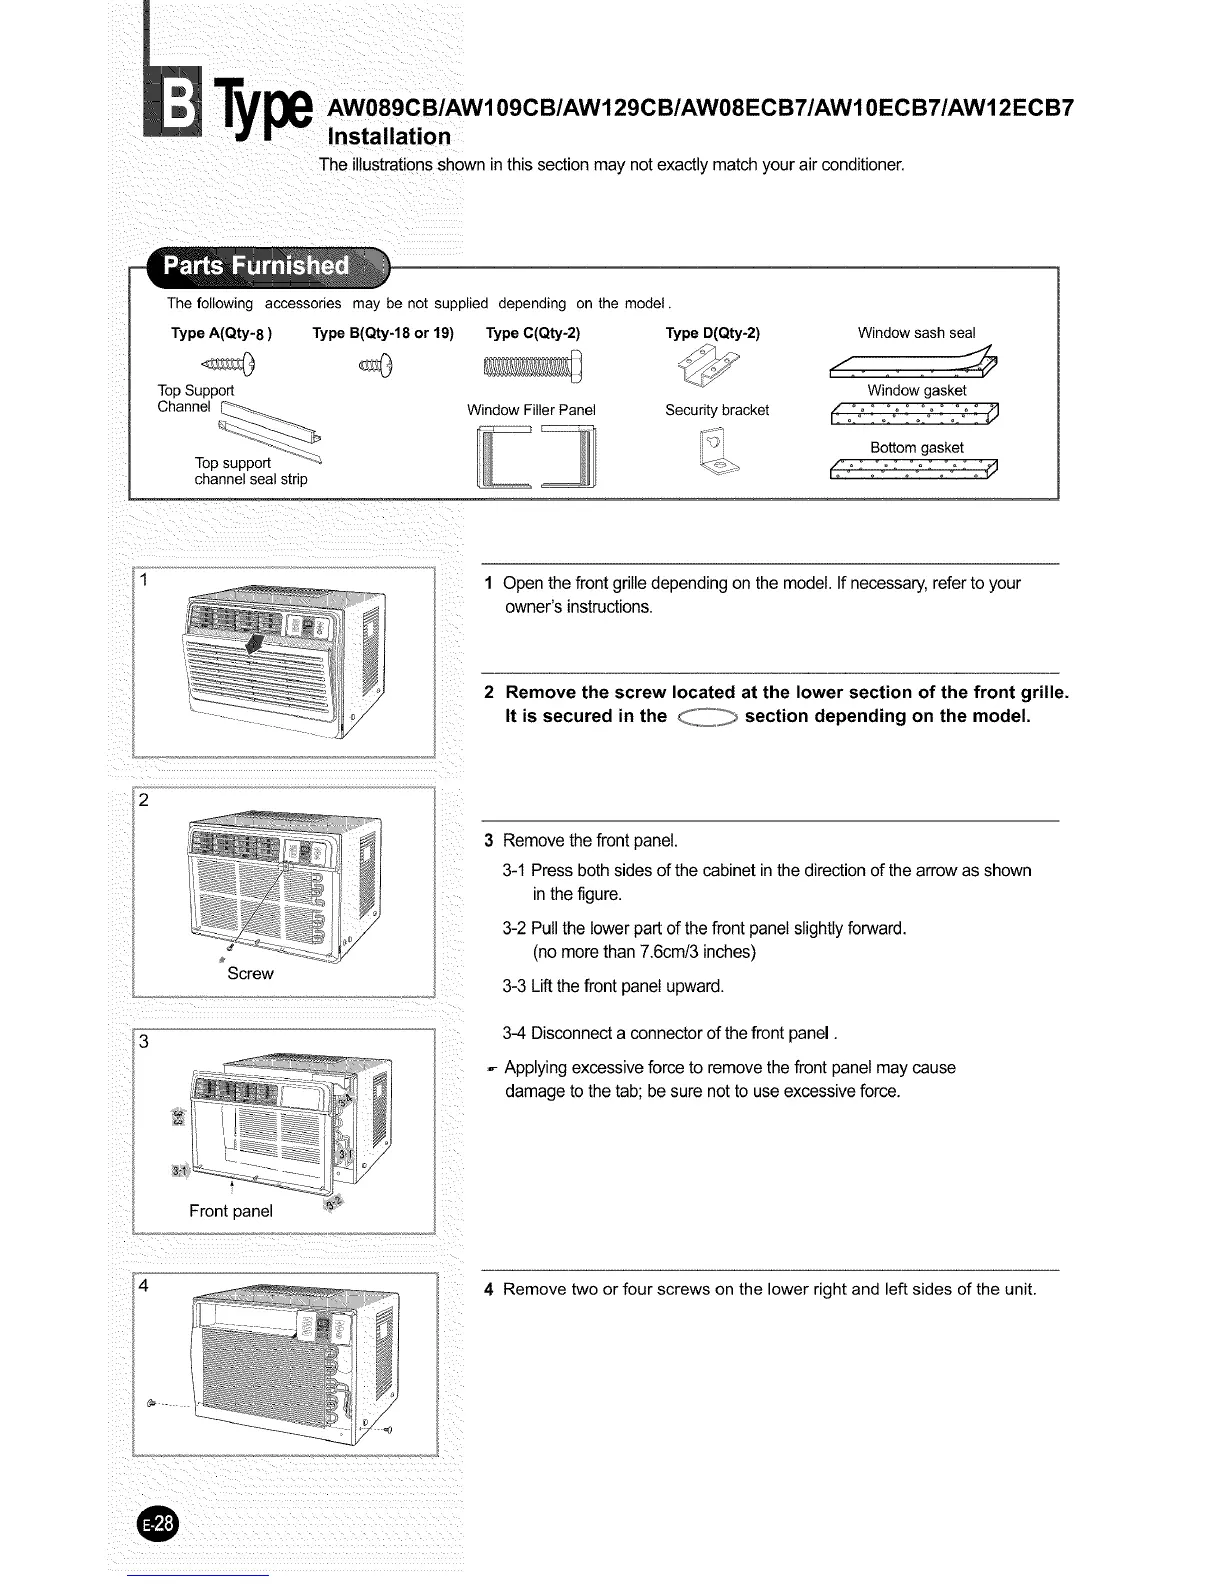
The following accessories may be not supplied depending on the model.
Type A(Qty-8 ) Type B(Qty-18 or 19) Type C(Qty-2) Type D(Qty-2)
TopSupport
Channel _
channel sealstrip
Window FillerPanel
Security bracket
Windowsash seal
Window gasket
Bottom gasket
Screw
..................................................
Front panel
1 Open the front grille depending on the model. If necessary, refer to your
owner's instructions.
2 Remove the screw located at the lower section of the front grille.
It is secured in the _"_ section depending on the model.
3 Remove the front panel.
3-1 Press both sides of the cabinet in the direction of the arrow as shown
in the figure.
3-2 Pull the lower part of the front panel slightly forward.
(no more than 7.6cm/3 inches)
3-3 Lift the front panel upward.
3-4 Disconnect a connector of the front panel.
F Applying excessive force to remove the front panel may cause
damage to the tab; be sure not to use excessive force.
iii_ilI
/ iii
ii iii iii i i i i i i i i i i i i i i i i i i i i
i_i_i_ !_ii_ii__iiiiiiiiiiiiiiiiiiiiiiiiiiiiiiiiiiiiiiiiiiiiii_
4 Remove two or four screws on the lower right and left sides of the unit.