This document serves as a service manual for the Samsung Microwave Oven model CE115KSR, providing comprehensive information for technicians on its function, usage, and maintenance.
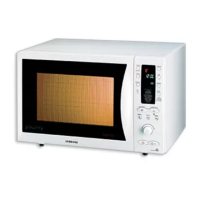
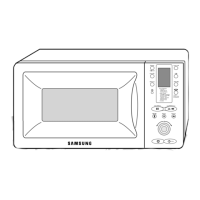
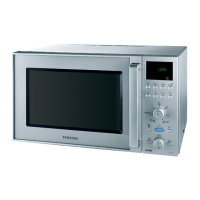
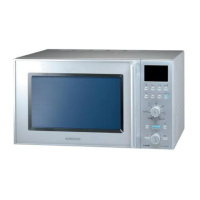
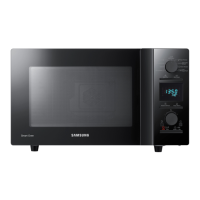
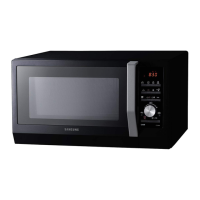
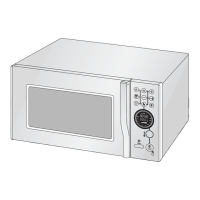
The Samsung Microwave Oven CE115KSR is a versatile kitchen appliance designed for various cooking tasks, combining microwave, grill, and oven functions. Its primary function is to heat, cook, and reheat food efficiently using microwave energy, while also offering grilling and conventional oven capabilities for broader culinary applications. The control panel, located on the front of the appliance, features a digital display and an array of buttons and a knob for selecting cooking modes, setting times, and adjusting power levels.
Usage Features:
The oven offers a range of usage features to cater to different cooking needs. Users can select from various cooking modes, including:
- Preheat: To preheat the oven to a desired temperature before cooking.
- Power Level: To adjust the microwave power for different types of food, allowing for precise control over cooking intensity.
- Grill+Oven: A combined mode that utilizes both grilling and conventional oven heating elements.
- Grill: For browning and crisping food.
- MW+Oven: A combination mode that uses both microwave and conventional oven heating.
- MW+Grill: A combination mode that uses both microwave and grilling functions.
In addition to these core modes, the oven includes several automated functions for convenience:
- Auto Reheat: This feature offers preset options for reheating common items like drinks, plated meals, and soups/sauces, simplifying the reheating process.
- Auto Cook: This function provides preset cooking programs for specific food items such as peeled potatoes, fresh vegetables, fresh fish, roast chicken, roast beef, roast pork, and cake, ensuring optimal cooking results without manual setting adjustments.
- Auto Defrost: Designed to safely and efficiently defrost various types of food.
- Deodorization: A function to remove unwanted odors from the oven cavity after cooking strong-smelling foods.
The control panel also includes a timer for setting cooking durations, and "More/Less" buttons for fine-tuning cooking times in automatic modes. A "Hold/Delay" button allows for delayed start or pausing of cooking cycles. The physical design includes a door with latches, a glass plate, and a guide roller inside the oven cavity, facilitating easy placement and rotation of food during cooking. Ventilation slots ensure proper airflow, and safety interlock holes are integrated into the door mechanism for user protection. An internal light illuminates the oven cavity, allowing users to monitor food progress.
Maintenance Features:
The service manual emphasizes several maintenance features and precautions to ensure the safe and proper functioning of the microwave oven.
- Safety Checks: Before any service or repair, technicians are instructed to perform safety checks, including verifying interlock operation, proper door closing, seal integrity, and checking for any damage to hinges or latches. This is crucial to prevent exposure to excessive microwave energy.
- Microwave Leakage Check: A microwave leakage check is mandatory after any service to ensure compliance with federal performance standards, safeguarding users from radiation exposure.
- Component Replacement: The manual stresses the importance of using exact replacement parts, especially for critical safety components like interlock switches, to maintain the oven's safety characteristics and prevent hazards such as shock or fire.
- High Voltage Precautions: Technicians are warned about the presence of high voltage and current in the transformer and magnetron circuits. Instructions include unplugging the oven and discharging the high voltage capacitor before touching any components. Measuring voltage in high voltage circuits is explicitly prohibited.
- Door Assembly Maintenance: Detailed procedures are provided for the removal and reassembly of the door components, including the door assembly, door "C," door "E," key door, spring, screen-door, and sub-door. Proper alignment and adjustment of the door are critical after replacement to prevent microwave leakage.
- Fuse Replacement: Instructions for replacing the fuse are given, along with guidance on checking associated components like interlock switches, door sensing switch, monitor switch, and power relay if the fuse blows due to interlock monitor switch failure.
- Drive Motor Replacement: The manual outlines the steps for replacing the turntable drive motor, emphasizing correct re-mounting and ensuring the motor shaft fits the tip coupler.
- Control Circuit Board Replacement: Procedures for removing and replacing the control circuit board are provided, with a caution to discharge static electricity from the body before handling sensitive electronic components.
- Troubleshooting Guide: A comprehensive troubleshooting section helps diagnose common electrical malfunctions, such as the oven being dead, fuse blown, display issues, key input problems, no microwave oscillation, buzzing noise, turntable not rotating, oven stopping during cooking, sparks, and uneven cooking. For each symptom, potential causes and corrective actions are listed, guiding technicians through the repair process. For instance, if the oven is dead and the fuse is OK, causes could include open lead wire harness, open thermal cutout, open low voltage transformer, or a defective PCB. Corrective actions involve checking the fan motor, PCB, and LVT.
- Grounding: Emphasized as a primary precaution, ensuring proper grounding before any troubleshooting or repair work.
- Component Continuity Checks: When checking continuity of switches or transformers, technicians must disconnect one lead wire and ensure the power source is off to prevent false readings or damage to the meter.
- Static Discharge Prevention: Technicians are advised to touch ground to discharge any static electricity before touching circuit parts or the control circuit board to prevent damage to sensitive components.
- Watch Removal: Servicemen are advised to remove their watches when working near or replacing the magnetron, likely due to magnetic interference or safety concerns.
The manual provides exploded views and parts lists for various sections of the oven, including the main assembly, door parts, control parts, and casing parts, aiding in the identification and ordering of correct replacement components. These detailed diagrams and lists are essential for accurate and efficient maintenance and repair.