EasyManua.ls Logo

Samsung QB24R-B - User Manual

Samsung QB24R-B
28 pages
Print Icon
To Next Page IconTo Next Page
Loading...
© Samsung
Samsung owns the copyright for this manual. Use or reproduction of this manual in parts or entirety without the authorization of Samsung is prohibited. Trademarks other than Samsung are property of their respective owners.
QBR (QB13R QB13R-T QB24R QB24R-B QB24R-T QB24R-TB)
The colour and the appearance may differ depending on the product, and the content in the
manual is subject to change without prior notice to improve the performance.
Recommended hours of use per day of this product is under 16 hours.
If the product is used for longer than 16 hours a day, the warranty may be void.
An administration fee may be charged in the following situations:
(a) An engineer is called out at your request, but it is found that the product has no defect (i.e.,
where the user manual has not been read).
(b) You bring the unit to a repair centre, but it is found that the product has no defect (i.e.,
where the user manual has not been read).
You will be informed of the administration fee amount before a technician visits.
Smart Signage User Manual (By Model)
This manual provides information about your Smart Signage including supported types and product specications per model.
Question and Answer IconNeed help?

Do you have a question about the Samsung QB24R-B and is the answer not in the manual?

Overview

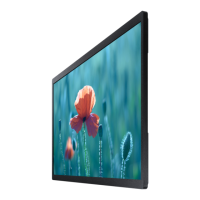
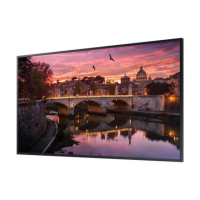
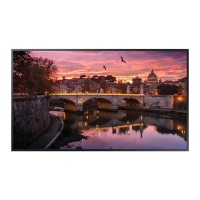
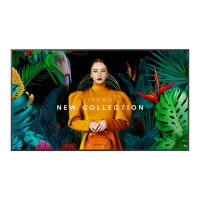
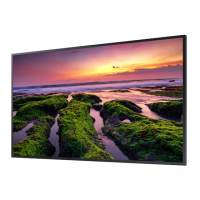
This document is a user manual for Samsung Smart Signage displays, specifically models QBR (QB13R, QB13R-T) and QB24R (QB24R-B, QB24R-T, QB24R-TB). These devices are designed for commercial use, offering various functionalities as smart signage displays, with some models featuring touchscreen capabilities.

Function Description

The Samsung Smart Signage displays serve as versatile digital signage solutions. They are designed to display content effectively in commercial environments. Certain models, specifically QB13R-T, QB24R-T, and QB24R-TB, incorporate touchscreen functionality, allowing for interactive user experiences.

The displays support various input sources, including HDMI, USB, and RJ45 for network connectivity. Audio output is also available. The touchscreen models can connect to a PC or laptop via a TOUCH OUT cable, enabling touch interaction with the connected device.

Important Technical Specifications

Model Name and Size:

  • QB13R / QB13R-T: 13 CLASS (13.27 inches / 33.7 cm)
  • QB24R / QB24R-B / QB24R-T / QB24R-TB: 24 CLASS (23.8 inches / 60.4 cm)

Panel Display Area:

  • QB13R / QB13R-T: 295.37 mm (H) x 166.49 mm (V)
  • QB24R / QB24R-B / QB24R-T / QB24R-TB: 527.04 mm (H) x 296.46 mm (V)

Resolution:

  • Optimum Resolution: 1920 × 1080 @ 60 Hz (for all models)
  • Maximum Resolution: 1920 × 1080 @ 60 Hz (for all models)

Power Supply:

  • All models: AC100–240V~ 50/60Hz. The adapter is for DC voltage of the product.

Environmental Considerations:

  • Operating Temperature: 0 °C – 40 °C (32 °F – 104 °F). For installing the enclosure, keep the internal temperature at 35 °C or below.
  • Humidity: 10% – 80%, non-condensing.
  • Storage Temperature: -20 °C – 45 °C (-4 °F – 113 °F).
  • Storage Humidity: 5% – 95%, non-condensing (Supported models: QB13R, QB13R-T) / 10% – 90%, non-condensing (Supported models: QB24R, QB24R-B, QB24R-T, QB24R-TB).
  • Packaging: Applicable before the product package is unpacked.

Wireless Network:

  • All models: 802.11 b/g/n (2.4GHz)
  • QB24R / QB24R-B / QB24R-T / QB24R-TB: 802.11ac (2.4GHz & 5GHz)

VESA Wall Mount Specifications:

  • QB13R / QB13R-T: 100 × 100 mm, 5–7 mm depth, M4 standard screw, quantity 4.
  • QB24R / QB24R-B / QB24R-T / QB24R-TB: 100 × 100 mm, 8.5 mm depth, M4 standard screw, quantity 4.

Touchscreen Compatibility (for touchscreen models):

  • Operating Systems: Windows (Win10 / Win8.1 / Win8 / Win7 / Vista), Mac OSX (10.7 – 10.15 and above), Ubuntu (10.04 / 12.10 / 14.04 / 18.04 / Above), Fedora (15 / 16 / 19 / 20 / Above), Linux OpenSUSE (11.4 / 12.1 / 12.2 / 12.3 / Above), Linux CentOS (6.6 / Above), Linux Mint (14.1 / Above).
  • Linux Touch Feature: Available in Kernel version 3.0 or above. Multi-touch feature or change display orientation requires a separate driver. Some OS (Linux distribution dependant) may not use touch function. Android/Chrome may have limited touch capability.

Usage Features

Preparations and Setup:

  • Component Check: The manual details all components included, such as Quick Setup Guide, Warranty card, Regulatory guide, Power cord, AC/DC adapter, Batteries, Remote Control, RS232C adapter, STAND-BAR (for QB13R, QB13R-T), and TOUCH OUT cable (for QB13R-T, QB24R-T, QB24R-TB).
  • STAND-BAR Installation: For supported models, the STAND-BAR is inserted into a slot on the product and fastened.
  • Anti-theft Lock: The device can be secured with an anti-theft locking device, which is purchased separately.
  • Wall Mount Installation: Instructions are provided for installing the display on a wall using a VESA-compliant wall mount kit. It emphasizes the importance of proper ventilation and ensuring the wall can support the display's weight.

Control and Interaction:

  • Power Button: Located on the back of the product, it allows turning the display on/off and selecting input sources.
  • Remote Control: A remote sensor is present on the display. The remote control can be used to perform various functions, including turning the product on or off, and selecting input sources. The effective range is 2.5 m to 4 m at an angle of 30° from the left and right.
  • Administrator Menu (for supported models: QB13R-T, QB24R-T, QB24R-TB): This menu is accessed via touchscreen interaction or remote control. It allows adjusting volume, entering Home mode, accessing the OSD menu for settings, and selecting input sources.
  • Touchscreen Monitor Usage (for supported models: QB13R-T, QB24R-T, QB24R-TB):
    • Connection: Connects to a PC using HDMI or HDMI-DVI cable and a TOUCH OUT cable (USB port on the PC).
    • Calibration: The touchscreen can be calibrated through Tablet PC Settings in Windows. This involves selecting the display, performing a calibration process by tapping crosshairs on the screen, and confirming the calibration.
    • Touchscreen Gestures: Supports common gestures like tap, double tap, drag, flick, and zoom in/out, similar to a mouse.

Connectivity:

  • Ports:
    • AUDIO OUT: Outputs sound to an audio device.
    • RS232C IN: Connects to MDC using an RS232C adapter.
    • USB (1.0A / 5V1.0A): Connects to a USB memory device. USB ports accept a maximum constant current of 1.0A.
    • RJ45: Connects to MDC and the Internet using a LAN cable (Cat7("STP Type") cable recommended).
    • HDMI IN: Connects to a source device using an HDMI cable or HDMI-DVI cable.
    • DC 14V: Connects to the AC/DC adapter.
    • TOUCH OUT (for touchscreen models): Connects to a PC using a TOUCH OUT cable to enable touch functions.
    • IR (for QB24R/QB24R-B/QB24R-T/QB24R-TB): Connects to an external IR cable that receives signals from the remote control.
    • Bluetooth (for QB24R/QB24R-B/QB24R-T/QB24R-TB): Only available with these models that contain the Bluetooth function.

Preset Timing Modes:

  • The manual provides a comprehensive table of preset timing modes, including resolution, horizontal frequency, vertical frequency, pixel clock, and sync polarity, for various display settings (VESA, IBM, MAC).

Maintenance Features

Safety Precautions:

  • AC/DC Adapter: Do not put AC/DC adapters together. Avoid letting water enter the adapter. Be careful not to get the adapter wet when washing the floor. Ensure the adapter is flat on a table or floor. If hanging, ensure it is secure to prevent malfunction.
  • Packaging: Remove the plastic bag from the AC/DC adapter before use.
  • Ventilation: Keep the AC/DC adapter in a well-ventilated area.
  • Product Placement: Maintain a minimum of 15 mm space between the product and wall surface for ventilation.
  • Touchscreen Care: Avoid pressing hard on the touchscreen with your finger tip or sharp objects. Do not tap the screen while wearing gloves, with a dirty finger, or something sharp. Ensure the screen does not contact moisture. The touch sensor may not function properly if there is static.
  • Display Maintenance: Displaying a still image on the screen for an extended period of time may cause after images (screen degradation) or stains. Switch off the screen when not in use.

Component Handling:

  • Batteries: Store used batteries out of reach of children and recycle. Do not use new and used batteries together. Replace both batteries at the same time. Remove batteries when the remote control is not to be used for an extended period of time.

Troubleshooting and Warranty:

  • The manual advises contacting the vendor for missing components.
  • It also states that the appearance of components may differ from images shown.
  • An administration fee may be charged if an engineer is called out at your request, but it is found that the product has no defect (i.e., where the user manual has not been read).
  • An administration fee may also be charged if the product is brought to a repair centre, but it is found that the product has no defect (i.e., where the user manual has not been read).
  • Samsung is not responsible for any damage to the product or injury to yourself or others if you select to install the wall mount on your own.
  • Do not use screws that are longer than the standard length or do not comply with the VESA standard screw specifications. Screws that are too long may cause damage to the inside of the product.
  • For wall mounts that do not comply with the VESA standard screw specifications, the length of the screws may differ depending on the wall mount specifications.
  • Do not fasten the screws too firmly. This may damage the product or cause the product to fall, leading to personal injury. Samsung is not liable for these kinds of accidents.
  • Samsung is not liable for product damage or personal injury when a non-VESA or non-specified wall mount is used or the consumer fails to follow the product installation instructions.
  • Do not mount the product at more than a 15 degree tilt.
  • Always have at least two people mount the product on a wall.
  • Do not install your Wall Mount Kit while your product is turned on. It may result in personal injury due to electric shock.

Plug-and-Play:

  • The monitor is installed and used with any Plug-and-Play compatible systems. Two-way data exchange between the monitor and PC system optimises the monitor settings. Monitor installation takes place automatically. However, you can customise the installation settings if desired.
  • Due to the nature of the manufacturing of this product, approximately 1 pixel per million (1ppm) may appear brighter or darker on the panel. This does not affect product performance.
  • This product can be set to only one resolution for each screen size to obtain the optimum picture quality due to the nature of the panel. Using a resolution other than the specified resolution may degrade the picture quality. To avoid this, it is recommended that you select the optimum resolution specified for your product.
  • For detailed device specifications, visit the Samsung website.

Samsung QB24R-B Specifications

General IconGeneral
BrandSamsung
ModelQB24R-B
CategoryDigital Signage
LanguageEnglish

Related product manuals