Do you have a question about the Samsung S1050 - Digital Camera - Compact and is the answer not in the manual?
Install camera driver software on your computer for proper connection.
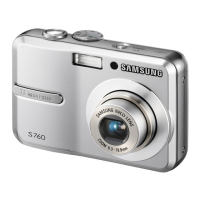
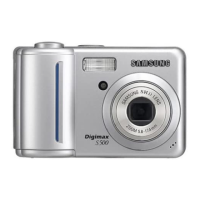
Identifies and labels various components of the camera.
Covers battery usage, charging, and safe power connection practices.
Guidelines for proper handling, care, and usage of memory cards.
Instructions on how to play back video files.
Estimated battery life and shot count for SNB-2512.
Table showing shot capacity based on resolution and quality.
How to set the camera's display language.
How to set the date and time on the camera.
How to select the battery type for optimal performance.
Guide to using the automatic shooting mode.
Guide to using the shutter priority shooting mode.
How the camera recognizes and focuses on faces for better portraits.
Instructions on how to record videos with the camera.
Guide to using the program shooting mode.
Guide to using the Advanced Shake Reduction shooting mode.
Guide to using the aperture priority shooting mode.
Specific warnings and considerations when using ASR mode.
Guide to using various scene modes for specific shooting situations.
Guide to using the manual shooting mode.
Shooting multiple images on a single frame.
Applies a cartoon effect to images.
Applying decorative photo frames to images.
Adding various stickers to images.
Applying a selective focus effect to blur backgrounds.
Saving multiple images on a single frame.
Selecting the metering method for correct exposure.
How to adjust exposure for brighter or darker images.
Applies color filter effects to images.
Protecting images from deletion or formatting.
Function to delete files from memory card or internal memory.
Setting print quantity for selected images.
Specifying the print size for outputted images.
Digital Print Order Format for print job setup.
Setting the camera to print index sheets of images.
How to connect the camera to a PictBridge-compatible printer.
Configuring camera settings for printer connection.
Setting the number of copies to print for selected images.
Configuring various print settings like paper size and quality.
Avoid extreme environments like high heat, humidity, sand, or dust.
Store in a cool, dry, well-ventilated place, away from chemicals.
Prevent sand from entering the camera to avoid damage.
Handle the camera carefully to prevent damage from impact.
Troubleshooting steps for rapid battery depletion.
Troubleshooting steps when images fail to play back.
Troubleshooting steps when the camera does not respond to shutter press.
Troubleshooting steps for abnormal image colors.
Troubleshooting steps for blurry images.
Troubleshooting steps when the computer doesn't recognize the camera via USB.
Troubleshooting steps for unexpected camera shutdowns.
Troubleshooting steps for unresponsive controls.
Troubleshooting steps for memory card errors.
Driver for establishing communication between camera and PC.
Program for managing, editing, and viewing camera media.
Initiating the connection mode for the camera to a computer.
Steps to connect the camera to a computer via USB.
Guide to accessing and managing files on the camera's storage.
Procedure for safely ejecting the camera's storage.
How to connect the camera to a Macintosh computer.
How to access camera storage on Macintosh.
How to transfer photos from the camera to a computer using Digimax Master.
How to view captured images using the Digimax Master software.
How to edit still images using Digimax Master.
How to edit multimedia files into a single video using Digimax Master.
Troubleshooting steps for USB connection issues.
| Camera Type | Compact |
|---|---|
| Image Sensor | CCD |
| Sensor Type | CCD |
| Effective Pixels | 10.1 MP |
| Optical Zoom | 5x |
| Digital Zoom | 5x |
| LCD Screen Size | 3.0 inches |
| ISO Sensitivity | Auto, 80, 100, 200, 400, 800, 1600, 3200 |
| ISO Range | 80 - 3200 |
| Video Resolution | 640 x 480 |
| Sensor Resolution | 10.1 MP |
| LCD Screen | TFT |
| Storage Media | SD |
| Battery Type | Li-ion |