Do you have a question about the Samsung S500 - Digimax 5.1MP Digital Camera and is the answer not in the manual?
Install the camera driver on your computer for connection.
Take photos and images with the camera.
Connect the camera to your computer using the USB cable.
Check if the camera power is turned on.
Check if 'Removable Disk' appears in Explorer.
Do not disassemble or modify the product to avoid shock or damage.
Do not use in environments with flammable or explosive gases.
Disconnect power immediately if water/substance enters; seek repair.
Do not insert metal or flammable items into the card slot.
Do not operate with wet hands to prevent electric shock.
Avoid flashing at close range, especially towards infants, to prevent vision damage.
Keep out of reach of children to prevent swallowing small parts or injury.
Allow camera to cool if it overheats during prolonged use.
Do not leave camera in hot environments to prevent damage and fire.
Ensure proper ventilation; do not cover camera or charger.
Use specified batteries; avoid shorting, heating, or disassembly.
Remove battery if not using for extended periods to prevent leakage.
Do not cover flash unit while firing to avoid burns.
Disconnect power and unplug cables before moving equipment.
Do not apply excessive force to lens, cover, or exterior to prevent damage.
Ensure lens or flash are not blocked by hands, hair, or strap.
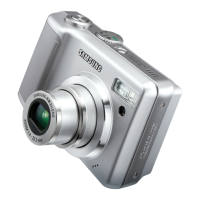
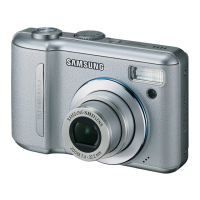
Identifies buttons, dials, and lenses on the front and top of the camera.
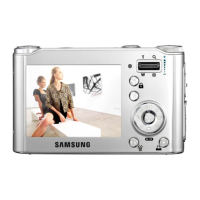
Identifies controls and ports on the back and bottom of the camera.
Details controls on the bottom and the function button.
Explains cradle usage for charging and data transfer.
Explains the function and indications of the self-timer lamp.
Describes the meaning of the camera's status lamp indications.
Provides estimated battery life and shot counts for SBP-2524.
General advice on battery usage, care, and low-temperature performance.
Explains how to charge the rechargeable battery using the cradle.
Step-by-step guide for charging the battery via cradle.
Shows the status indicators for charging the battery.
Estimated charging time for the battery when camera is off.
Notes on camera status lamp and memory card data corruption risks.
Explains the function of the memory card's write-protect switch.
Step-by-step guide to set the camera's date and time.
Steps to select the camera's operating language.
Guide to choose the correct battery type for the camera.
Lists shooting mode features and their corresponding page numbers.
Guide for using the automatic shooting mode.
Guide for using the program shooting mode.
Guide for using the manual shooting mode.
Explains the function of half-pressing the shutter button.
Notes on half-shutter press and potential for blurry photos.
Instructions for recording movies.
How to pause and resume movie recording.
How to record movies without audio.
Explains how to select and use specific scene shooting modes.
Guide for selecting and using various scene modes.
Steps to record voice memos.
Explains the function of half-pressing the shutter button.
Notes that shooting time is estimated and may vary by conditions.
How to handle camera shake warnings.
Tips for shooting backlit subjects.
Ensure lens or flash are not obstructed by hands, hair, or strap.
Lists situations where focus may fail, causing blurry photos.
How to turn the camera on/off and use auto power-off.
How to use the shutter button for shooting and voice recording.
How to use the zoom buttons for optical and digital zoom.
How to use the W button for wide-angle zoom.
How to use digital zoom in wide-angle.
Notes on digital zoom limitations and image quality reduction.
Function of the UP button when navigating menus.
How to add voice memos to still photos.
Function of the DOWN button when navigating menus.
Table showing focus modes and their corresponding distances.
Details available focus modes for different shooting types.
Lists available flash types for each shooting mode.
Function of the LEFT button when navigating menus.
Step-by-step guide for using the flash.
Table showing flash range by ISO, mode, and zoom.
Step-by-step guide for setting and using the self-timer.
How to open and close the menu screen.
How to confirm selections and change values in menus.
Introduction to the special effects button.
Lists special effects available for still images.
Lists special effects available for movies.
Table showing which modes support special effects.
Modes where the E button cannot be used for special effects.
Overview of the color effect function.
Steps to access color effects via the E button.
How to navigate to color effect options.
How to select color effect values.
Purpose of the out-of-focus effect.
How to access the out-of-focus effect.
Navigating to out-of-focus options.
Selecting the strength of the out-of-focus effect.
Final step to apply the out-of-focus effect.
How to modify the focus range after selection.
Display 2-4 images simultaneously on one screen for still photos.
How to access the split shooting function.
Navigating to split shooting options.
Selecting the split shooting layout.
Instructions for shooting with the split screen active.
Finalizing the capture of split screen images.
How to re-shoot the last captured image.
How to re-shoot before the last captured image.
Deleting previous images by pressing the +/- button.
Notes on using other camera buttons with special effects.
How to re-shoot the last captured image.
How to re-shoot before the last captured image.
How to continue split shooting by pressing the shutter button.
Adds decorative frames to still images.
Images with frames do not display date/time.
How to access the photo frame effect via the E button.
How to navigate to photo frame options.
How to select the desired frame type.
Press shutter button to apply the photo frame effect.
Use +/- buttons to select RGB, ISO, White Balance, Exposure.
Adjust R, G, B values for shooting.
Step-by-step guide for RGB value adjustment.
Explanation of how to select ISO sensitivity for image shooting.
Step-by-step guide for selecting ISO sensitivity.
Achieve natural colors based on light source conditions.
Step-by-step guide for selecting White Balance.
Guide for setting and applying custom white balance.
Camera auto-adjusts exposure, manual adjustment via +/- buttons.
Step-by-step guide for setting exposure compensation.
Overview of how to configure shooting functions via the LCD menu.
Press Menu button in modes other than Voice Recording to show menu.
Conditions under which the menu screen may not appear.
List of functions configurable via the menu screen.
Initial menu display upon turning on the camera.
Use left/right buttons to move between menu tabs.
Use up/down buttons to select sub-menus.
Press Menu button after selection to save and exit.
Select image size based on intended use.
Select compression based on use; higher compression reduces quality.
Change metering mode for proper exposure in difficult lighting.
Explanation of multi-segment metering mode.
Explanation of spot metering mode.
Use exposure compensation if subject isn't centered for spot metering.
Select the number of continuous shots.
Standard single shot mode.
Mode for continuous shooting.
Function for auto exposure bracketing.
Higher resolution/quality increases saving time and waiting period.
Flash is fixed to off for Continuous/AEB modes.
AEB shooting is not possible if less than 3 shots remain.
Use tripod for AEB shooting due to longer saving time and potential shake.
Function to adjust the sharpness of recorded images.
Sharpness effect applies on saving; cannot preview on LCD before shooting.
Setting for soft sharpness.
Setting for normal sharpness.
Setting for sharp sharpness.
Purpose of the OSD Information menu.
Details on the auto power-off timer and LCD display.
How to wake the camera from power saving mode.
Playback functions depend on memory card presence.
Playback functions apply to internal memory if no card is inserted.
How to switch between playback and shooting modes.
Setting playback functions via buttons or menu.
How to view images one by one.
How to play back movie files.
Save movie frames as still images.
How to capture frames from movie files.
How to activate silent mode by pressing the Playback button.
Shutter button switches to shooting mode when in playback.
Steps to play back voice recordings.
Select [All] in [OSD Info] menu to view image details.
List of image information items and their page numbers.
How to use split view and digital zoom in playback.
View multiple photos or zoom/trim selected ones.
How to view photos in a split screen layout.
How to zoom in on photos.
Zoomed images may have reduced quality.
Table showing maximum zoom ratios per image resolution.
Crop and save desired parts of zoomed images.
Select image, zoom, then press Menu for crop option.
Function of the UP button when navigating menus.
Record voice memos on photos when menu is not displayed.
Steps to add voice memos to photos.
How buttons operate in playback mode.
Function of the DOWN button when navigating menus.
Controls for playing back recorded memos, audio, or movies.
Button to add special effects to captured images.
Press E button in still/movie modes to access effects.
Select desired sub-menu value, then press OK.
Function to delete images stored in memory.
How to delete single images in normal playback mode.
How to delete images in split playback mode.
Troubleshoot PictBridge connection issues.
Press Printer button to enter direct print mode.
Camera may turn off if not recognized by printer.
How buttons operate in playback mode.
Function of the left button in menu and playback.
Function of the right button in menu and playback.
How to open and close the playback menu.
How to confirm settings and change values in menus.
Overview of available playback menu settings.
List of available playback menus.
Settings for the slide show feature.
Settings for slide show transition effects.
Settings to protect images from deletion.
Settings for deleting images.
Settings to change image resolution.
Settings for rotating images.
Settings for DPOF print ordering.
How to set standard print options for DPOF.
How to set index print options for DPOF.
How to set print size for DPOF.
How to copy images from internal memory to memory card.
Set unique transition effects for slide show images.
How to start the slide show from the 'Start' menu.
Setting the playback interval for the slide show.
Use unique effects for image transitions in slide shows.
Protect important images from deletion or unprotect them.
Step-by-step guide for protecting images.
Window to choose images for protection/unprotection.
Protect or unprotect all saved images.
Deletes unprotected files in the DCIM folder on the memory card.
Step-by-step guide for deleting files.
Window to choose files for deletion.
Confirmation window appears when deleting all files.
Change photo resolution; select [User Image] to save as startup image.
Table of available image resolutions.
Rotate saved photos; returns to original after playback.
Press Playback button, then Menu to access rotation.
Use up/down buttons to select rotation type.
Press OK to apply rotation; returns to original after playback.
DPOF stores print info on memory card for compatible printers.
DPOF photos show an icon and are usable with compatible printers.
DPOF cannot be set for movies or voice recordings.
Memory card is required to use DPOF features.
Set to print photos from memory card in specified quantities.
Press Playback, then Menu to access DPOF settings.
Use left/right buttons to select DPOF menu tabs.
Press up/down for Standard Print, then right.
Press up/down for options, then OK.
Print multiple photos as thumbnails on one page.
Press Playback, then Menu to access DPOF settings.
Use left/right buttons to select DPOF menu tabs.
Press up/down for Index Print, then right.
Press up/down for options.
Press OK to save DPOF settings.
Specify print size for photos stored on memory card.
Print Size menu requires DPOF 1.1 compatible printers.
Step-by-step guide for setting print size.
Screen to select images for changing print size.
Set print size for all photos.
Copy images/movies/audio from internal memory to memory card.
Step-by-step guide for copying files to memory card.
Confirmation message and process for copying.
Playback mode screen appears after copying.
View shooting information of the current image on the LCD.
How to configure OSD display settings.
Connect to PictBridge printer for direct photo printing.
How to configure camera settings for PictBridge connection.
Steps to connect camera and printer.
Connecting camera to printer using cradle.
Connecting camera directly to printer.
Troubleshoot PictBridge connection issues.
Press Print button to enter direct print mode; check compatibility.
How to perform a simple print of the current image.
How to select photos for printing.
Press Menu button to access photo selection.
The [Image] menu appears as shown.
Use up/down buttons to select photo selection options.
PictBridge applies to the current photo.
PictBridge applies to all photos except movies/voice.
How to use automatic print settings.
Select paper size, output format, paper type, quality, date, filename.
Press left/right to select [User Setting] tab.
Use up/down buttons for values, then right.
Use up/down buttons for options, then OK.
List of available print settings.
Steps to initiate photo printing.
Use left/right buttons to select [Print] tab.
Select print output type (Standard or Index).
Print photos one per page in specified quantities.
Print multiple photos as thumbnails on one page.
Index print quantity may vary by printer.
Directly print DPOF files to the printer.
Press left/right to select [DPOF Print] tab.
Use up/down for options, then OK.
Reset user settings to initial state.
Press left/right to select [Initialize] tab.
Use up/down for options, then OK.
Initialization is cancelled if [No] is selected.
Reset printer and photo settings to default.
Settings for USB connection type (Computer/Printer).
Settings for the AF assist lamp.
How to adjust the LCD screen brightness.
Settings for video output signal type (NTSC/PAL).
Setting the duration for quick view of photos.
How to reset all camera settings to default.
Selecting the correct battery type for the camera.
Setting the auto power-off timer for the camera.
How to change the camera's display language.
How to adjust camera operation sounds.
How to turn the AF assist light on or off.
Selecting USB connection mode (Computer/Printer).
How to adjust the LCD screen brightness.
Setting the video output signal type (NTSC/PAL).
Guide for connecting AV cables.
Connecting camera to monitor via AV cable using cradle.
Connecting camera to monitor directly via AV cable.
Setting the duration for quick view of photos after shooting.
How to reset all camera settings to default.
Selecting the correct battery type for the camera.
Overview of menu tabs for custom camera settings.
How to set the startup image displayed on the LCD.
How to set the startup image displayed on the LCD.
How to adjust the camera's startup sounds.
How to adjust the camera's shutter sounds.
Set startup sounds when turning on the camera.
Selectable startup sound options.
Set sounds when pressing the shutter button.
Selectable shutter sound options.
Meaning and solutions for memory card errors.
Meaning and solution for a locked memory card.
Meaning and solution for full storage.
Meaning and solution when no photos are found.
Meaning and solution for corrupted files.
Steps to troubleshoot if the camera does not turn on.
Troubleshooting steps for unexpected camera power-off.
Steps to troubleshoot rapid battery drain.
Steps to troubleshoot if shooting fails.
Troubleshooting steps for unexpected camera power-off.
Steps to troubleshoot rapid battery drain.
Steps to troubleshoot if shooting fails.
Steps to troubleshoot incorrect camera date/time settings.
Steps to troubleshoot unresponsive buttons or switches.
Troubleshooting memory card errors.
Do not rename image files if they violate DCF standard.
Adjust White Balance or Effect settings for color cast issues.
Adjust exposure compensation if playback is too bright.
Check AV cable connection and ensure camera is powered on.
Use only correctly formatted memory cards for playback.
Check USB cable connection.
Ensure the camera is powered on.
Verify OS compatibility and USB support.
Ensure the camera driver is installed.
Important notes regarding software and manual usage.
Software is for one camera; unauthorized copying prohibited.
Manufacturer not responsible for issues with non-certified PCs.
Manual assumes basic PC and OS knowledge.
Overview of software included on the CD.
Driver for connecting camera to PC; includes USB Storage Driver.
Multimedia program for managing, editing, and viewing photos/videos.
Install software for sharing, editing, and saving images.
Contact information for installation and usage inquiries.
Click [Install] on the auto-run screen.
Install camera driver, DirectX, and Digimax Master sequentially.
Restart computer after installation.
Connect camera via USB cable after software installation.
Connect camera via USB cable to enter computer connection mode.
No screen display in computer connection mode.
Steps to establish USB connection with the computer.
Guide for connecting camera to computer via USB.
Connect camera to computer using cradle and USB cable.
Connect camera directly to computer via USB cable.
Download photos to PC for printing or editing.
Open [My Computer], then [Removable Disk] to access DCIM folder.
Click photos to select them for download.
Use right-click menu to copy or cut selected photos.
Paste photos into a desired folder on your computer.
Download images to PC first for safer viewing.
Non-camera files may not display correctly on the camera.
Steps to safely remove the USB device in older Windows versions.
Steps to safely remove the USB device in Windows 2000/ME/XP.
Follow prompts to safely remove the hardware.
Camera is automatically recognized by Macintosh.
Verify Mac OS version compatibility (9.2-10.3).
Connect camera to Macintosh using USB cable.
Access camera files via desktop icon; copy/move files.
Eject removable disk via the taskbar icon after upload.
Program for editing, saving, and managing photos/videos.
Sequence to launch Digimax Master from Start menu.
Connect camera to computer before downloading.
Auto download window appears when connecting camera.
Choose folder location for downloaded images.
Select images to download, choose folder structure.
Click 'Next' then 'Start' to begin download.
View downloaded images.
View captured images.
Edit captured still images.
Edit movies, audio, music files into a single video.
Check cable connection and ensure correct cable is used.
Reinstall drivers, reconnect camera after reboot.
Restart communication after unexpected errors.
Connect camera directly to PC, avoid USB hubs for compatibility.
Disconnect other USB devices to avoid conflicts.
Remove unrecognized devices from Device Manager and reinstall drivers.
Reinstall drivers and reboot after removing unrecognized devices.
Temporarily disable security software to resolve connection issues.
Use rear USB ports if front ports are not recognized.
Ensure correct video codec is installed for playback.
Install DirectX 9.0 or later if not already installed.
Disconnect camera or disable Legacy USB Support in BIOS.
Ensure Digimax Master is closed; use CD for full software install.
Warranty void if serial number is missing or altered.
Manual is protected by copyright; no unauthorized reproduction.
Opened items cannot be returned or exchanged unless defective.
| Megapixels | 5.1MP |
|---|---|
| Optical Zoom | 3x |
| Digital Zoom | 4x |
| Screen Size | 1.8 inches |
| Image Sensor Type | CCD |
| Battery Type | 2 x AA batteries |
| Storage | SD card |
| Camera Type | Compact |
| Image Format | JPEG |
| Video Format | AVI |
| Weight | 136g |
| ISO Range | Auto, 100, 200, 400 |
| Shutter Speed | 1/2000 - 15 sec |