Do you have a question about the Samsung S24R35 Series and is the answer not in the manual?
General safety guidelines to prevent injury and property damage during product use.
Electrical safety measures and warnings for safe product operation and connection.
Procedures and precautions for physically installing the product and its components.
Guidelines and warnings for operating the product safely and correctly.
Instructions and precautions for cleaning the product's screen and exterior.
Recommendations for ergonomic setup to ensure user comfort and health.
Initial steps and checks required before using the product.
Step-by-step guide for assembling and attaching the product stand.
Safety advice and proper methods for transporting the product.
Ensuring adequate ventilation and clearance for the product.
How to adjust the screen's angle for optimal viewing.
Guidance on securing the product using an anti-theft lock device.
Details and requirements for mounting the product using a VESA compatible kit.
Overview of the buttons and indicators on the product for navigation and status.
Explanation of shortcuts and direct access functions for quick menu navigation.
Description and function of the different input/output ports on the product.
Steps for connecting a personal computer to the monitor.
Guide for connecting via the analog D-SUB port.
Guide for connecting via the digital HDMI port.
Information on connecting using an HDMI-DVI cable.
Steps for connecting the product to a power source.
Methods for organizing and routing cables for a neat setup.
How to configure the display resolution for the best picture quality.
Adjusting various picture quality settings for optimal viewing.
Controls the overall brightness level of the screen display.
Adjusts the difference between the lightest and darkest areas of the image.
Enhances or softens the detail and clarity of the image.
Adjusts the color saturation, tone, and gamma for desired color reproduction.
Adjusts black levels for improved image quality when using HDMI input.
Optimizes screen settings for reduced eye strain during prolonged use.
Configures settings for enhanced gaming performance and experience.
Adjusts panel response rate for smoother motion in videos and games.
Options to change the aspect ratio or fit of the displayed image.
Fine-tuning the screen's position or scaling.
Settings related to the visibility and behavior of on-screen menus.
Adjusts the opacity of on-screen menu windows.
Controls the placement of on-screen menus on the display.
Sets the display language for the on-screen menus.
Configures how long on-screen menus remain visible.
Accessing and configuring system-level settings and features.
Runs a test to check for product malfunctions or issues.
Technology to eliminate screen tearing and provide smoother gameplay.
Feature to reduce energy consumption and save power.
Sets the product to automatically turn off after a specified period.
Selects the input mode for PC or AV devices.
Configures automatic detection of the input source.
Adjusts the delay before a key press is repeated.
Configures the behavior of the power indicator LED.
Returns all product settings to their factory default values.
Displays current software version and other system information.
Software for partitioning the screen into multiple sections.
Potential issues and limitations during software installation.
Minimum hardware and OS specifications for software installation.
Steps to install the necessary drivers for product functionality.
Checks to perform before seeking technical support.
How to run a self-diagnostic test for screen problems.
Verifying display settings for compatibility.
Solutions for various common problems encountered with the product.
Steps to adjust the screen refresh rate on the PC.
Steps to adjust the screen resolution on the PC.
Instructions for configuring power management settings.
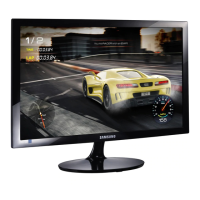
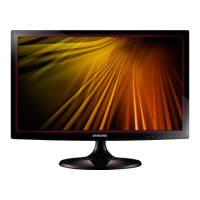
Basic specifications like model name, size, and display area.
Information on the product's compatibility with Plug-and-Play systems.
Details about pixel characteristics and manufacturing tolerances.
Reference table for supported display resolutions and frequencies.
Information on service charges and warranty conditions.
Conditions under which service may be charged, not covered by warranty.
Scenarios where product damage incurs charges.
Other conditions that may lead to service charges.
Guidelines for environmentally responsible product disposal.