Do you have a question about the Samsung SHP-H20 and is the answer not in the manual?
Mutes the sound of key entry and door opening by pressing the [*] button before entering the PIN code.
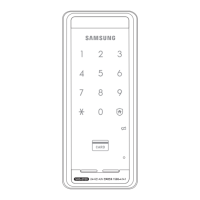
Touching the number pad lights up the pad for PIN entry.
Enter the PIN code when the number pad is lit and press the [*] button.
The door automatically locks 2 seconds after it is closed.
Touch the outer body unit number pad to lock the door.
The door automatically locks 2 seconds after it is closed.
Press the [CLOSE/DOUBLE LOCK] button from the inside.
Prevents door opening when someone is inside.
Press the [CLOSE/DOUBLE LOCK] button to prevent unauthorized entry from inside.
This document describes the Samsung SDS SHP-H20 digital door lock, a device designed to enhance security and convenience for residential and commercial properties.
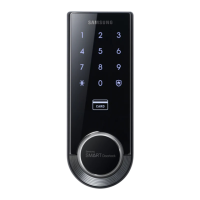
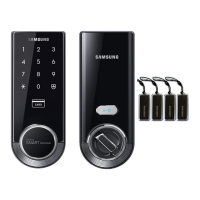
The SHP-H20 is a digital door lock that offers multiple methods of entry, including a keypad for PIN codes and an RFID reader for key tags or cards. It is designed for easy installation and user-friendly operation, providing a secure and modern alternative to traditional mechanical locks.
The primary function of the SHP-H20 is to secure a door, allowing authorized users to gain entry through various digital authentication methods. It replaces traditional keys with PIN codes and RFID credentials, offering enhanced security features such as randomizer mode and 2-step authentication. The lock also includes an alarm system to alert users of potential security breaches or abnormal events.
The SHP-H20 offers multiple convenient ways to open the door:
This feature enhances security by preventing the exposure of the user's PIN code. Before entering the actual PIN, users are prompted to enter two random digits, followed by their PIN. This makes it difficult for onlookers to guess the PIN by observing finger traces on the keypad.
For heightened security, users can enable 2-step authentication, which requires both a PIN code and an RFID key tag to open the door. This dual authentication method provides an extra layer of protection against unauthorized access.
This mode is designed for when the user is away from home. When activated, if someone attempts to open the door from the inside, an alarm will sound. This feature is useful for preventing unauthorized exit or for alerting the user to potential intruders.
The lock allows users to adjust the volume of sounds generated by the device, such as button presses and alarm sounds. There are three levels of volume, and it can also be muted.
The SHP-H20 offers flexibility in how the door locks:
This feature is designed to prevent opening of the door from the outside while someone is inside.
The lock supports up to 10 PIN codes. To register a new PIN, users must enter the master PIN, select the registration option, and then input the new PIN.
Up to 20 RFID key tags or cards can be registered. The process involves entering the master PIN, selecting the registration option, and then placing the key tag on the RFID reader.
Individual PIN codes or RFID key tags can be deleted. There is also an option to delete all registered PIN codes or all registered RFID key tags simultaneously.
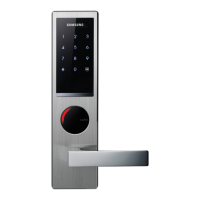
The interior unit features a lever handle that allows for easy exit. Simply push down the handle to open the door.
The SHP-H20 includes a high-temperature alarm function for safety. If the room temperature abnormally increases (e.g., due to a fire), the lock will detect the temperature rise.
The SHP-H20 is powered by four AA alkaline 1.5V batteries.
The lock is equipped with an intrusion detection function. If the door is forced open while locked, or if the door sensor detects an abnormal opening, an alarm will sound for 3 minutes.
This function is designed to prevent unauthorized attempts to open the door. If an unregistered key tag is used or an incorrect PIN code is entered 5 consecutive times, an alarm will sound for 3 minutes, and the lock will be locked for 3 minutes.
This comprehensive set of features ensures that the Samsung SDS SHP-H20 digital door lock provides a secure, convenient, and reliable access solution for various environments.
| PIN Length | 4-12 digits |
|---|---|
| RFID Technology | 13.56 MHz |
| Power Source | Battery |
| Auto Lock | Yes |
| Anti-Theft Alarm | Yes |
| Installation | DIY or Professional |
| Connectivity | Bluetooth |
| Access Methods | RFID |
| Battery Life | Approx. 1 year |
| Emergency Power | 9V battery |
| Material | Zinc |
| Color | Black |
| Operation Method | Touchscreen |