W
William WilliamsJul 26, 2025
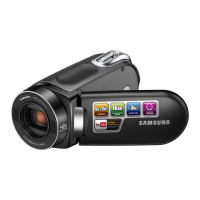
What to do if my Samsung SMX-C10 says 'Card Full'?
- PPatricia ButlerJul 26, 2025
To resolve a 'Card Full' error on your Samsung Camcorder, you can: * Delete unnecessary files from the memory card. * Use the built-in memory (available on SMX-C13/C14 models only). * Back up files to your PC or other storage media and then delete them from the card. * Switch to a different memory card with sufficient free space.