Assembling the cleaner
assembling the cleaner _7
01 ASEMBLING THE CLEANER
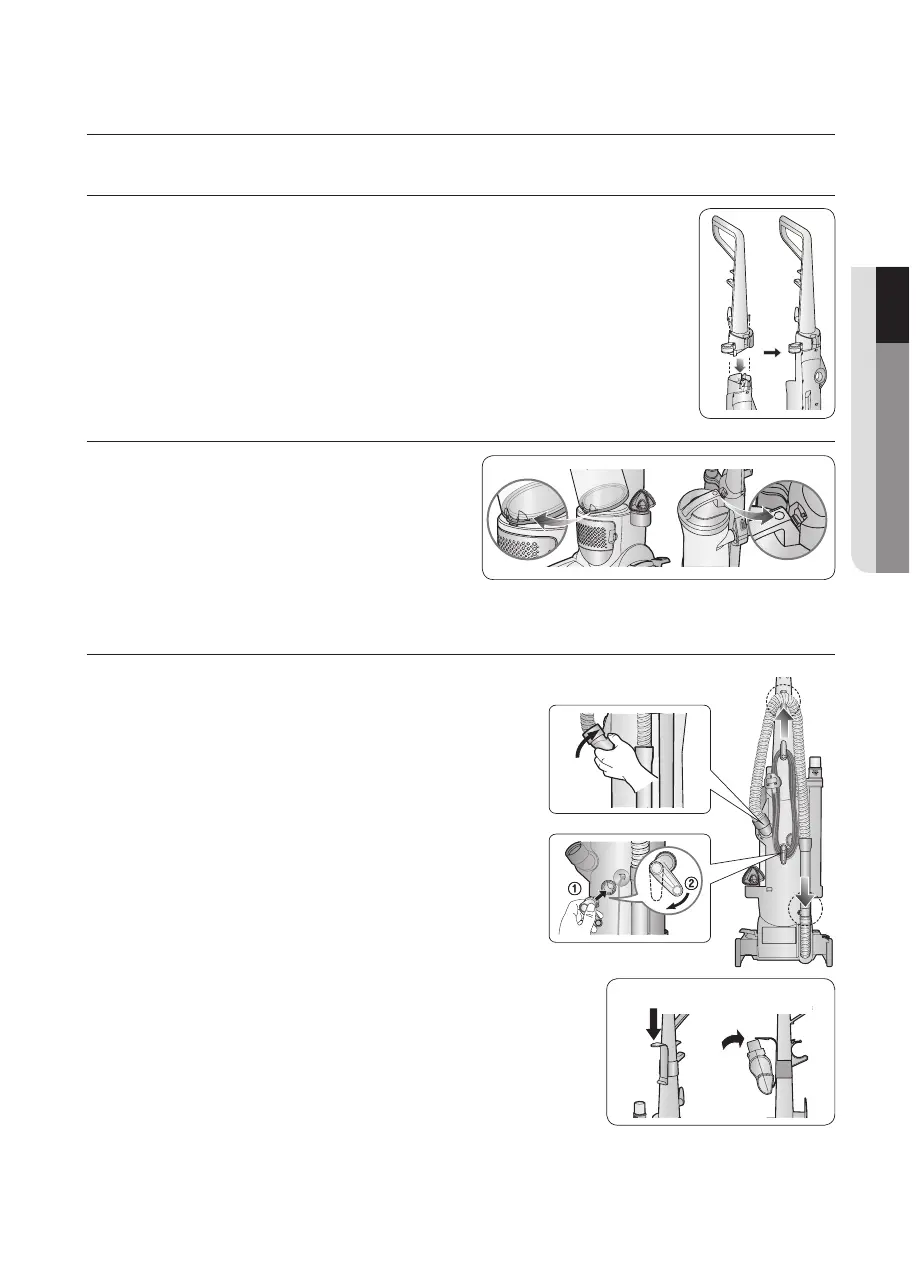
ATTACH HANDLE TO VACUUM
1.Standthevacuumuprightandslidethebaseofthehandle
firmly into the grooves at the top of the vacuum body.
2.Checktobesurethehandleisttedtothevacuumbody.If
there is a gap, continue to push firmly until the handle is flush.
3.Insertthescrewprovidedfromthescrewpacketintothe
existinghole.Tightensecurelywithascrewdriver.
ATTACH DUST BIN TO VACUUM
Fit the groove located on the lower
frontsideoftheDustBintothehook
located on the vacuum body and
attach the hook located on the
DustBinHandletothevacuumbody
as shown.
ATTACH VACUUM HOSE AND TOOLS
1.AttachtheTwistSnapHosebyliningupthe
taps on the base with the corresponding
notches on the back of the vacuum as shown.
2.TurntheTwistSnapHoseclockwisetolock
the hose into place.
3.GraspingtheHoseWand,slidetheendofthe
it onto the Hose Wand Base. Snap the Hose
into the Hose Clip.
Note : The vacuum will not operate effectively
unless the Hose Wand is firmly
attached.
4.AttachtheLowerCordWrapbyliningup
the tab on the base with the corresponding
notch on the back of the vacuum and turn it
clockwise as shown.
5.AttachtheExtensionWandandtheCreviceTool
together into the holder on the right side of the body
as shown.
6.AttachtheCombinationToolintotheholderonthe
left side of the body as shown.
7.AttachtheBracketBrushonthefrontofthehandle
andcliptheMiniTurboBrushintotheBracketBrushasshown.
* Select Models Only