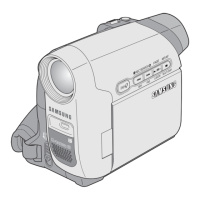
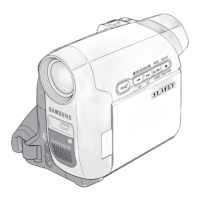
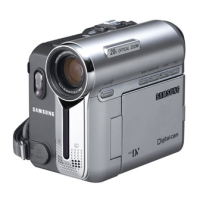
Do you have a question about the Samsung VP-D364W and is the answer not in the manual?
General safety checks and procedures for servicing to prevent hazards.
Precautions to follow during servicing, including design alteration warnings and lead dress.
Guidelines for handling electrostatically sensitive devices (ESD) to prevent damage.
Preparation and steps for adjusting the VCR settings, including button functions.
Specific electronic adjustment for VCR, focusing on SWP Position.
Preparation for camera system adjustments, including items after LENS Assy or PCB replacement.
Procedure for EEPROM data initialization and lens zoom track adjustment.
Procedures for adjusting Auto HALL, Auto IRIS, and Auto White Balance settings.
Periodic maintenance checks for drum assembly and tape path, including cleaning procedures.
Table outlining maintenance checks based on hours of use for various systems.
Adjustment of tension regulator, including disassembly and reassembly.
Procedures for back tension confirmation, PB/REV torque checks, and reel table height.
Preparation for tape path adjustment, including cleaning and observing RF signal waveforms.
Procedures for tracking adjustment and take-up path adjustment using guide rollers and capstan.
Checking tracking, cue, and rev signals after adjustment to ensure proper performance.
Procedure for removing the front assembly, including screws and mic-harness.
Steps to remove the left assembly, including screws, FFC, and separating from the right assembly.
Procedure for removing the rear assembly, including battery cover, screws, and connectors.
Procedure for removing the main PCB, including FPCs and screws.
Steps to remove the main deck assembly, including cover housing and tape eject knob.
Diagram illustrating the connections between the main board, deck, jack, and rear boards.
Component side layout of the main PCB, showing ICs and connectors with location coordinates.
Schematic diagram for the audio circuit on the main PCB, including waveforms.
Schematic diagram for the DC/DC power supply circuit on the main PCB, including waveforms.
Schematic diagram for the DSP7 circuit on the main PCB, showing ICM01 and waveforms.
Schematic diagram for the preamp prml circuit on the main PCB, showing various ICs and waveforms.
Schematic diagram for the servo circuit on the main PCB, detailing motor drivers and sensors.
Schematic diagram for the system micom circuit on the main PCB, showing IC501 and waveforms.
Instructions on charging the lithium ion battery pack and understanding charging indicators.
Guidelines for recharging, managing, and handling battery packs to ensure safety and longevity.
Important notes on battery usage, charging, replacement, and disposal.
Procedure for setting the camcorder's clock, including year, month, day, hour, and minute.
Procedure for selecting the desired language for menu screens and messages displayed on the OSD.
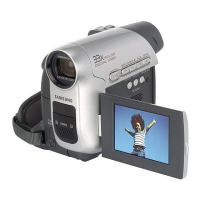
Instructions for adjusting LCD screen brightness and color based on viewing conditions.
Guide to connecting to a printer and printing pictures using the PictBridge function.
Steps for recording with a DV connection cable, including setting switches and connecting devices.
How to select USB device (Computer or Printer) for data transfer or printing.
Procedure for connecting the camcorder to a PC using a USB cable.
How to use the camcorder as a PC camera, including software requirements and operation.
Troubleshooting steps for loading errors, checking power supply and components like IC501.
Troubleshooting steps for drum rotation issues, checking IC501, VS, and drum waveforms.
Troubleshooting steps for capstan rotation problems, checking voltages and waveforms.
Troubleshooting steps for reel errors, checking DCDC, IC401, and reel sensors.
Troubleshooting steps for video signal issues, checking DSP7, CCD, and FFC.
Troubleshooting steps for no audio output, checking mic cell, harness, IC601, and R619.
Troubleshooting steps for video missing in play mode, checking drum, IC301, and video in/out.
Troubleshooting steps for playback issues, checking CNR02 signals and aligning the deck.
Troubleshooting steps for no LCD display, checking voltages for LCD ON, BL ON, and IC303.
Troubleshooting steps for no CVF display, checking voltages for CVF ON, 5V, 3V, and IC501.
Troubleshooting steps for no power issues, checking fuses, IC503, and output voltages.
Lists safety and EMC standards applicable to audio and video products.
Details on camera circuit block requirements, including signal conversion and digital effect functions.
Details on the SYSCON/SERVO Block, including its processor, clock, RTC, and motor control functions.
Description of the DV-1 Chip Block's function in AV I/F, video signal processing, and data communication.
Details on the PRML Block's role in serial enable/data/clock control, signal processing, and ATF signal processing.
Demand matter for the PREAMP Block, covering recording/playback operations and signal amplification.
Demand matter for the AV I/F Block, handling audio/video input and output, and OSD/MENU display.
Demand matter for the DC/DC Block, detailing power supply functions and error signal handling.
Demand matter for the CAMERA LENS ASS'Y, covering image formation, zoom, focus, and auto iris functions.
Flowchart detailing the tape loading sequence, including motor, gear, and roller movements.
Flowchart illustrating the transition from Stop to REC mode, detailing component movements and tape winding.
Flowchart illustrating the unloading process, from pushing eject key to housing lock.
| Recording Media | Mini DV tape |
|---|---|
| Optical Zoom | 34x |
| Digital Zoom | 1200x |
| Image Stabilizer | Electronic |
| Focus Adjustment | Auto / Manual |
| Display Type | LCD |
| Battery Type | Lithium-ion |
| Type | Camcorder |
| LCD Screen Size | 2.5 inches |
| Image Sensor | 1/6" CCD |
| Video Resolution | 720 x 480 |
| Microphone | Built-in |
| Connector Type | A/V out |
| Effective Pixels | 680k |
| Viewfinder | Color |