Installing the WindFree 1-Way Cassette Panel
4
English
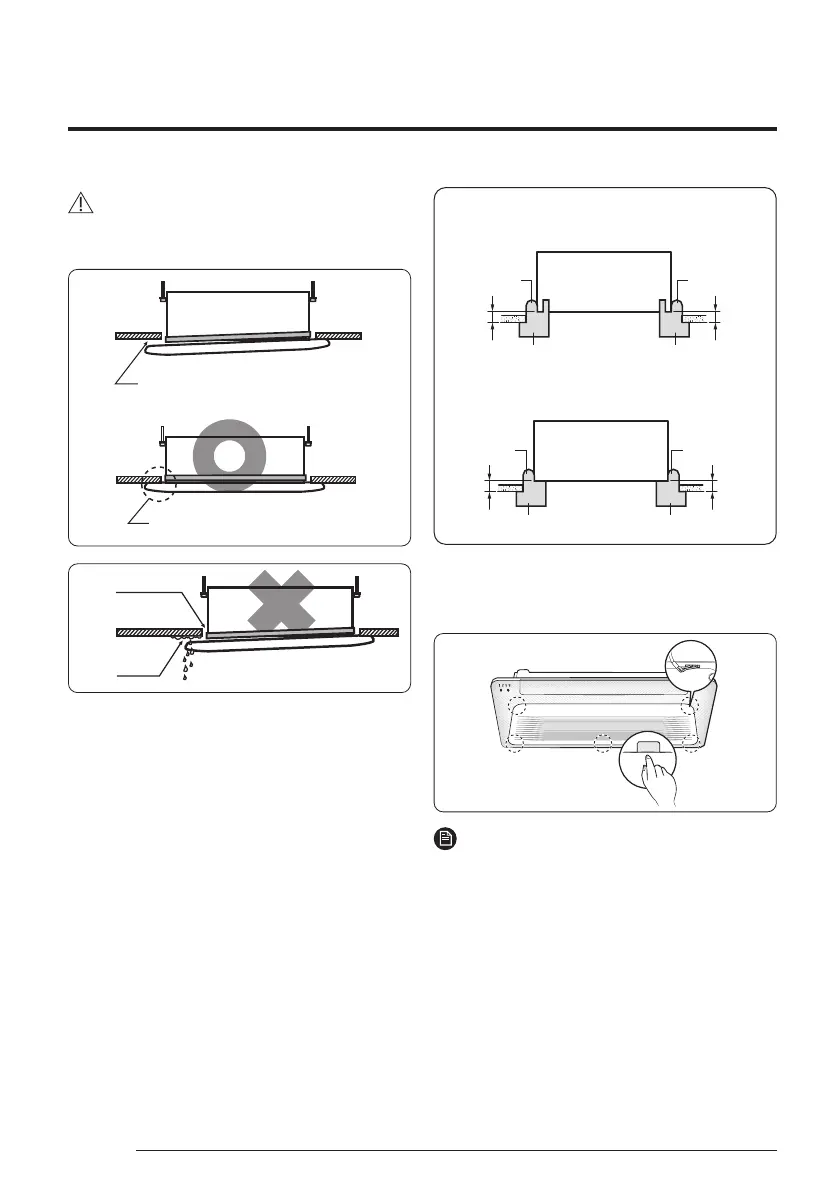
CAUTION
• If the panel is installed incorrectly onto the
cassette, air may leak out.
Make sure that there is no gap here.
Make sure that there is no gap here.
Condensation and drops
Air leaks
Dust
accumulates
Air l
eaks
from ceiling
Incomplete installation (fastening) produces the problems as
shown in the figure. Be sure to check again after the installation.
• When installing the panel, if there are any gaps
between the panel and the indoor unit due
to incomplete installation (fastening), air and
condensation water may leak into the room. Be sure
to remove gaps by using the indoor unit installation
gauges (on the pattern sheet for installation).
– For detailed specifications, refer to the
installation manual for the product.
ceiling
Jig
8.0
6.0
Air inlet
(Unit: mm)
Slim 1 way cassette (Small, WindFree panel)
Slim 1 way cassette (Medium/Large, WindFree panel)
Air outlet
Indoor unit
ceiling
Jig
10
10
Air inlet
Indoor unit
Air outlet
6
Connect the grill.
• Hook the 2 panel safety hooks onto both sides of the grill.
• Push the [PUSH] sign to fix the grill.
PUSH
NOTE
• Before working on the grill, be sure to hook the
panel safety hooks onto both sides of the grill to
prevent it from falling during work.
DB68-13073A-00_IM_SYS WindFree 1way Panel WiFi_EU_EN_.indd 4DB68-13073A-00_IM_SYS WindFree 1way Panel WiFi_EU_EN_.indd 4 2024-07-22 오전 9:20:502024-07-22 오전 9:20:50