Do you have a question about the Samsung DVM S WATER-GEO and is the answer not in the manual?
Installation must be requested to a qualified installer. If the user installs a product improperly on their own, it may cause water leakage, electric shock or fire.
Neatly arrange the wires in the electrical parts to make sure that electrical cover is closed securely without any gaps.
Perform the drainage/piping work securely according to the installation manual.
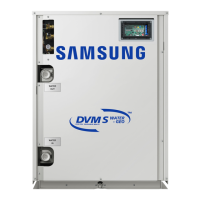
Guidance on selecting compatible indoor units and connecting them to outdoor units for DVM S WATER-GEO.
Criteria for choosing a suitable installation place, considering ventilation, structure, and environmental factors.
Guidelines for refrigerant pipe length, height difference, and tools compatible with R-410A.
Explains how to calculate the total additional refrigerant based on pipe length and indoor unit amounts.
Important safety information and precautions for refrigerant pipe work, including moisture and leakage checks.
Instructions for connecting refrigerant pipes to outdoor units for H/P and HR systems, including heat pump valve and option switch settings.
Guidance on connecting pipes between outdoor units using branch joints and installing traps when needed.
Safety precautions for electrical work, including mandatory installation of ELCB/MCCB+ELB and power cable selection.
Instructions for connecting power cables to the terminal board using solderless ring terminals and torque specifications.
Examples of MCU connections for different configurations, showing power and communication cable routing.
Example of MCU connections, illustrating power and communication cable routing for specific MCU models.
Guidelines for grounding work, including power cable grounding standards and methods.
Procedure for performing an air tightness test using nitrogen gas to detect leaks and ensure system integrity.
Steps for vacuum drying refrigerant pipes and indoor units to remove moisture and ensure system stability.
Steps for connecting a refrigerant container to the outdoor unit and collecting refrigerant.
Detailed explanation of DIP switches (SW51-SW58) for configuring outdoor unit functions and settings.
Procedure for setting outdoor installation options using buttons K1-K4, including unit address and quantity settings.
Details on setting options like emergency operation, cooling capacity correction, and heating capacity correction.
Steps for setting MCU addresses and configuring MCU ports using DIP switches and S/W options.
Procedure for manually setting pipe addresses using remote controls or S-NET Pro 2.
Procedure for automatically setting pipe addresses using the auto pipe pairing operation.
Step-by-step guide to execute the auto pipe pairing operation, including display indicators and results.
Diagrams and components for water pipe installation, including flanges, valves, and strainers.
Checks for insulation resistance and voltage/phase before supplying power to the outdoor unit.
Checklist for installation work, indoor unit status, and refrigerant pipe work after completion.
Safety precautions to be taken before starting trial operation, including power supply timing and touching components.
List of checks before auto trial operation, including cables, power supply, voltage, and tracking.
Procedure and checks for auto trial operation, including error handling and user explanation.
Consequences of incomplete auto trial operation and how to proceed.
Procedure for handling errors during auto trial operation, referring to error codes and service manuals.
Steps to address E503 errors, involving trial operation, fan mode, and auto trial restart.
Procedure to follow when E505 or E506 errors occur, involving vacuum modes and pressure sensor checks.
Actions for excessive, insufficient refrigerant, or insufficient supercooling, and handling 'Judgment not available'.
Importance of managing cooling water quality to prevent corrosion and scale on the heat exchanger.
Ensuring adequate water flow to prevent freezing of the plate heat exchanger and related issues.
Steps to address E436 error related to anti-freeze control to prevent water freezing and potential damage.
Essential precautions for maintaining the plate type heat exchanger, including checks after long periods of non-operation.
Methods for cleaning the plate heat exchanger using chemical solutions and circulating water.
Guidelines for managing cooling water quality to prevent corrosion and scale, with detailed parameters.
Information on the operational range of cooling water flow rates and pressure drops for different outdoor unit models.
Mandatory checklist for using anti-freeze with ground heat exchangers, covering handling, injection, and monitoring.
| Brand | Samsung |
|---|---|
| Model | DVM S WATER-GEO |
| Category | Air Conditioner |
| Language | English |