USA
San Jamar
555 Koopman Lane
Elkhorn, Wisconsin 53121
USA
T:+1.262.723.6133
F:+1.262.723.4204
info@sanjamar.com
www.sanjamar.com
San Jamar Canada
3300 Bloor Street West
Center To wer, 11th Floor
Suite 3140 To ronto, ON
M8X 2X3
CANADA
T:+1.416.760.7367
F: +1.416.207.2071
canada@sanjamar.com
San Jamar Europe
Schoorstraat 26a, bus 1
2220 Heist op-den Berg
BELGIUM
T: +32 1522 8140
F: +32 1522 8148
emea@sanjamar.com
San Jamar México
Av. Universidad #1377-701
Colonia Axotla CP 01030
Del. Alvaro Obrego
MEXICO, D.F.
T: +52 (55) 3626 0772
F: +52 (55) 5273 4495
mexico@sanjamar.com
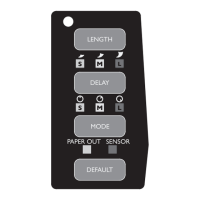
Length
Towel length can be adjusted by pressing top button.
Press button to corresponding color to change paper length.
INDICATOR LENGTH LED COLOR
Short (S) 8" (20cm) Green
Medium (M) 12" (30cm) Yellow
Long (L) 16" (40cm) Red
Delay
The delay between dispensing can be adjusted by pressing the 2nd button.
Press button to corresponding color to change paper delay.
INDICATOR DELAY LED COLOR
Short (S) 0 second Green
Medium (M) 1.5 second Yellow
Long (L) 3 second Red
Mode
The Sensor Essence can be set in one of two operating modes.
1. SENSOR MODE- upon closing the cover after inserting batteries, one sheet of
paper will automatically dispense. After that initial sheet is torn, the dispenser will be
in sensor mode, waiting for a hand to be placed underneath before it dispenses paper.
2. TOWEL OUT MODE- when in this mode, paper is always available with no wait
time in between dispensing of next sheet of paper. Once the exposed sheet of paper
is torn, the next sheet of paper automatically dispenses.
MODE LED COLOR
Towel Out Green
Sensor Red
Default
Pressing this button will change settings to factory default setting as indicated by red light.
LENGTH 30CM
Delay 0 second
Mode Sensor
Problems
Typical problems can be solved by opening and closing cover. If that fails to
resolve problem, try removing and then reinserting the batteries. If that fails,
try replacing with new batteries.
Adjusting Settings
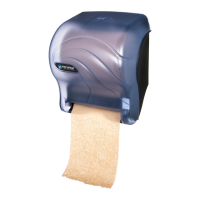
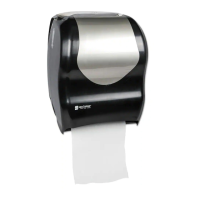
ELECTRONIC ROLL TOWEL DISPENSER
Mounting Instructions Refer to separate mounting instruction sheet.
Battery Loading
Load 4 D-cell Alkaline batteries as shown below. Batteries must be loaded in correct orientation, with positive end towards the left. If batteries are not loaded correctly, unit will
not function.
D-CELL
ALKALINE
D-CELL
ALKALINE
D-CELL
ALKALINE
D-CELL
ALKALINE
RECHARGEABLE
WARNING: BATTERIES MUST BE INSERTED CORRECTLY
DO NOT USE RECHARGEABLE OR NICAD BATTERIES AS THESE
MAY CAUSE DAMAGE TO YOUR DISPENSER OR PERSONAL INJURY.
You must replace all batteries with 4 NEW D-Cell Alkaline batteries.
!
D-CELL
ALKALINE
D-CELL
ALKALINE
D-CELL
ALKALINE
D-CELL
ALKALINE
RECHARGEABLE
WARNING: BATTERIES MUST BE INSERTED CORRECTLY
DO NOT USE RECHARGEABLE OR NICAD BATTERIES AS THESE
MAY CAUSE DAMAGE TO YOUR DISPENSER OR PERSONAL INJURY.
You must replace all batteries with 4 NEW D-Cell Alkaline batteries.
!
Do not use re-chargeable or NiCad batteries
in this dispenser as it will cause damage.
102289_RevA