Do you have a question about the Sangean K-200 and is the answer not in the manual?
Users must read and understand all safety and operating instructions before operating the radio.
Keep the safety and operating instructions for future reference.
Follow all warnings on the appliance and in the operating instructions.
Avoid using the appliance near water or in damp conditions like bathrooms or sinks.
Unplug before cleaning; use a damp cloth. Ensure proper ventilation, do not block openings.
Operate only from the indicated power source type and handle the mains adaptor safely.
Avoid overloading outlets/cords and never insert objects into openings to prevent fire or shock.
Unplug if left unattended for long periods. Remove batteries to prevent leakage damage.
Do not attempt self-servicing; refer all servicing to authorized personnel to avoid damage.
Never push objects or spill liquids into the radio through any openings.
Service is required if adaptor, plug, or enclosure is damaged, or if operation is abnormal.
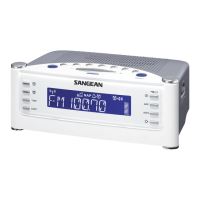
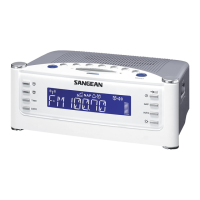
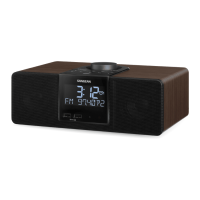
Highlights the Sangean K-200's features in a stream-lined portable size.
Supports AM/FM broadcasts with RDS and offers 10 station presets.
Features clock display, two alarms with snooze, and an adjustable Auto Off Timer.
Includes a 3.5mm auxiliary input, headphone socket, and voice message recording.
Notes attractive design, ergonomic knobs, flat buttons, and built-in/external antennas.
Identifies backlight, RDS, standby/auto off, alarm 2, band, and station preset buttons.
Identifies message 2, message 1, CT (auto clock time), and Alarm 1 buttons.
Identifies the main LCD display screen and the built-in microphone.
Details the functions of the tuning control knob and volume control knob.
Identifies the battery compartment, headphone socket, and AC in socket on the rear.
Identifies the 3.5mm Aux in socket and the FM Antenna jack.
Details the buzzer level control for alarm sounds.
Explains icons for battery capacity, time display, and PM indicator.
Explains icons for RDS, CT (auto clock time), and signal strength.
Explains icons for Alarm 2, Alarm 1, and Timer status.
Steps for connecting the radio using the AC power adapter.
Steps for inserting batteries and notes on battery replacement.
Steps to turn on the radio and select AM or FM band.
How to use the tuning knob for auto-scanning stations.
What the display shows during tuning, including station name and RDS.
How to use the volume control to set the sound level.
Steps to turn on the radio and select AM or FM band.
How to rotate the tuning control to manually select stations.
Details FM/AM frequency step changes for manual tuning.
How to use the volume control to set the sound level.
Steps to enter the tuning step setting mode from power off.
How to choose between 100kHz/200kHz for FM and 9kHz/10kHz for AM.
How to use the RDS button to cycle through display information.
Shows station name, program type (e.g., Pop), and radio text messages.
Shows the current frequency of the FM station being tuned.
Notes that display shows only frequency if RDS info is unavailable.
Steps to store up to 5 stations for AM and 5 for FM using preset buttons.
How to overwrite previously stored preset stations.
Steps to recall a previously stored preset station by pressing preset buttons.
How to set the clock display to use either 12 or 24 hour format.
Steps to enter manual clock time setting using the CT button.
How to adjust and confirm hour, minute, month, date, and year settings.
How to set clock time automatically by tuning to RDS data stations.
Display shows 'CCT' indicating the radio time is synchronized with RDS.
Switch standby display between Month-Day and Year-Week formats.
Ensure the clock time is set correctly before configuring alarms.
Steps to set the desired alarm hour and minute.
Choose when the alarm sounds: Once, Daily, Weekdays, or Weekends.
Select alarm to wake by buzzer, AM/FM radio, or recorded voice messages.
Set the required radio frequency or preset number for radio alarms.
Set the required volume for buzzer alarms or use previously set volume for radio/voice.
How active alarms are indicated on the display using small alarm icons.
How to cancel an active alarm by pressing Alarm 1 or Alarm 2 buttons.
Describes buzzer alarm's gradual increase and repetition until cancelled.
Radio or voice alarms sound non-stop for up to 60 minutes unless cancelled.
How to disable an active alarm using the Standby or alarm buttons.
Press any button other than Standby to silence alarm for five minutes.
How to cancel the snooze timer by pressing the Standby button.
Set the timer for automatic turn-off between 15 and 120 minutes.
How to cancel the Auto Off Timer before the preset time has elapsed.
How to set the egg timer for a duration of 1 to 120 minutes.
Display shows remaining minutes; press and hold button to cancel.
How to adjust the required timer setting while countdown is progressing.
The receiver will sound for 3 minutes when the timer finishes its countdown.
Adjusting the LCD display brightness in standby mode across 8 levels.
Turning the scenario LED at the bottom of the receiver on or off.
How to record voice messages up to 30 seconds in length.
How to play back the recorded voice content.
Press and hold the Message button for 2 seconds to record a new message.
Operates in power on/off modes; mutes receiver during message processing.
How to display the radio's software version number for reference.
Details on the 3.5mm stereo socket and automatic speaker muting.
Warning about excessive sound pressure from headphones potentially causing hearing loss.
How to connect external audio devices like iPod, MP3, or CD players.
Adjust volume on player and receiver for comfortable listening.
Details on mains power input and required battery type (4 x 1.5V C).
Specifies the FM frequency range and AM frequency ranges for different versions.
Details loudspeaker size, output power (mains/battery), and socket types.
Specifies the integrated FM wire aerial for reception.
Information on proper disposal of waste electrical products and recycling.
| mains voltage | 9 V |
|---|---|
| current | 0.7 A |
| battery type | 4 X 1.5V Size “C” / UM-2 / R14 |
| FM frequency range | 87.5 – 108 MHz |
|---|---|
| AM frequency range (USA version) | 520 – 1710 kHz |
| AM frequency range (other version) | 522 – 1629 kHz |
| loudspeaker impedance | 8 ohm |
|---|---|
| output power (mains) | 3 Watt |
| output power (batteries) | 1.5 Watt |