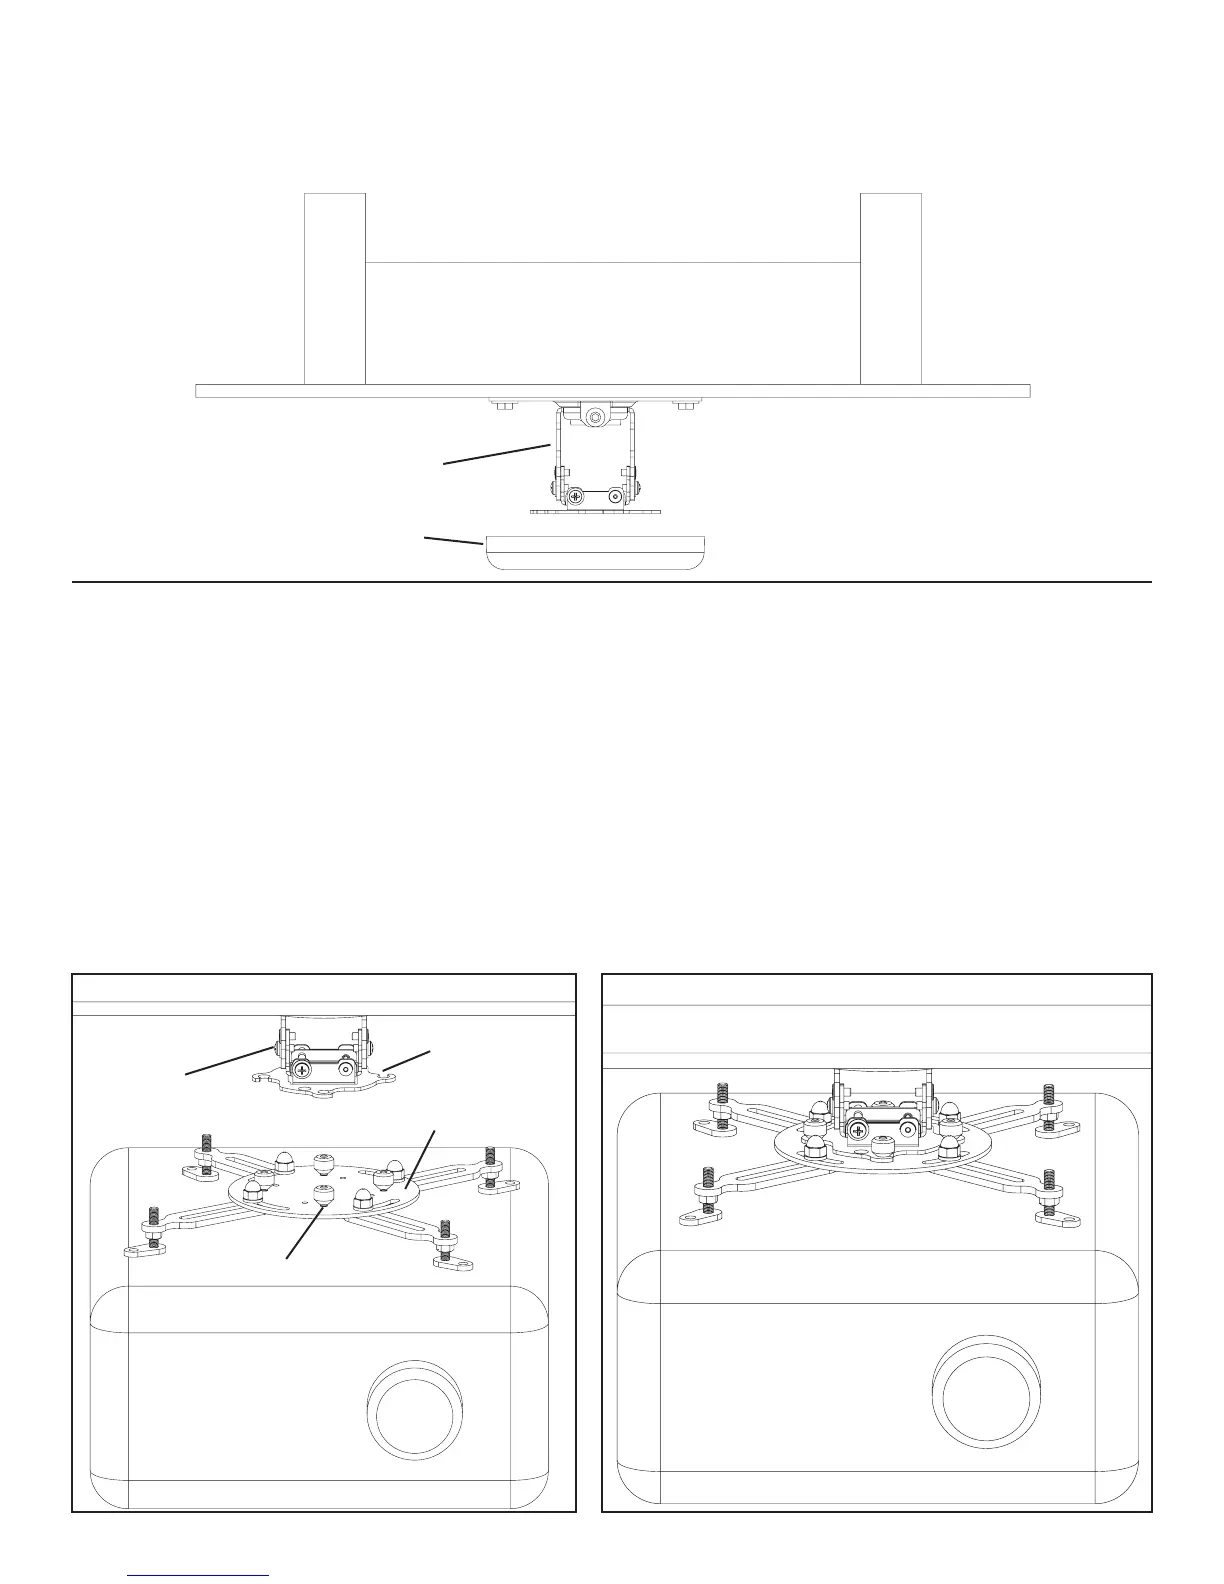
Step 6: Add Top Cover
To add the Top Cover (f) choose the desired color and simply insert it over the Adjustment Bracket (d). The Top Cover should push
Snugly onto the Ceiling Plate (c).
Diagram 6
d
f
Step 7: Add Projector
First, loosely install the Tapered Nuts (n) tapered side down on the studs of the Universal Projector Interface (a). See Diagram 7a for
Assistance.
Note: Make sure Tapered Nuts are tapered side down! It is not necessary to remove the Tapered Nuts from the studs to install
and remove the projector.
The two halves of the VMPR1 attach by lifting and rotating the Universal Projector Interface so the Threaded Studs rotate into the four
vee slots of the Adjustment Bracket (d). Align the four locating slots of the Adjustment Bracket with the threaded studs of the Universal
Projector Interface and rotate the bracket to the limit of the slotted holes. Secure the Universal Projector Interface and the Adjustment
Bracket to each other by tightening the Tapered Nuts (tapered side down). See Diagram 7a and 7b for assistance.
NOTE: Once tightened, the Tapered Nuts should seat in the holes of the bracket.
Diagram 7a Diagram 7b
vee slot
d
a
threaded stud
 Loading...