1
1 Wall Template
2
1 Wall Plate with Lock
3
1 Knob Assembly
4
3 Anchors
5
3 Screws (#10 x 1-3/4”)
6
3 Cabinet Screws (#10 x 3/4”)
A
Sonos
®
Amp
™
7
2 Screws (1/4-20 x 3/8”)
8
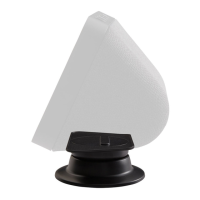
1 Cable Management Bracket
B
Cables
NOT INCLUDED
INCLUDED IN BOX
IMPORTANT SAFETY INSTRUCTIONS. READ ENTIRE MANUAL PRIOR TO USE. SAVE THESE INSTRUCTIONS
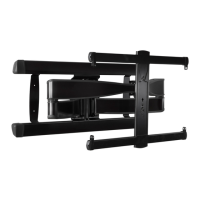
PARTS AND HARDWARE
NOTE: Not all hardware included in this kit will be used.
6901-602260 00
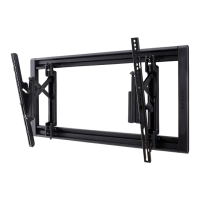
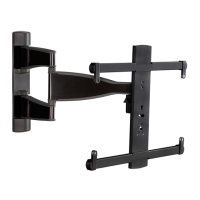
Slim Wall Mount
WSSCAM1-B2
INSTRUCTION MANUAL
WE’RE HERE TO HELP
If you have any questions along the way, our install experts are standing by to help.
Call us at: +31 (0) 495 580 852 US: 1-800-359-5520
UK: (0) 800 056 2853 AUS: +61 (0) 7 3299 7000
Or, email at: info@sanus.com / sanus.europe@milestone.com (EU)
Before getting started, let’s make sure this product is perfect for you!
This mount is designed to
support Sonos
®
Amp™.
CAUTION: To avoid potential personal injuries and property damage:
•
Check your Sonos
®
Amp
™
owner’s manual to see if there are any special requirements for mounting your Sonos
®
Amp
™
.
•
Please read through these instructions completely to be sure you’re comfortable with this easy install process.
•
Do not use this product for any purpose not explicitly specified by manufacturer.
•
Manufacturer is not responsible for damage or injury caused by incorrect assembly or use.
•
The wall must be capable of supporting five times the weight of the Sonos
®
Amp
™
and mount combined.
•
If you do not understand these instructions or have doubts about the safety of the installation, assembly or use of this product,
contact Customer Service.
Tools
Needed
Wood Stud or
Cabinet Install
Concrete Install
Awl
Pencil Level
Stud Finder
Screwdriver
Drill Bit
Electric
Drill
Hammer Drill Bit
1/4 in.
(6.5 mm)
Masonry
1/4 in.
(6.5 mm)
1/8 in.
(3 mm)
Wood
Drywall Install
Hammer Drill Bit
Before starting assembly, verify all parts are included and undamaged. If any parts are missing or damaged,
DO NOT return the damaged item to your dealer; contact Sanus. Do not use damaged parts.
WARNING:
CHOKING HAZARD — This product contains small items that could be a choking hazard if swallowed.
DIMENSIONS
6 lbs.
(2.72 kg)
Amp Weight Limit
DO NOT EXCEED
Milestone AV Technologies and its affiliated corporations and subsidiaries (collectively, “Milestone”), intend to make this manual accurate and complete.
However, Milestone makes no claim that the information contained herein covers all details, conditions, or variations. Nor does it provide for every possible
contingency in connection with the installation or use of this product. The information contained in this document is subject to change without notice or
obligation of any kind. Milestone makes no representation of warranty, expressed or implied, regarding the information contained herein. Milestone assumes no
responsibility for accuracy, completeness or sufficiency of the information contained in this document.
Milestone Global Headquarters - 6436 City West Parkway Eden Prairie, MN 55344 USA
©2018 Milestone AV Technologies. All rights reserved. ECHOGEAR is Milestone brand.
ECHOGEAR and the ECHOGEAR logo are trademarks of Milestone. Made in China.
WOOD SURFACES ONLY!