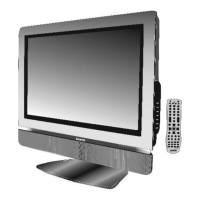
19
Screen Setup for Component1 & 2 inputs
Customizing the picture
Navigate to the Video s ub-menu.
1
2
Within the menu, use ,, to navigate
Press OK or button to confirm, enter sub-
menu or toggle the settings of the selected
menu item.
563or4 or
adjust.
4
Press EXIT button to exit
3
Option
Function Choice/remarks
Picture Mode
Brightness
Contrast
Selects a desired picture mode.
User/Nature/Soft/Bright
Adjusts screen brightness for easier
viewing of dark picture such as night
scenes and black hair.
Adjusts image contrast.
4: stronger
3 : weaker
Color
Adjusts colour saturation.
4: lighter
3 : darker
4: stronger
3 : weaker
AspectRatio
Selects screenaspectratio.
Wide/Cinema/Normal/Zoom
Sharpness
Adjusts image sharpness and displays a
sharp image.
4: sharper
3 : softer
AdvancedVideoMenu
Note: you may directly press PICTURE button
on the remote control to select.
H-Pos
V-Pos
Clock
Phase
Setting
Adjuststhehorizontalpositionofthe
image.
4: rightward
3 : leftward
Adjuststheverticalpositionoftheimage.
4: upward
3 downward:
Adjuststhesamplefrequency for improved clarity under certain conditions.
Improvesthefocussingofstableimage.
SelectsandactivatesPreset to reset the adjusted values to original factory values.
Note: you may directly press ZOOM button on
the remote control to select. See page 18.
Video
Picture Mode
Contrast
Brightness
Color
50
0
50
50
Sharpness
User
Wide
Aspect Ratio
Advanced Video Menu
To Move
To Select
To Exit
Audio
Setup
Feature
OK Exit
Component Set
Noise Reduction--Spatial
Noise Reduction--Speckle
Noise Reduction--Temporal
Spatial/Speckle/Temporal
On/Off
Adjusts tint for image.
Tint
4: greenish
3 : purplish
Color
Temperature
Cool/Warm/Normal
3DY/C
On/Off
Selects one of three automatic color
adjustments. Sets to warm to enhance
hottercolorssuchasred,orsettocoolto
seelessintensecolorswithmoreblue.
Selects 3D comb filter on/off, normally
please select On.
Auto Adjust
Automatically adjusts the settings based on the signal input.
Component Set
Reducesnoise (snow)inthepicture.