Do you have a question about the Sanyo KS2422 and is the answer not in the manual?
Symbol warns of immediate hazards resulting in severe personal injury or death.
Symbol refers to a hazard or unsafe practice resulting in severe personal injury or death.
Symbol refers to a hazard or unsafe practice resulting in personal injury or property damage.
Do not install where there are fumes, flammable gases, or in extremely humid spaces.
Do not install where excessively high heat-generating objects are placed.
Avoid installing where salty sea water can splash directly onto it.
All wiring must conform to local codes and be properly grounded.
Check that the power supply voltage matches the unit's requirements.
Never use or store gasoline or other flammable liquids near the air conditioner.
Open doors/windows when using gas/oil heating to prevent suffocation.
Use the operation ON/OFF button, not the main power switch.
Do not stick anything into the air outlet as the fan rotates at high speed.
Do not let children play with the air conditioner.
Avoid extreme cooling or heating when babies or invalids are present.
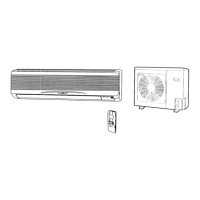
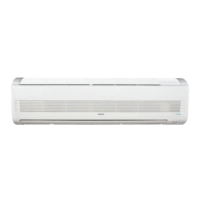
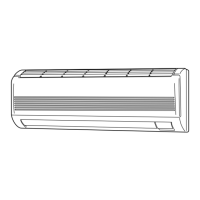
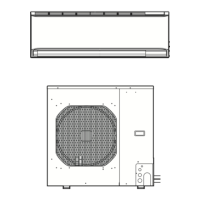
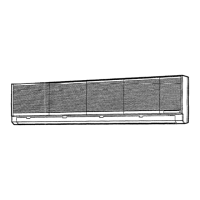
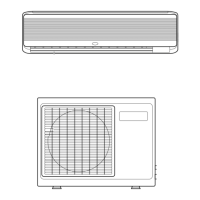
Identifies air intake, air outlet, remote control receiver, drain hose, and refrigerant tubes.
Details the compressor, fan motor, and heat exchanger coil in the outdoor unit.
Picks up infrared signals from the remote control unit (transmitter).
Lights when the system is in continuous COOL or FAN mode.
Lights when the system is controlled by the timer.
Selects operation mode; ON for remote, OFF for extended periods.
Used only for servicing; should not be left in this position.
The OFF position does not disconnect power; use the main power switch.
Details the buttons and display of the remote control transmitter.
Turns the air conditioner on and off.
Opens from the left to reveal additional controls.
Adjusts set temperature up (WARMER) or down (COOLER).
Buttons for setting the timer functions (HH/MM).
Used to select modes for programming timer functions.
Activates energy-saving temperature adjustment mode.
Controls the automatic up/down movement of the flap.
Starts/stops flap movement for air distribution; model-specific.
Selects operation mode: FAN (circulation) or COOL (cooling).
Sets timer operation: NORM (off), OFF (stop at set time), ON (start at set time), PROGRAM (daily schedule).
Sets fan speed: AUTO, HIGH, MED., LOW.
Internal sensor that detects room temperature.
Instructions for opening the lid, installing AAA batteries, and using the ACL button.
Guidance on battery life, replacement, and removing batteries for long-term storage.
Recommendations for placement (non-fixed or wall-mounted) and avoiding poor signal locations.
Step-by-step guide to set mode, timer, temperature, and fan speed for cooling.
Choose the best room position for the remote control unit acting as a sensor.
Explains the 3-minute delay for compressor start and auto-restart after power failure.
Ensure selector switches click into position to prevent malfunction.
Activates energy-saving by automatically adjusting temperature.
Details how the mode adjusts temperature for comfort and energy saving.
Sets fan speed to AUTO for automatic microcomputer control.
Manually select fan speed: HIGH, MED., or LOW.
Steps to operate the unit as a circulation fan without temperature control.
How to turn on the unit using the operation selector when stopped.
How to turn off the unit using the operation selector when running.
Notes that set temp. and fan speed are retained from the last selection.
Steps to set the current time on the remote control.
Instructions to set a specific time for the air conditioner to stop.
Instructions to set a specific time for the air conditioner to start.
Steps to set a daily schedule for both starting and stopping the unit.
Adjusts horizontal airflow by moving the vertical vane left or right.
Uses SWEEP button for automatic flap movement or manual stop.
Avoid directing flap down more than 30° in COOL mode to prevent dripping.
For KS0911 model, SWEEP button is not provided; flap can be moved manually.
Caution against moving the flap by hand.
Turn off unit and disconnect power before cleaning.
Use vacuum cleaner brush or soft cloth; mild detergent for stains.
Avoid solvents, hot water; be careful of sharp metal edges and fins.
Internal coil and components should be cleaned annually by dealer/service center.
Steps to remove, clean (vacuum or wash), and replace the air filter.
Possible causes (power failure, breaker, voltage, OFF button, batteries) and remedies.
Possible cause (obstruction in front of condenser coil) and remedy (remove obstruction).
Causes (dirty filter, heat source, open doors, obstacles, high thermostat) and remedies.
Do not block air intake/outlet to prevent damage and ensure performance.
Use sunshades/curtains to prevent direct sunlight from heating the room.
Keep the air filter clean for optimal performance; refer to Care and Cleaning.
Close windows and doors to prevent conditioned air from escaping.
Specifies maximum and minimum indoor air intake and outdoor air intake temperatures.
| Brand | Sanyo |
|---|---|
| Model | KS2422 |
| Category | Air Conditioner |
| Language | English |