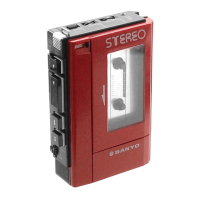
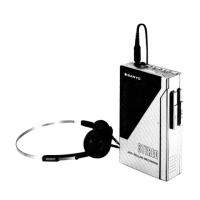
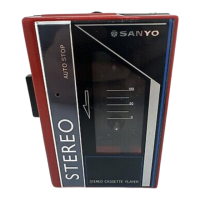
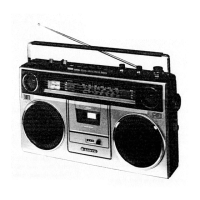
The SANYO M4440 is a mini cassette stereo player, designed for portable audio playback.
Function Description
The SANYO M4440 functions primarily as a stereo cassette player. It is equipped to play back mini cassettes, delivering stereo audio through headphones. The device includes basic controls for playback, fast forward, and rewind, as well as adjustments for volume, balance, and pitch. A built-in microphone is also integrated, suggesting potential for recording capabilities, although the manual primarily focuses on playback functions.
Important Technical Specifications
Power Source:
The player operates on DC 6V, powered by four UM-3, HP 7, AA Cell, Mignonzellen, or R6 batteries.
Output Power:
The maximum output power is 30mW.
Current Consumption (at VR min):
- Playback mode: 110mV
- Fast Forward mode: 140mV
- Rewind mode: 140mV
Tape Speed:
The tape speed is 1-7/8 ips. ±3%.
Wow & Flutter:
The wow & flutter is rated at 0.35% (WRMS).
Fast Forward Time:
Approximately 150 seconds for a C-60 cassette.
Rewind Time:
Approximately 150 seconds for a C-60 cassette.
Frequency Response:
The device offers a frequency response range of 63-10kHz.
Signal to Noise Ratio:
A signal to noise ratio of 45dB is specified.
Crosstalk (with Fe2O3):
- Track to Track: 55dB
- Channel Separation: 33dB
Hum & Noise:
43dBs (at maximum volume).
Usage Features
The SANYO M4440 is designed for ease of use in a portable format.
- Headphone Jack: A standard headphone jack (J1) is provided for private listening.
- External Power Jack: An external power jack (J2) allows for operation with a regulated DC 6V power supply, conserving battery life.
- Controls:
- Volume Control (VR1): Allows users to adjust the overall playback volume.
- Balance Control (VR2): Enables adjustment of the audio balance between the left and right channels.
- Pitch Control (VR3): Offers the ability to fine-tune the playback pitch.
- Tone Switch (S3): Provides "HIGH" and "LOW" tone settings for audio customization.
- Talk Switch (S4): This switch is mentioned but its specific function is not detailed in the provided excerpts, though it is set to "OFF" for electrical adjustments.
- Power Switch (S1): Controls the main power to the unit.
- Mute Switch (S2): Allows for muting the audio output.
- Cassette Loading: The cassette compartment lid can be removed for inserting and removing cassettes.
Maintenance Features
The manual provides detailed instructions for mechanical and electrical adjustments, which are crucial for maintaining optimal performance.
- General Remark: Before any adjustments, it is recommended to clean tape-contacting surfaces and driving parts with a soft cloth soaked in alcohol to prevent issues caused by oil and grease stains.
- Flywheel Thrust Adjustment: This mechanical adjustment ensures proper clearance (0.1-0.2mm) between the Flywheel Thrust and the Flywheel. The procedure involves moving the Capstan, turning the Flywheel Thrust clockwise to find the zero clearance, and then counterclockwise by approximately 45 degrees, finally securing it with paint or glue.
- Power Switch Position Adjustment: This adjustment ensures the Power Switch engages correctly with the F.F. Gear and Take-up Gear. It involves pressing the play button, slowly pushing the F.F. button to check switch operation, and then loosening a screw to adjust the switch position before securing it.
- Tape Speed Adjustment: This electrical adjustment requires a frequency counter and a 3kHz test tape. The potentiometer (P301) on the P.C. Board is adjusted until the frequency counter reads 3kHz, ensuring accurate tape playback speed.
- R/P Head Azimuth Adjustment: This critical electrical adjustment optimizes the playback head alignment for the best audio quality. It requires a VTVM and a 10kHz test tape. The process involves:
- Connecting a VTVM to the headphone jack.
- Playing a 10kHz test tape.
- Turning the azimuth adjusting screw until the Left channel output on the VTVM is maximum (No. 1 position).
- Reconnecting the VTVM to the Right channel.
- Turning the azimuth adjusting screw until the Right channel output on the VTVM is maximum (No. 2 position).
- Turning the adjusting screw to the center of the No. 1 and No. 2 positions (No. 3 position).
- Repeating the adjustment several times for precision.
- Securing the adjusting screw with paint or glue after the adjustment.
These detailed maintenance procedures highlight the SANYO M4440's design for longevity and user-serviceability, allowing for precise calibration to maintain high-fidelity audio playback.