10
The Sapling Company, Inc.
670 Louis Drive
Warminster, PA 18974
USA
P. (+1) 215.322.6063
F. (+1) 215.322.8498
www.sapling-inc.com
Wall Mount Installation - Round SlimLine Clock - Battery Powered
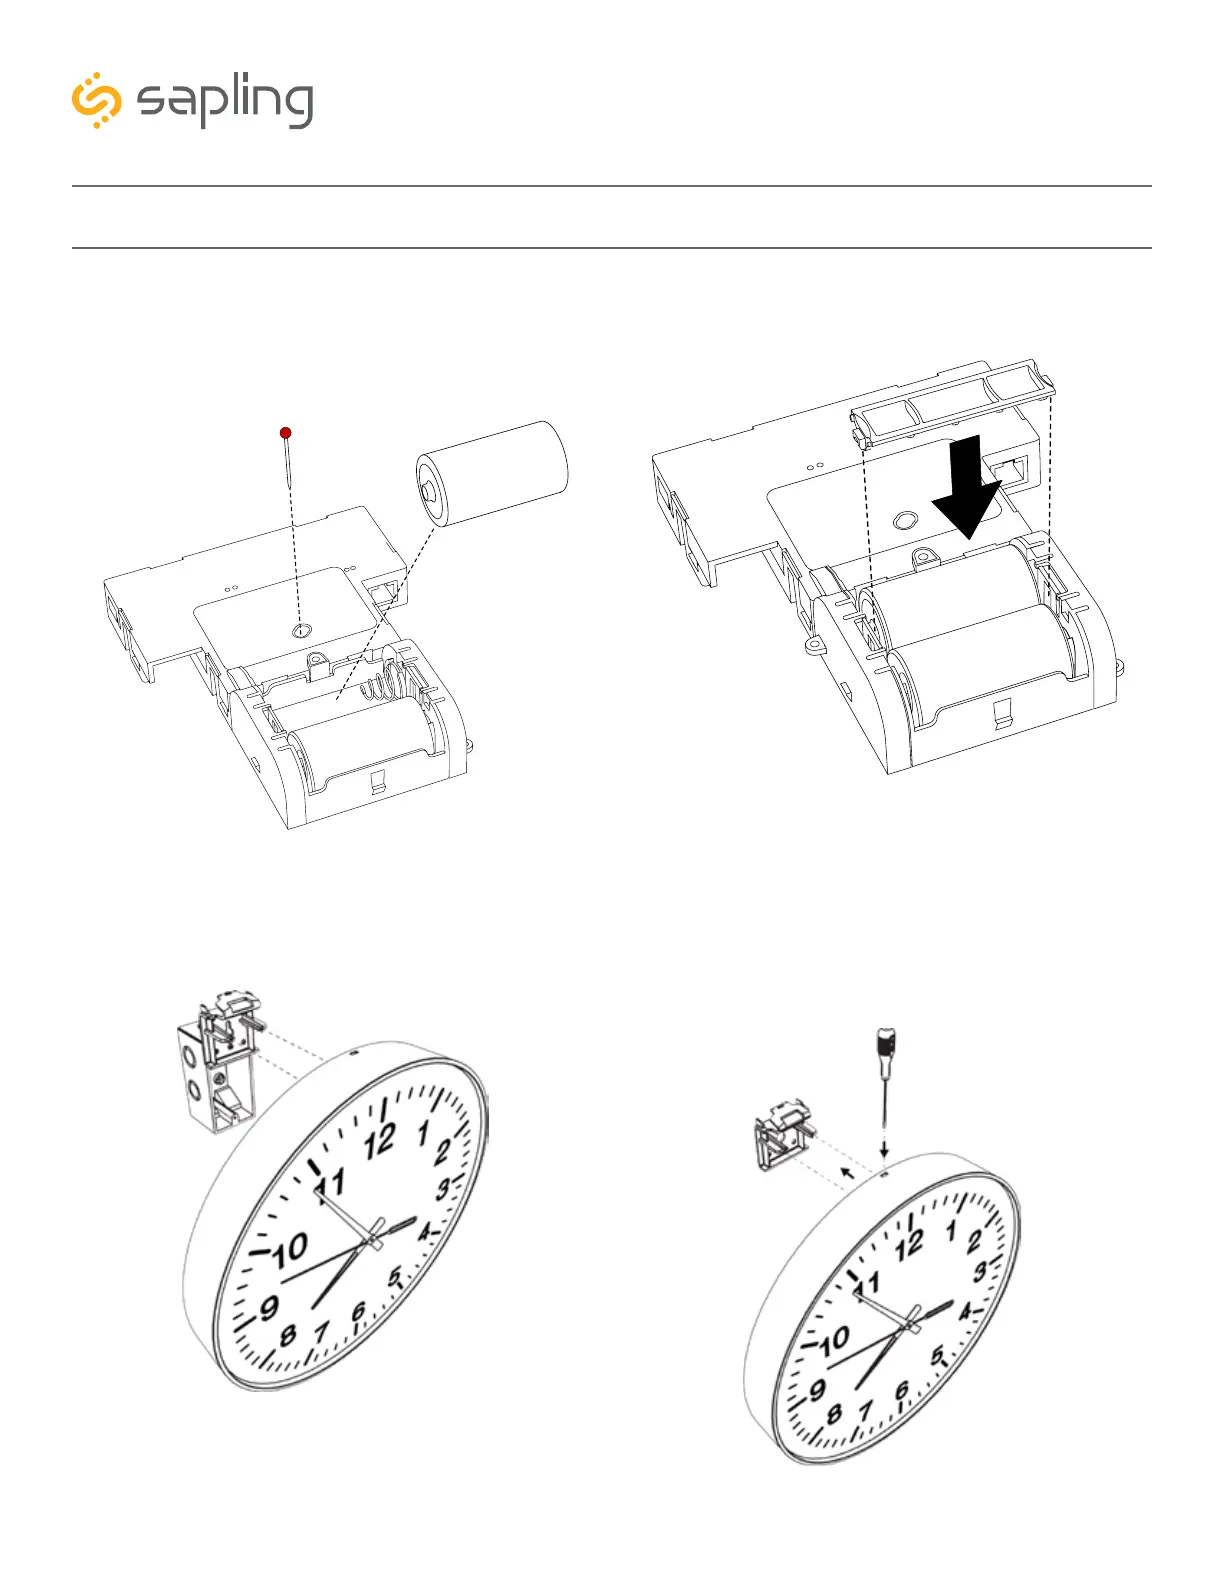
8) If you need to take the clock off the wall after
the installation has been completed, use a flat-blade
screwdriver or eyeglasses screwdriver to lower the
mounting piece latch, then slide the clock off the
mounting piece.
5) First remove the gearbox pin, then insert the
batteries into the clock. If the clock is within range
of a powered transmitter, the hands should begin to
move within a minute.
6) Place the cover back onto the battery pack. You
should hear a snapping noise as the latches engage.
7) Attach the clock to the mounting piece by sliding
the clock back onto it. You should hear a snapping
noise as the latch engages.
1
2