31
The Sapling Company, Inc.
670 Louis Drive
Warminster, PA 18974
USA
P. (+1) 215.322.6063
F. (+1) 215.322.8498
www.sapling-inc.com
Wall Mount Installation - Square Clock - Locally Powered
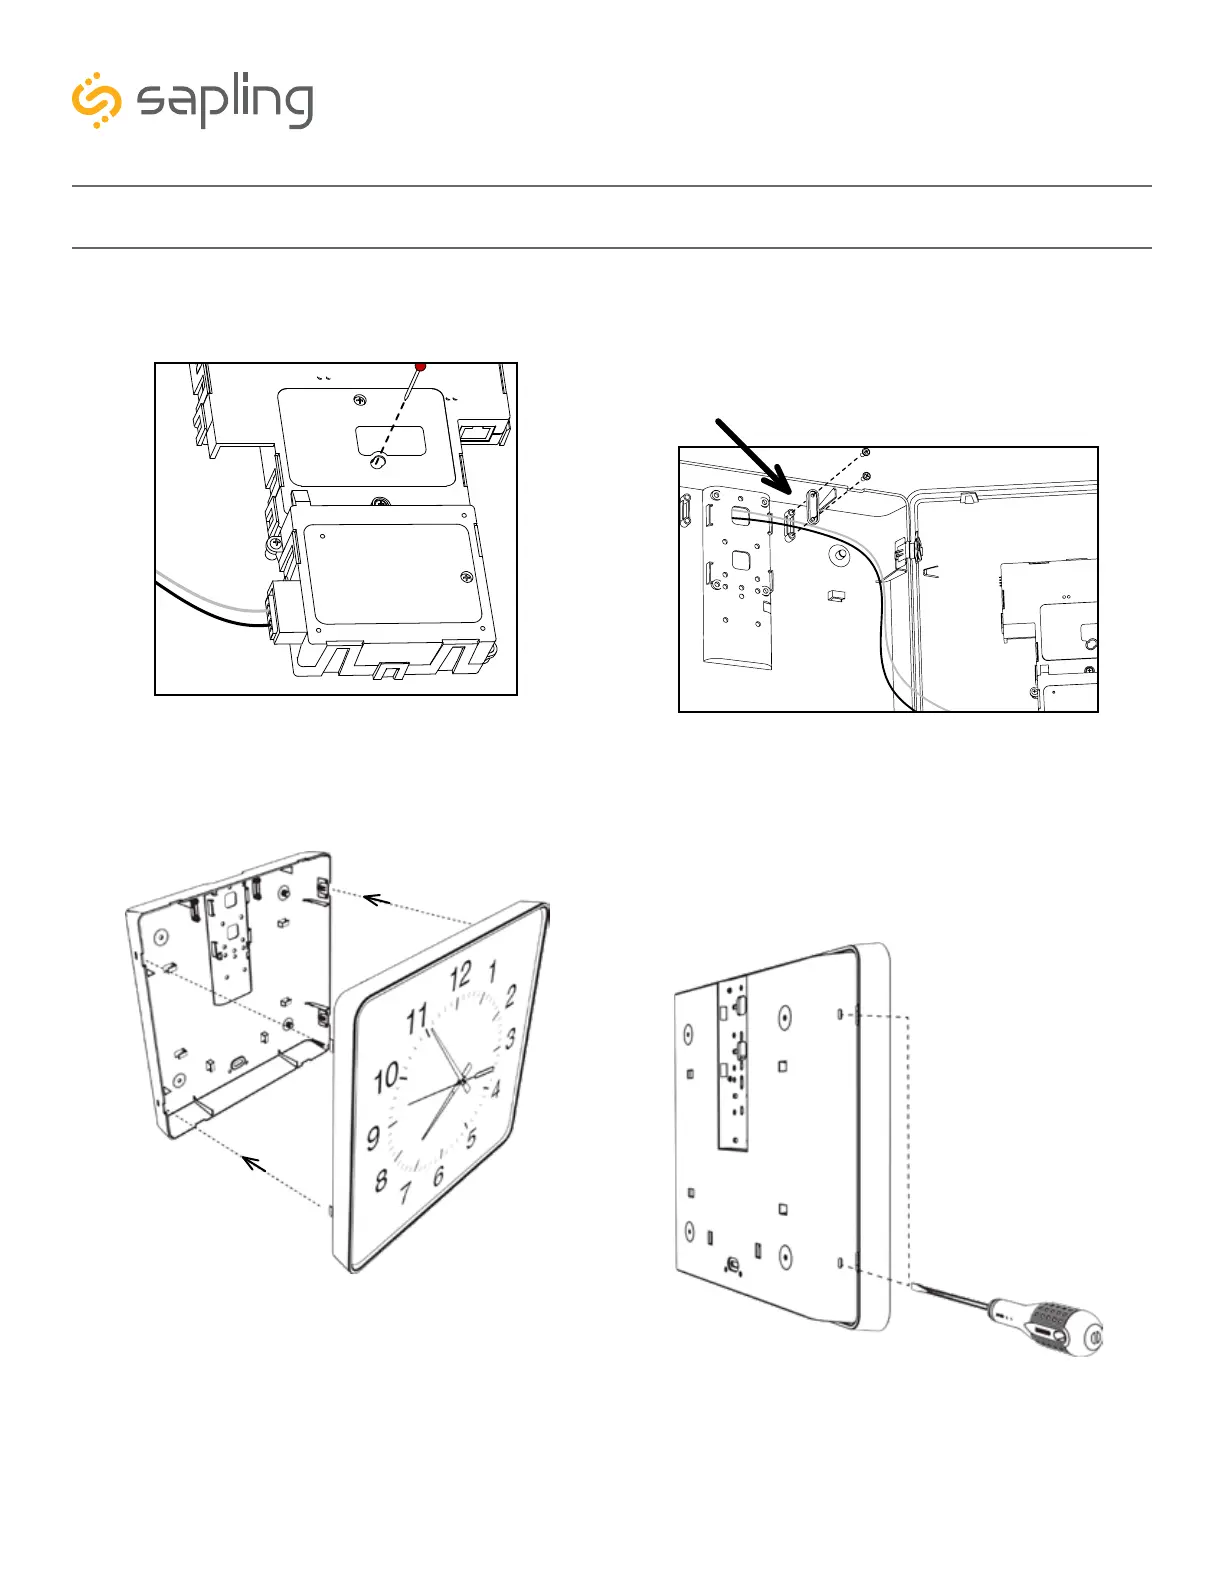
9) First remove the gearbox pin, then attach the
power connector to the port on the movement.
11) Slide the clock back into the housing. You
should hear a snapping noise as the
latches reengage.
10) Loosen the strain relief by unscrewing the two
screws. Slip any excess wiring through it, then
tighten the strain relief by reinserting and tightening
the screws.
12) If you feel the need to take the clock off the
wall after the installation has been completed, use
a flat-blade screwdriver to detach the housing from
the back of the clock, then use a Phillip’s-head
screwdriver to detach the mounting piece from the
housing and gang box.
1
2