65
The Sapling Company, Inc.
670 Louis Drive
Warminster, PA 18974
USA
P. (+1) 215.322.6063
F. (+1) 215.322.8498
www.sapling-inc.com
Double Mount Installation - Round SlimLine/Aluminum Clock - Battery Powered
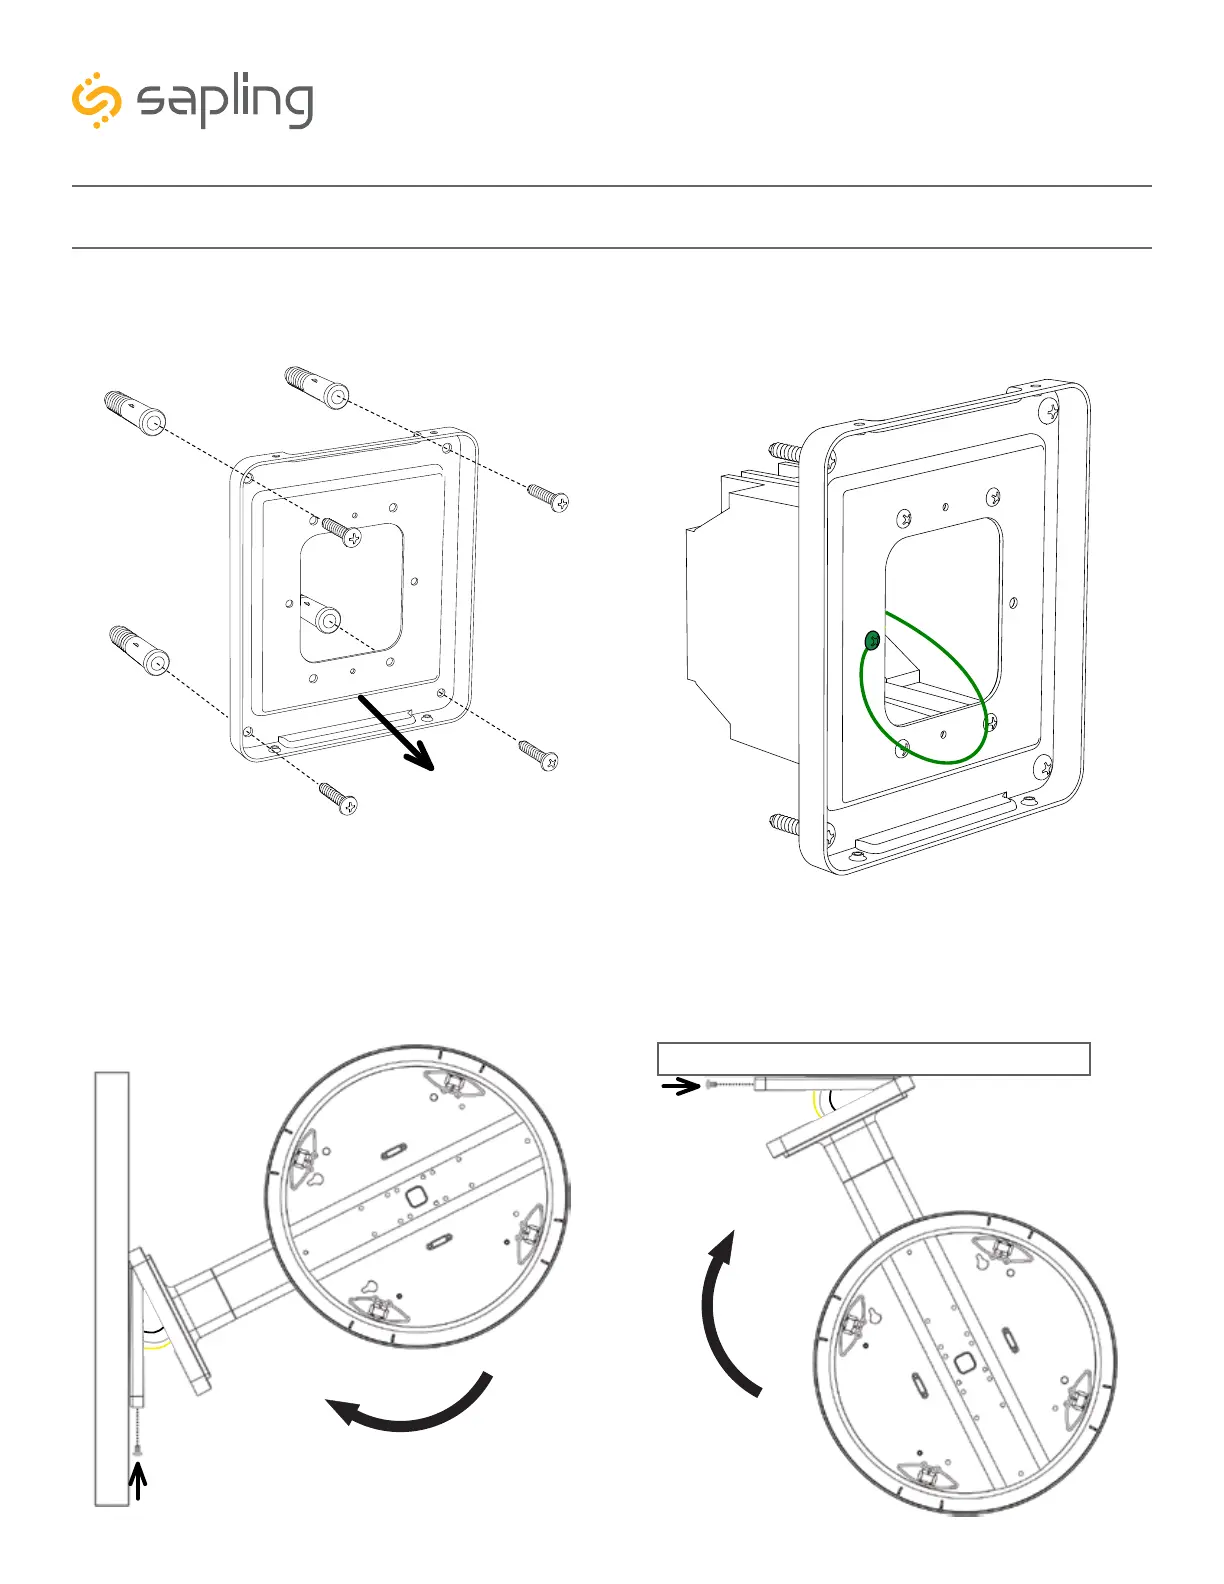
6) Attach the base of the pole to the mounting plate so that the lip is on the top of the base, and the
holes for the screws are on the bottom of the base. Hang the base on the mounting plate, attach the
wires from the bottom of the pole to the wires in the gang box, then screw the other side of the base
onto the mounting plate using the two black screws you set aside before.
1
2
1
2
WALL
CEILING
1
2
5) Insert the #8 screws through the mounting plate
and into the anchors.
5B) If you are installing the clock atop an gang box,
use the green screw to attach a grounding wire to
the mounting plate.