7
8
9
10
12
The Sapling Company, Inc.
1633 Republic Road
Huntingdon Valley, PA 19006
USA
P. (+1) 215.322.6063
F. (+1) 215.322.8498
www.sapling-inc.com
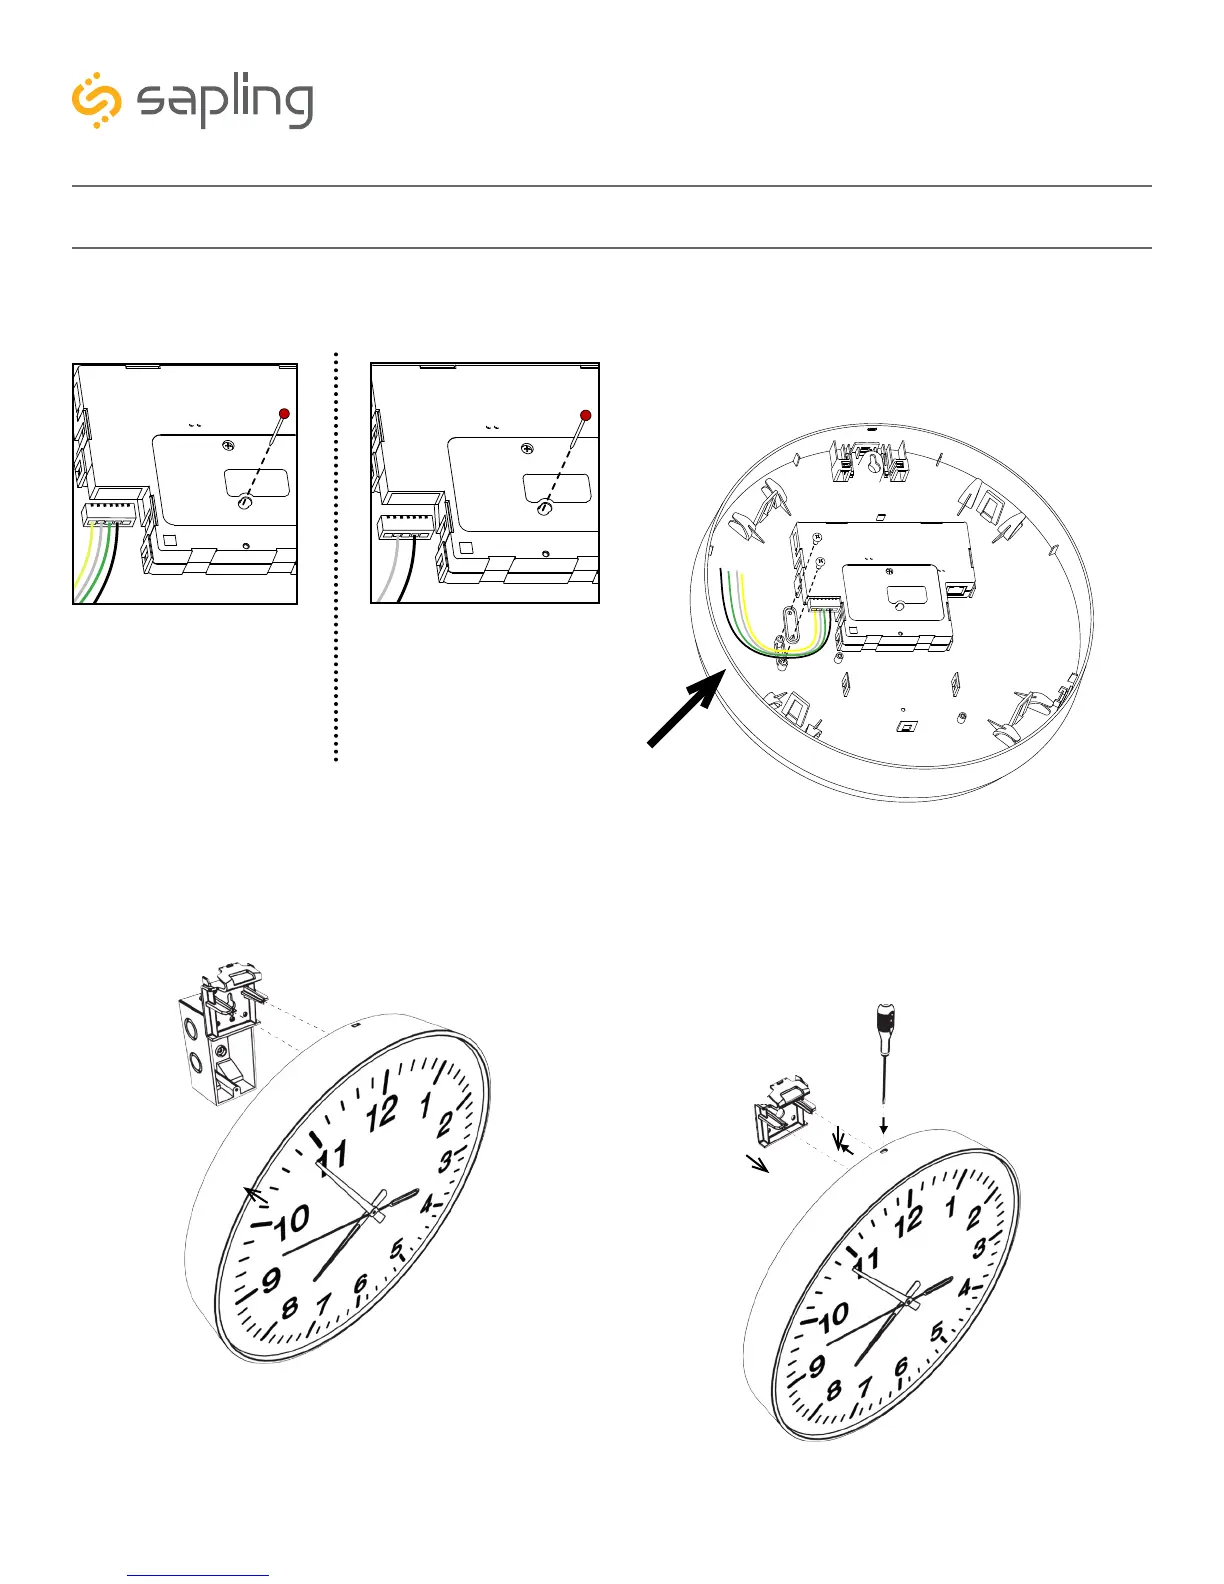
Yellow
White
Green
Black
White
Black
Wall Mount Installation - Round SlimLine Clock
7) Remove the gearbox pin, then attach the
power connector to the port on the movement.
9) Attach the clock to the mounting piece by sliding
the clock back onto it. You should hear a snapping
noise as the latch engages.
10) If you need to take the clock off the wall after
the installation has been completed, use a flat-blade
screwdriver or eyeglasses screwdriver to press down
on and release the mounting piece latch, then slide
the clock off the mounting piece.
8) Lay any excess wiring across the strain relief base,
then attach the strain relief to the clock with the
two #6-19x7/16 screws. The strain relief should be
tight enough to prevent the wire from sliding.
3-Wire Sync 2-Wire Digital