EasyManua.ls Logo

Sargent and Greenleaf 6120 - Troubleshoot Manual

Sargent and Greenleaf 6120
6 pages
Print Icon
To Next Page IconTo Next Page
Loading...
This troubleshooting guide is designed to help you identify and solve problems you may encounter with
a Sargent & Greenleaf electronic lock. It is not designed as a substitute for the instructions that were
shipped with your lock. If the instructions are missing, you can obtain a replacement by contacting S&G
at the Nicholasville address listed at the bottom of the page. As an alternative, you can call us at (859)
885-9411. An automated literature extension will record your request and mailing information. An auto-
mated lock help line is also available 24 hours a day, 7 days a week. The number is (800) 826-7652,
extension 500. You must call from a touch tone phone. Troubleshooting information is also available on
S&G’s internet site. The address is
www.sargentandgreenleaf.com
Some of the following troubleshooting procedures are intended for the consumer, and others require the
skills of a qualified safe technician. The Sargent & Greenleaf line of electronic combination locks is not
designed to be user serviceable. We specifically do not recommend any repairs beyond replacing either
the keypad or the lock body as a unit.
All applicable troubleshooting procedures should be tried before a safe is forcibly opened. Whenever a
safe must be opened by drilling, S&G recommends you contact the safe manufacturer first. The safe
maker will supply appropriate procedures for dealing with his product.
If you find it necessary to locate a competent safe technician in your area, S&G suggests you call the Safe
& Vault Technicians Association, at (214) 827-7233. Any work which you think may be submitted to S&G
as a warranty claim must be cleared by our Technical Services Department prior to completion.
Sargent & Greenleaf, Inc.
One Security Drive, Nicholasville, Kentucky 40356
Phone (859) 885-9411 FAX (859) 887-2057
Copyright 1995, Sargent & Greenleaf, Inc.
This document is part number 630-325
Revision 4/1/04
Troubleshooting
Guide
Model 6120, 6123
Motorized Electronic
Combination Locks
Basic Operation:
The Sargent & Greenleaf line of electronic locks is powered by alkaline batteries which are
located under or within the keypad housing. They can be easily replaced by following the
instructions that originally came with the lock.
The lock can be ordered in two basic lock bolt configurations—a traditional square bolt for
use with most safe designs, and a beveled spring bolt for direct locking applications on
light safe doors and inner compartments of burglary safes.
When the correct code is entered and followed by the
#
sign, a motor retracts the lock
bolt. This allows the container to be opened. The bolt remains retracted for six seconds;
then the motor extends the bolt again. S&G electronic locks are equipped with a spring
mechanism to automatically extend the bolt after any obstruction, such as safe boltwork,
is moved out of its path.
Some safe manufacturers ship safes with the lock bolt retracted. With the door open and
the safe handle turned fully to the locked position, enter the code (followed by the
#
sign).
Wait fifteen seconds, then repeat the procedure. The lock should now cycle normally.
Close your safe door only after checking for proper lock operation at least three times.

Other manuals for Sargent and Greenleaf 6120

Question and Answer IconNeed help?

Do you have a question about the Sargent and Greenleaf 6120 and is the answer not in the manual?

Summary

Basic Lock Operation

Basic Operation Overview

Explains how Sargent & Greenleaf electronic locks are powered by alkaline batteries and how the lock bolt retracts and extends.

Troubleshooting Common Issues

Lock Beeps and Flashes, No Opening

Lock beeps/flashes on key press but fails to open with a six-digit code. Suggests checking # sign, code, batteries, lockout mode, or keypad.

Lock Opens, No Feedback

Lock opens but provides no beep or light response when a key is pressed. Points to defective keypad or broken feedback wire.

Programming Mode Failure

Lock does not enter programming mode when sequence is entered. Possible causes include lockout mode or incorrect Master Code.

Motor Runs, Bolt Stalls

Motor starts but doesn't run long enough to open safe. May be due to bolt side pressure or weak batteries.

Clicking Sound, No Motor

Lock emits clicking sounds but the motor is not heard running. Suggests a cross-threaded drive nut.

Motor Runs Free, Safe Not Opening

Motor runs freely but the safe does not open. Could be a dislodged stop pin, insufficient bolt retraction, weak batteries, or engaged relock device.

Additional Troubleshooting Scenarios

Intermittent Lock Opening

Lock opens intermittently when valid codes are used. May be due to loose keypad connector or faulty keypad.

Code Entered, No Opening (3 Beeps)

Lock beeps three times after code entry but does not open. Indicates the lock is in time delay mode.

Unable to Delete Time Delay

Time delay cannot be deleted, possibly due to being outside the opening window or incorrect Master Code usage.

Time Delay Adjustment Issues (Model 6123)

Difficulty setting time delay over nine minutes or adjusting opening window on Model 6123.

Bolt Binding on Spring Bolt Lock

Motor starts on spring bolt lock, but safe door won't open. Suggests pushing door or checking for binding.

Motor Runs Continuously After Battery Change

Lock motor runs continuously after battery change. Recommends unplugging and replugging keypad connector to reset.

Bolt Fails to Re-extend

Lock opens but the bolt will not re-extend far enough to lock the safe. Indicates weak batteries.

Troubleshooting Test Procedures

Lockout Mode Test Procedure

Determines if the lock is in lockout mode by listening to beep duration after code entry and pressing the # key.

Lockout Reset Procedure

Procedure to reset the lock from lockout mode by waiting, then entering a valid code and #.

Master Code Check Procedure

Verifies the correct Master Code by attempting to enter programming mode with code '74*'.

Walk Back Procedure

Retracts bolt under side pressure by repetitive cycling or using fresh batteries and specific unplugging steps.

Wire Check and Repair Procedure

Checks the four wires connecting the keypad to the motor lock for breaks or damage, recommending splicing if found.

Battery Check Procedure

Uses a voltmeter to check battery voltage, requiring alkaline batteries to show at least 7.75 volts.

Stop Pin Check and Opening Procedure

Identifies a dislodged stop pin causing motor run without bolt retraction and suggests gravity assist or drilling.

Keypad Connector Check

Tests for intermittent lock function by checking for loose wires at the 2-battery keypad connector.

Model Check Procedure

Verifies if the lock is a model 6120 or 6123 by pressing '*8' and observing beep patterns.

Low Battery Warning Check Procedure

Tests the low battery warning feature by holding '*' and entering a code, checking for pitch change in the sounder.

Safe Relock Device Engaged Check Procedure

Determines if a relock device is engaged by observing handle motion change when the lock bolt retracts.

Overview

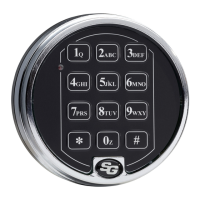
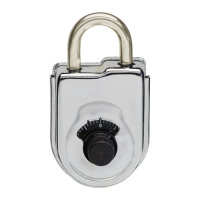
This document serves as a troubleshooting guide for the Sargent & Greenleaf Model 6120 and 6123 motorized electronic combination locks. It is designed to assist users in identifying and resolving common issues, though it emphasizes that the locks are not intended for user servicing beyond replacing the keypad or the lock body as a unit. For more complex repairs, the guide recommends contacting a qualified safe technician.

Function Description:

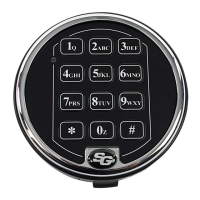
The Sargent & Greenleaf electronic combination locks are designed to secure containers, such as safes, by controlling a motorized bolt. When a correct code is entered, the motor retracts the lock bolt, allowing the container to be opened. The bolt remains retracted for six seconds before the motor automatically extends it again. These locks are powered by alkaline batteries, typically located within or under the keypad housing. The locks are available in two main bolt configurations: a traditional square bolt for most safe designs and a beveled spring bolt for direct locking applications on lighter safe doors and inner compartments of burglary safes. A key feature of these locks is a spring mechanism that automatically extends the bolt if an obstruction, like safe boltwork, moves out of its path. The locks also incorporate a wrong code lockout feature to prevent tampering, which activates after four consecutive incorrect code entries, rendering the lock inoperable for five minutes. During this lockout period, the lock will beep and flash an LED on key press but will emit an error tone when the '#' key is pressed.

Usage Features:

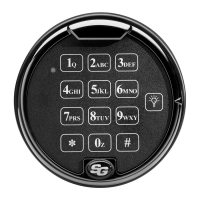
Operating the lock involves entering a correct code followed by the '#' sign. The guide notes that some safes may be shipped with the lock bolt retracted. In such cases, with the door open and the safe handle in the fully locked position, the user should enter the code (followed by '#'), wait fifteen seconds, and then repeat the procedure. It is crucial to verify proper lock operation at least three times before closing the safe door.

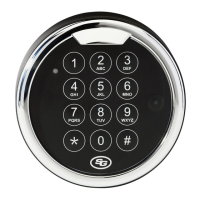
The locks include several user-facing features and indicators:

  • Beeps and LED flashes: These provide feedback on key presses and lock status.
  • Programming Mode: Users can enter a programming mode (by entering 74* followed by the Master Code and #) to manage lock settings.
  • Time Delay: The locks can be configured with a time delay, which must expire before the lock can be opened. This delay can only be deleted during an "opening window."
  • Low Battery Warning: The lock is equipped with a feature that changes the pitch of the sounder when the batteries need replacement. A demonstrator function (activated by pressing and holding the '*' key until three beeps are heard) simulates this warning for one lock cycle.
  • Master Code: A Master Code is used for advanced functions, including deleting time delays and entering programming mode. The Supervisor Code on Model 6123 locks allows entry into programming mode but restricts changes to the Master Code, Time Delay, Time Delay Override Code, or Opening Window value.

Maintenance Features:

While the locks are not user-serviceable for internal repairs, several maintenance-related procedures are outlined:

  • Battery Replacement: Batteries are easily replaceable by following the instructions provided with the lock. The guide strongly recommends using alkaline batteries and advises against "Extra Heavy Duty" batteries, which are not alkaline.
  • Battery Check Procedure: A voltmeter is required to check battery voltage. Each battery should indicate at least 7.75 volts, with fresh batteries showing 9.2 volts or greater. Batteries below this threshold should be replaced.
  • Keypad Replacement: If the keypad is defective or if loose wire connections to the keypad cannot be tightened, replacing the keypad is recommended.
  • Wire Check and Repair: The lock requires four wires from the keypad connector to the motor lock for normal operation. If the feedback wire is broken, the lock will operate but without beeping or LED flashing. If any other wire is broken, the lock will not operate until repaired. The guide suggests splicing and insulating broken wires with 24-gage stranded copper wire, but emphasizes that the lock should be replaced after such repairs.
  • Lockout Reset Procedure: If the lock enters lockout mode, users should ensure batteries are good and correctly installed, the lock cable is properly inserted, and then wait at least five minutes without pressing any buttons before attempting to enter a valid code.
  • Walk Back Procedure: This procedure is used to retract the bolt when there is excessive side pressure or other factors preventing full retraction. It involves repetitive bolt retractions without allowing it to extend, often requiring fresh batteries and ensuring the safe handle is in the fully locked position.
  • Keypad Connector Check: For intermittent lock operation, users should check for loose wires at the keypad connector by gently pushing and rotating each wire. If motion is noted, attempting to tighten the connection by pushing in on the wire is suggested. If looseness persists, replacing the lock is recommended.
  • Relock Device Check: If a safe's relock device activates (e.g., due to rough handling), a specific procedure is provided to verify this, involving observing the safe handle's range of motion before and after the lock bolt retracts. If a relock device is suspected, a trained safe technician should be consulted.

The guide also provides contact information for Sargent & Greenleaf, Inc. for obtaining replacement instructions or technical assistance, and for the Safe & Vault Technicians Association to locate qualified safe technicians. It stresses the importance of attempting all applicable troubleshooting procedures before resorting to forcibly opening a safe.

Sargent and Greenleaf 6120 Specifications

General IconGeneral
TypeElectronic Safe Lock
Lock TypeElectronic
Audit TrailNo
Lock Case FinishBlack
Relock TriggerYes
Weight1.5 lbs
Power Source9V Battery
Lock Case MaterialZinc Die-Cast

Related product manuals