EasyManua.ls Logo

Saris Bones 2 805 User Manual

Saris Bones 2 805
6 pages
To Next Page IconTo Next Page
Page #1 background imageLoading...
Page #1 background image
Figure 2
• To adjust rear legs, loosen knobs, remove from end of cylinder and
reposition (A).
• To adjust arms, loosen knobs, slide to center of aluminum cylinder and
rotate (B).NOTE: It is not necessary to move bumper legs, as the
bones rack is pre-assembled to fit a majority of vehicles and bicycles.
However, it offers the flexibility of a wider arm or base spread if necessary.
To do so, remove rear legs, bumper legs, and arms and reposition
symmetrically as desired. For questions, see a local Saris dealer or call
1-800-783-7257 (C).
ADJUST CARRIER TO VEHICLE:
1
As shown in figure 3c, it is important that the tip of the arms (2nd position)
are at the highest point , as shown in Figure 3c. If you do not follow these
instructions, you run the risk of breaking the arm.
•Following the illustration that most resembles the rear of your
vehicle, adjust arm and rear leg to position carrier.
•Retighten knobs. Do not overtighten knobs.
NOTE: To keep legs/feet firmly against glass of square back vehicles lean carrier
slightly farther away from vehicle.
REAR LEG
ARMS
(A)
(B)
(C)
BUMPER LEG
ARMS
(B)
(C)
BUMPER LEG
Rear Leg
Arm
Bumper
Leg
Figure 3a Figure 3b Figure 3c
Cylinder
1
2
Bones Strap
Cradle
Bicycle Tube
Side View
The bicycle tube must be in the center of
the bones strap cradle as shown at right.
Bones 2 (2-bike)
Model # 805 - owners manual
FINALLY – A
COMPANY THAT
LOVES BIKES AS
MUCH AS YOU DO.
Chances are, your bikes are just like
ours - your most valued possessions.
And if it has the Saris name on it,
nothing we build goes out the door
unless it’s worth putting those
possessions on. Call it obsessive. Call
it eccentric. We just chalk it up to
caring a hell of a lot about creating
the last rack you’ll ever need.
Upper-hook
Strap
Locking Knobs
Bumper Legs: Rest
on Bumper
Lower Hook Strap
Side Hook
Strap
Rear Leg
Hold-downs
Arms with
Stabilizers
and Hold-downs
NOTE: Before installing carrier,
clean all surfaces of vehicle
which may come in contact with
the carrier or its straps. Make
sure foot pads are free of any
debris that could scratch vehicle’s
finish.
Bones is a bumper-supported bike rack.
Be sure to check Saris Fit Guide before
installing rack on vehicle.
CAUTION
Upper Hook
Upper Hook
Attach Upper Hook straps to top hinge line of vehicle as shown in
Fig.4
NOTE: Upper Hook attachment must be to a supported
hinge line - NEVER hook to glass, unsupported plastic, or
roof rack.
Attach lower hook straps to bottom edge of trunk at position C2;
and side hook straps to the side at position C1 or above bend in
trunk at position C3 (Fig. 5). NOTE: For square back vehicles
such as mini-vans, make sure the side straps are in-line with
aluminum cylinder.
ATTACH STRAPS:
Figure 5
LOWER
STRAP
HOOK
SIDE STRAP HOOK
2
Figure 4
Figure 6
Lower strap hook special application:
ONLY IF SPECIFIED IN CURRENT FIT CHART
Some vehicles require placing the lower strap hook
completely inside the trunk. To do so, loosen lower strap,
place hook inside trunk, close trunk, pull strap until hook
braces against trunk wall, and tighten as usual (Fig. 6).
•Tighten all straps evenly, removing any slack. When
straps are taut, shake carrier to check for any movement.
Retighten if necessary.

Other manuals for Saris Bones 2 805

Question and Answer IconNeed help?

Do you have a question about the Saris Bones 2 805 and is the answer not in the manual?

Saris Bones 2 805 Specifications

General IconGeneral
ModelBones 2 805
CategoryAutomobile Accessories
Capacity2 Bikes
Mount TypeTrunk
FitUniversal
Assembly RequiredNo
WarrantyLifetime
ColorBlack
TypeBike Rack
Frame CompatibilityMost bikes
MaterialPlastic and steel
Weight9 lbs
CompatibilityFits most sedans, hatchbacks, minivans, and SUVs

Summary

Adjust Carrier to Vehicle

Position Rear Legs and Arms

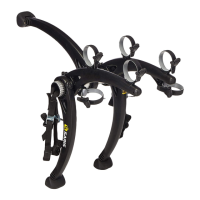
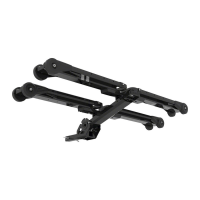
Adjust rear legs by repositioning, and slide arms to center of aluminum cylinder for proper placement.

Bumper Leg Placement

Bumper legs are pre-assembled to fit most vehicles; reposition symmetrically if needed.

Carrier Lean for Glass Contact

Lean carrier slightly away from vehicle to keep legs firmly against glass on square back vehicles.

Arm Tip Position

Ensure arm tips are at the highest point to avoid breaking the arm.

Bicycle Tube Support

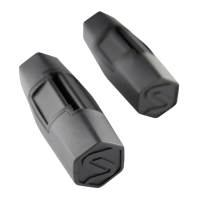
Place the bicycle tube in the center of the bones strap cradle for secure mounting.

Attach Straps and Secure

Upper Hook Strap Attachment

Attach upper hook straps to the supported hinge line, never to glass or plastic.

Lower and Side Hook Strap Attachment

Connect lower straps to trunk bottom edge and side straps to the side of the trunk.

Special Lower Strap Application

For some vehicles, place the lower strap hook inside the trunk and pull taut.

Final Strap Tightening

Tighten all straps evenly, remove slack, and shake the carrier to check for movement.

Load and Secure Bikes

Bike Placement on Arms

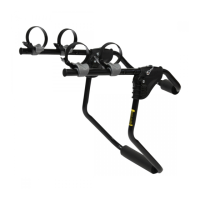
Place bikes on carrier arms, alternating handlebar direction, and secure with hold-down straps.

Seat Tube Stabilization

Rest the seat tube against the stabilizer and pull the strap around the tube.

Women's Frame Mounting

Mount women's frames using the alternative method shown in Figure 9.

Final Checks and Precautions

Final Adjustment Tightening

Retighten all mounting straps with bikes loaded and tie off any excess strap length.

Check Straps and Stability

Recheck straps after first use and periodically thereafter for safety.

Ground Clearance

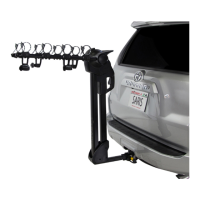
Ensure at least 12-15 inches of clearance between the load and the ground.

Important Cautions and Restrictions

Follow compatibility guides, avoid tandem bikes, check exhaust clearance, and adhere to speed limits.

Related product manuals