Do you have a question about the Saris FLUID2 and is the answer not in the manual?
Consult physician before exercise; stop if pain occurs.
Avoid hazards like moving parts, pedal entanglement, and falling off.
Visual overview of the Wind resistance unit.
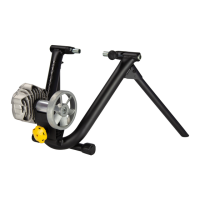
Visual overview of the Magneto resistance unit.
Visual overview of the Mag resistance unit.
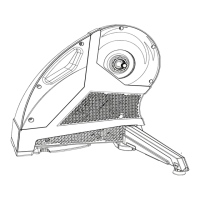
Visual overview of the Mag+ resistance unit.
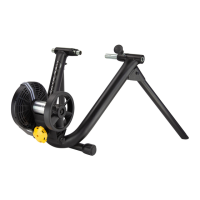
Visual overview of the Fluid² resistance unit.
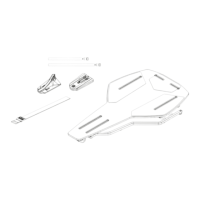
Extend legs and place on a flat surface; adjust foot pads for levelness.
Insert the bolt action tube and secure the lever.
Insert the L-bolt into the trainer frame as shown.
Insert carriage bolt through frame and resistance unit.
Turn resistance unit knob to engage the L-bolt.
Place nut onto bolt and secure with a 1/2” wrench.
Fill tire to manufacturer's suggested pressure.
Use the provided skewer; ensure quick release is on the left.
Lift bike and position skewer into trainer.
Pull down quick release handle to lock.
Adjust non-drive side by pulling shaft and rotating.
Turn knob until roller touches tire, then 2.5 rotations.
Dial resistance knob clockwise to position adjuster.
Tighten barrel adjuster and press shifter lever down.
Pull shift cable end and route around adjuster.
Route shifter cable around bike to handlebar.
Adjust nylon strap and lock cam lever.
Use shifter lever to adjust resistance (up for decrease, down for increase).
Thread barrel adjuster to loosen or tighten cable tension.
Details on warranty duration for frame, electronics, etc. for different trainers.
Instructions on cleaning, inspecting, and storing the trainer.
| Type | Bike Trainer |
|---|---|
| Resistance Type | Fluid |
| Adjustable Foot Pads | Yes |
| Power Measurement | No |
| Weight | 21 lbs (9.5 kg) |
| Foldable | No |
| Warranty | Lifetime |
| Wheel Size Compatibility | 700c, 29", 26" |
| Maximum Weight Capacity | 300 lbs |
| Connectivity | ANT+ FE-C & Bluetooth |
| Noise Level | Quiet operation |