8
Stand 10/2018 MK TM
• Kontrolle korrekter Sitz des
Scharnierstabes links am Gerät�
Scharnierstab muss dafür in den
Vorrichtungen richtig eingefädelt sein,
sonst fällt der Deckel�
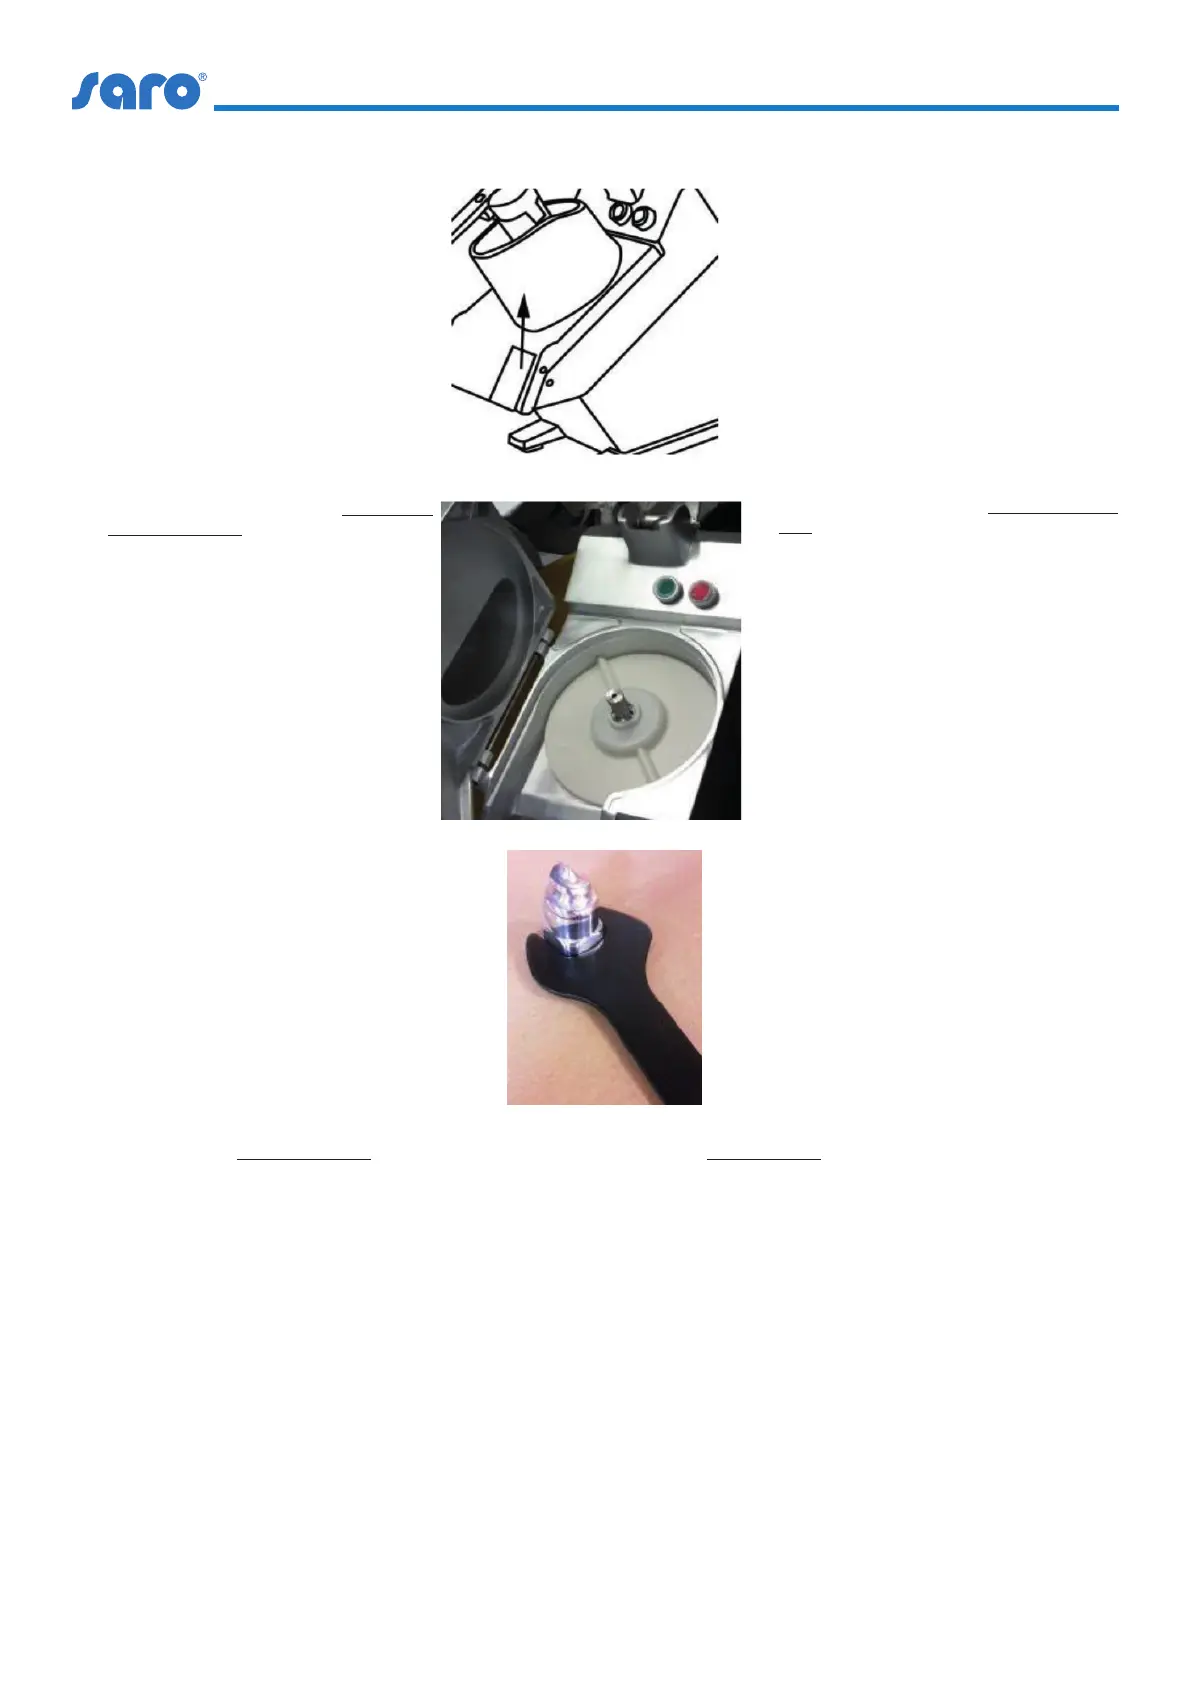
• Gerätedeckel auf der Vorderseite
des Gerätes durch Betätigung der
rechteckigen Wippe rechts unten am
Gerät önen, nach links aufklappen�
• Bei CANUS: Aufstecken der Kunststo-
Auswurfscheibe auf
• die Scheibenaufnahmeachse�
• (mittige Wölbung der Auswurfscheibe
nach oben, siehe Bild)
• Gerade und entsprechend der Form
aufstecken und andrücken�
• With CANUS: Attach the plastic ejection
disc to the
• the disc mounting axis�
• (central curvature of the discharge disc
upwards, see picture)
• Fit straight and according to the shape
and press on�
• Check that the hinge rod is correctly
seated on the left side of the unit� Hinge
rod must be correctly threaded into the
devices, otherwise the lid will fall�
• Open the device cover on the front of
the device by actuating the rectangular
rocker on the bottom right of the device
and open it to the left�
• Bei TITUS: Erst Abdrehen/Entfernen des
Kohlstrunkbohrers
• mit dem mitgelieferten Werkzeug
(Maulschlüssel)
• von der Aufnahmeachse, um die
Scheiben einzusetzen oder zu wechseln�
• Maulschlüssel dazu nach links
(entgegen dem Uhrzeigersinn) drehen�
• with TITUS: First twist/removal of the
cabbage core drill
• with the supplied tool (open-end
wrench)
• from the mounting axis to insert or
replace the discs�
• Turn the open-end wrench to the left
(counterclockwise)�
• Aufstecken der Arbeitsscheiben auf die
Scheibenaufnahmeachse�
• Dazu die zwei Aufnahmeönungen an der Scheibe
auf den Achsbolzen der Aufnahme bringen (Messer
oder Reibeplatte zeigen beim Einsetzen nach oben =
Sichtkontakt) und im Uhrzeigersinn einrasten lassen�
• Bei CANUS: Die Oberkante der Aufnahme der Scheibe
schließt fast bündig ab mit der Oberkante der
Aufnahmeachse�
• Bei TITUS: Wiederaufdrehen, per Hand, des
Kohlstrunkbohrers auf die Aufnahmeachse� Aufdrehen im
Uhrzeigersinn�
• Fit the working discs onto the disc receiving axle�
• To do this, place the two mounting openings on the disc
on the axle bolt of the mounting (knife or friction plate
pointing upwards when inserting = visual contact) and
allow to engage clockwise�
• With CANUS: The upper edge of the mounting plate is
almost ush with the upper edge of the mounting axis�
• For TITUS: Turn the cabbage core drill back on the
pickup axis by hand� Turn it clockwise�
DEUTSCH / ENGLISH


 To Next Page