Product specification
Installation
Dimensions
Buttons and Display
50.00
85
54.97
24
18
12
6
0
24
18
12
6
0
A
UTO
/
MA
N
U
PRO
G
+
-
1
2
3
4 5
AUTO
MANU
10
11
24
18
12
6
0
ON
PROG
16:55
6
7
8 12
9 15
13
14
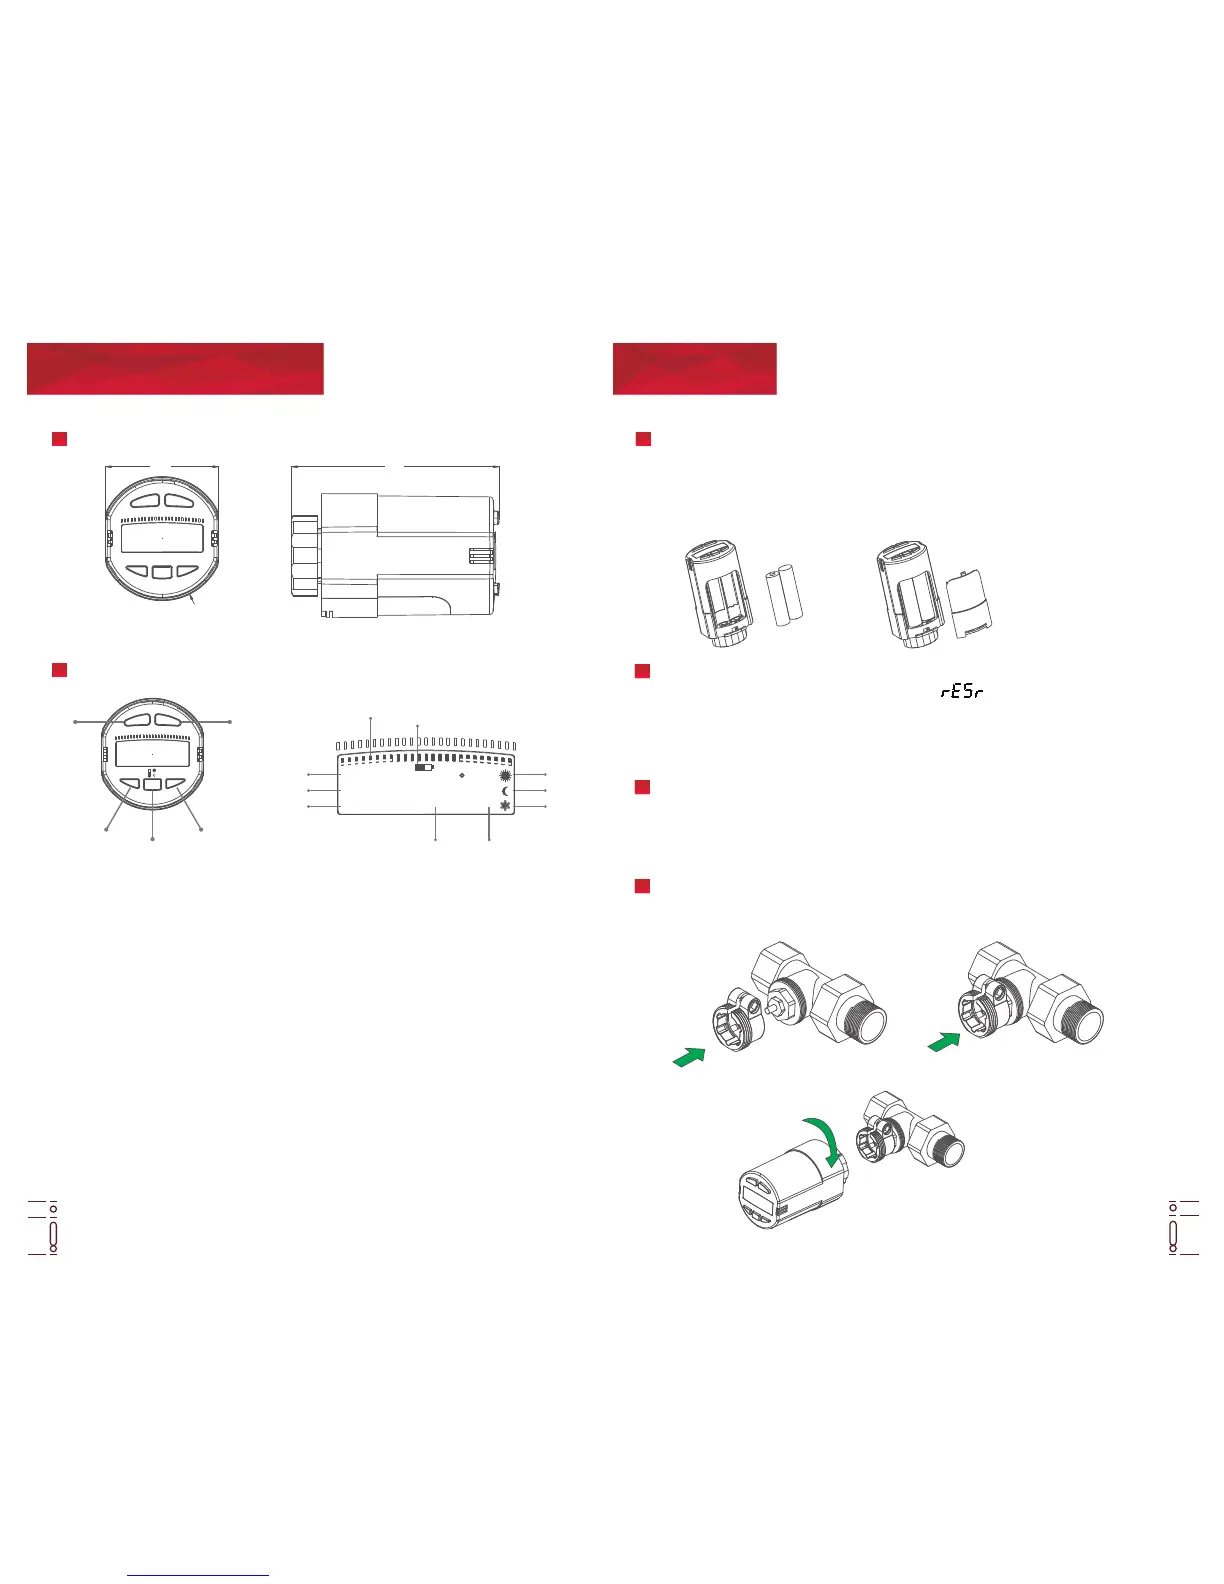
1. Inserting/replacing the batteries (Please note: before you change the
battery, keep the valve completely open convenient for the following
installation)
Remove the battery cover and insert the two batteries. Ensure that the
batteries are correctly inserted.
2. After install the battery, first the screen is fully displayed, then show
the software version, finally the symbol (TEST) will blink, and now
the connector will retract entirely. It will be convenient for you to mount
the adapter.
(PS: Press any key to end the test after mounting the valve adapter.)
3. Mounting the RA and Caleffi adapter
Tighten the RA adaptor using the screw. Tighten the Caleffi adaptor by
hand.
4. Screw the thermostat onto the adaptor and hand tighten (max.4.5mm).
3
4
(1) Auto/Manual mode switch buon
(2) Program /D ate/T ime set buon
(3) Comfort/Economic temperature seng buon
(4) Raise the temperature/meseng
(5) Lower the temperature/meseng
(6) Show when the controller is in Auto mode
(7) Show when the controller is in Manu seng or holiday mode
(8) Show when the controller is in program seng mode
(9) Shows current set temperature or me clock
(10) Comfort mode symbol
(11) Economic mode symbol
(12) F rost protecon open symbol
(13) Low baery indicaon symbol
(14) Show the program me period(0-24hours)
(15) Valve opening symbol
 Loading...