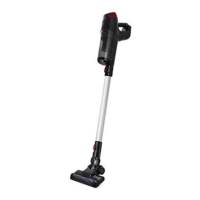
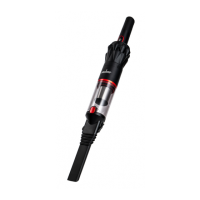
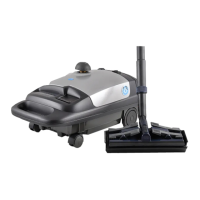
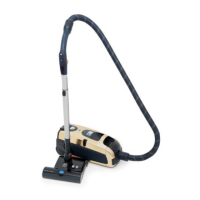
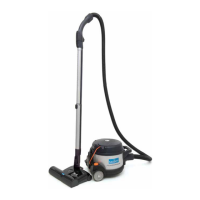
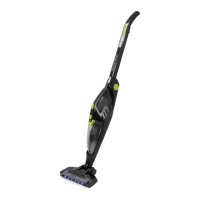
The Sauber SD-100 Technic Stick Vacuum is a cordless, bagless stick vacuum cleaner designed for domestic household cleaning. It is intended for removing dry dirt and dust from carpets, flooring, walls, and fabrics. The cleaner is not suitable for industrial use or for picking up water or liquids.
Important Technical Specifications:
- Voltage: 21.6V DC
- Power: 300W
- Dust Capacity: 400ml
- Battery: 2500mAh Lithium Ion
- Runtime: Up to 25 minutes (on lower mode)
- Net Weight: 3.3Kg
Usage Features:
The vacuum features a modular design, allowing for various configurations and attachments to suit different cleaning needs.
Main Unit Components:
- Battery (A): The power source for the vacuum.
- On/Off Trigger (B): Activates and deactivates the vacuum.
- Dust Bin (C): Collects dust and debris.
- Dust Bin Release Button (D): Allows for easy removal and emptying of the dust bin.
- Rod Release Button (E): Used to detach the rod from the main unit.
- Rod (F): Extends the reach of the vacuum for floor cleaning.
- Powerhead Release Button (G): Releases the powerhead from the rod.
- Boost Button and Charging Port (I): The Boost button allows selection of cleaning modes, while the charging port is for connecting the power adapter.
- Battery Release Button (J): Releases the battery from the main unit.
Assembly:
- Connecting the Powerhead: Insert the Powerhead into the rod until a "click" sound confirms it is securely in place.
- Connecting the Rod to the Unit: Insert the plug end of the rod into the air inlet of the cleaner until a "click" sound confirms it is securely in place.
- Connecting Accessories to the Unit: Insert accessories into the cleaner's air inlet until a "click" sound confirms secure placement. To disassemble, press the rod release button and pull the accessory out.
Operation:
- Switch On/Off: Press the On/Off trigger to start the machine.
- Cleaning Mode: While the vacuum is on, press the Boost button to select the desired cleaning mode.
- Charging: Connect the power adapter to a household power supply and insert the DC plug into the machine's charging port.
- Battery Capacity Indicator:
- Blue light: Fully charged.
- Blue light flashing: Charging.
- Light turns green for one minute after fully charged.
- Orange light flashing: Out of power, needs charging.
- It is recommended to charge the product after each use to maintain maximum performance.
Accessories:
The Sauber SD-100 comes with a range of accessories to enhance its versatility:
- Multi-tasker Powerhead (K): Ideal for daily cleaning on carpets.
- Hard Floor Powerhead (H): Specifically designed for daily cleaning on hard floors.
- Dusting Brush (L): Features soft bristles to help remove dust without scratching surfaces.
- Crevice Tool (M): Useful for cleaning crevices, corners, and hard-to-reach areas.
- Mini Motorised Pets Brush (N): Makes light work of removing pet hair from furniture, cars, and upholstery.
- Charger (O): For recharging the vacuum's battery.
- Wall Mount Shelf (P): Includes screws for installation, providing a convenient storage and charging solution.
Safety Precautions for Motorised Brushes (Multi-tasker Powerhead, Hard Floor Powerhead, Mini Motorised Pets Brush):
- Keep hair, hands, and feet away from the rotating brush while it is running.
- Do not run the motorised brush over electric cables or string.
- Do not use the motorised brush on pets.
- If children are present, turn off the vacuum when leaving the motorised brush unit unattended.
- Do not attempt to service or unclog the motorised brush while the vacuum is running.
- The motorised brush will only operate when connected to the vacuum cleaner.
Installation of Wall Mount:
- Hold the Wall Mount Shelf firmly at the desired punching position (recommended 130cm off the ground) and use the screw holes as a guide.
- Use a 5mm drill bit (user-supplied) to make holes at the marked positions.
- Insert expansion pins into the holes, position the wall mount, and tighten the screws with a Phillips head screwdriver.
- Adjust the wall mount to ensure it remains vertical, then tighten the screws completely.
- Insert the DC plug of the power adapter into the charging port on the top of the battery.
Maintenance Features:
Regular maintenance is crucial for optimal performance and longevity of the vacuum cleaner.
Emptying the Dust Bin:
- Click the Dust Bin Release button to remove the entire dust bin.
- Firmly hold the filter handle and pull the filter out of the Dust Bin to empty.
- Wash the Dust Bin under a tap if necessary, then wipe it dry completely before use.
Cleaning Filters:
- Hold the filter bin handle and rotate counter-clockwise to remove the HEPA filter. Tap the dirt from the HEPA filter.
- Refit the HEPA filter into the filter housing and slide both back into the Dust Bin, then reassemble into the main unit.
- Note: It is recommended to replace the HEPA filter every 6 months or when it becomes visibly dirty.
Cleaning Multi-tasker Powerhead:
- Warning: Switch off the machine and disconnect the motorised brush before cleaning.
- Press the brush roll release button and pull out the roller brush shaft from the side.
- To remove tangled hair, carefully run a cutting cleaning tool down the groove to cut the hair and pull it off. Re-insert the brush into the powerhead.
Cleaning Hard Floor Powerhead:
- Warning: Switch off the machine and disconnect the motorised brush before cleaning.
- Press the brush roll release button and pull out the roller brush shaft from the side.
- To remove tangled hair, carefully run a cutting cleaning tool down the groove to cut the hair and pull it off. Re-insert the brush into the powerhead.
Cleaning Mini Motorised Pets Brush:
- Warning: Switch off the machine and disconnect the motorised brush before cleaning.
- Lift the floor brush side cover slightly and rotate it anticlockwise.
- Pull the soft fleece roller out of the brush body (some dust may come out). Remove any tangled hair or debris from the soft pile drum, dust off, and reassemble.
Battery Use and Care:
- Only use the charger provided with the appliance.
- Charge the battery inside the product using the designated charger.
- Store the appliance away from metal objects when not in use to prevent shorting.
- Avoid contact with liquid ejected from the battery; if contact occurs, flush with water and seek medical help if it gets into eyes.
- Do not charge or store the appliance outdoors or in a car. Charge and store in a dry indoor area between 5°C and 45°C.
- Never attempt to open the battery. Discontinue use and do not recharge if the battery casing is broken or cracked.
- The charger is not a serviceable part.
- Fully discharge the battery before disposal.
- The cleaner contains a Li-Ion battery. Dispose of it according to local council instructions, not with general garbage.
- Do not use the charger for non-chargeable batteries.
Warranty and Customer Service:
The Sauber SD-100 Technic Stick Vacuum comes with a 2-year parts and labour warranty for domestic use against product defects, provided it is used according to the instruction manual. The warranty is valid only in the country of purchase and requires proof of purchase. For service or advice, contact Sauber Customer Service Australia on 1800 728 237 or New Zealand on 0800 282 288.