EasyManua.ls Logo

Sauder Harbor View Library with Doors User Manual

Sauder Harbor View Library with Doors
32 pages
To Next Page IconTo Next Page
Page #1 background imageLoading...
Page #1 background image
NOTE: THIS INSTRUCTION
BOOKLET CONTAINS IMPORTANT
SAFETY INFORMATION.
PLEASE READ AND KEEP FOR
FUTURE REFERENCE.
Enlish p 1-22
Français p 23-25
Español p 26-28
Lot # 390995 05/05/16
Purchased: __________________
Be sure to ive us a rin before
makin any returns. 1-800-523-3987
Library with Doors
Harbor View Collection | Model 401632
Need help? Visit Sauder.com to view video assembly tips or chat with a live rep.
Prefer the phone? Call 1-800-523-3987.
Share your journey!
sauder.com
Here's one for
the books.
Question and Answer IconNeed help?

Do you have a question about the Sauder Harbor View Library with Doors and is the answer not in the manual?

Sauder Harbor View Library with Doors Specifications

General IconGeneral
Product NameSauder Harbor View Library with Doors
CategoryIndoor Furnishing
CollectionHarbor View
MaterialEngineered Wood
Number of Doors2
Number of Shelves5
Adjustable ShelvesYes
Assembly RequiredYes

Summary

Library with Doors Assembly Manual

Assembly Tools Required

Part Identification

Hardware Identification

Step-by-Step Assembly Guide

Step 1: Prepare for Assembly

Assemble unit on protected surface and insert initial fasteners.

Step 2: Attach Tie Plates and Cam Components

Attach tie plates, cam screws, and hidden cams to parts.

Step 3: Install Angle Brackets and Cabinet Sides

Attach angle brackets and cabinet sides to main panels.

Step 4: Attach Panels to Right End

Connect top, shelf, and bottom panels to right end.

Step 5: Attach Left End Panel

Connect left end panel to assembled structure.

Step 6: Install Top and Shelf Moldings

Attach top and shelf moldings using screws and cams.

Step 7: Install Valance and End Moldings

Attach valance and end moldings to unit.

Step 8: Install Skirt, Bottom Molding, and Feet

Attach skirt, bottom molding, and feet to unit base.

Step 9: Attach Back Panel

Secure back panel to unit using nails.

Step 10: Install Hinges on Doors

Attach hinges to doors for mounting.

Step 11: Attach Doors and Knobs

Mount doors and attach knobs to unit.

Step 12: Adjust Doors

Make adjustments to door alignment and position.

Step 13: Assemble Drawer - Part 1

Connect drawer sides, bottom, brace, and back.

Step 14: Assemble Drawer - Part 2

Install drawer cams, slides, and knobs.

Step 15: Install Safety Strap for Stability

Secure unit to wall using safety strap.

Step 16: Install Adjustable Shelves and Drawers

Insert pins, set shelves, and install drawers.

Step 17: Final Drawer Adjustments

Fine-tune drawer alignment and positioning.

Important Safety Warnings

Overloaded Shelves Warning

Risk of injury or breakage from overloaded shelves.

Furniture Movement Warning

Risk of injury from moving furniture not designed with casters.

Children Climbing Warning

Risk of injury or death from children climbing on shelves.

Television Placement Warning

Hazardous to place TVs on furniture not designed to support them.

Weight Limit Adherence

Never exceed the weight limits indicated in the instructions.

Shelf Loading and Moving Advice

Advice on loading shelves bottom-to-top and unloading before moving.

Warranty and Customer Support

Limited 5-Year Warranty Details

Covers material/workmanship defects; excludes misuse, damage, and rental.

Warranty Limitations and Exclusions

Warranty is non-transferable; limits implied warranties and consequential damages.

Contact Sauder Customer Service

Contact information for assistance, assembly tips, and replacement parts.

Register Your Product Online

Instructions for registering the product online for service.
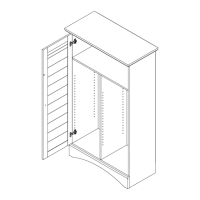
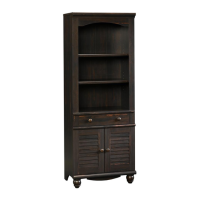
Related product manuals