EasyManua.ls Logo

Sauder Home Plus Base Cabinet User Manual

Sauder Home Plus Base Cabinet
23 pages
To Next Page IconTo Next Page
Page #1 background imageLoading...
Page #1 background image
NOTE: THIS INSTRUCTION
BOOKLET CONTAINS IMPORTANT
SAFETY INFORMATION.
PLEASE READ AND KEEP FOR
FUTURE REFERENCE.
English pg 1-16
Français pg 17-18
Español pg 19-20
Base Cabinet
Store behind
closed doors.
Share your journey!
Lot #
Purchased: __________________
Question and Answer IconNeed help?

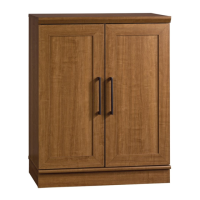
Do you have a question about the Sauder Home Plus Base Cabinet and is the answer not in the manual?

Sauder Home Plus Base Cabinet Specifications

General IconGeneral
TypeBase Cabinet
MaterialEngineered Wood
AssemblyAssembly Required
Product TypeStorage Cabinet
BrandSauder
CollectionHomePlus
FinishDakota Oak
ShelvesAdjustable

Summary

Step 1: Prepare for Assembly

Initial Fastener Placement

Insert Twist-Lock fasteners into large holes in ends and top.

Step 2: Attach Ends to Top

Secure Ends to Top Panel

Fasten ends (A, B) to top (C) using Twist-Lock fasteners.

Step 3: Attach Bottom Panel

Secure Bottom to Side Panels

Fasten bottom (D) to ends (A, B) using flat head screws (W).

Step 4: Install Top Molding

Attach Top Molding and Tie Plate

Fasten top molding (J) and tie plate (O) to top (C) with fasteners.

Step 5: Install Feet and Glides

Attach Feet to Skirts and Insert Glides

Slide feet (I, K) into skirts (H, R) and install prop nuts and glides.

Step 6: Attach Skirts to Bottom

Secure Skirts to Bottom Panel

Fasten skirts (H, R) to bottom (D) using wafer head screws (AA).

Step 7: Attach Back Panel

Square Unit and Fasten Back

Ensure unit is square, then attach back panel (E) using nails (CC).

Step 8: Attach Hinges to Doors

Mount Hinges on Doors

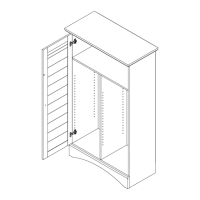
Fasten two hinges (M) to each door (F) using flat head screws (BB).

Step 9: Install Doors and Pulls

Mount Doors and Attach Pulls

Attach doors (F) to unit and install pulls (Q) with screws (Y).

Step 10: Adjust Doors

Fine-tune Door Alignment

Adjust door position horizontally, vertically, and in-depth using hinge screws.

Step 11: Stacking Option

Secure Upper Unit to Lower Unit

Fasten stacked units together using silver flat head screws (X).

Step 12: Final Placement and Shelving

Secure Unit and Install Shelf

Fasten safety bracket (N) and install adjustable shelf (G) using pins (U).

Related product manuals