Do you have a question about the Sauder Trestle 424127 and is the answer not in the manual?
Details parts with labels and inked letters to distinguish them for assembly.
Illustrates and names all hardware components, including screws, cams, and rails.
Assemble unit on carpeted floor. Insert SAUDER TWIST-LOCK® FASTENERS (10F) into BACKS (H and J).
Insert HIDDEN CAMS (1F) into ENDS and LOWER BACKS. Insert CAM DOWEL (2F).
Insert HIDDEN CAMS (1F) into BOTTOMS, SHELVES, and LARGE BACK.
Separate SLIDES from RAILS. Fasten RAILS to LOWER ENDS (C2, D2).
Turn CAM SCREWS (8F) into LEGS (K2, L2, M2, N2, O2, P2).
Fasten UPPER ENDS (A, B) to LEGS using SCREWS (9S).
Fasten LOWER BACKS (12) to SHELVES (G) and tighten HIDDEN CAMS.
Fasten SHELVES (G) to LEGS (K2, L2, M2, O2) and tighten HIDDEN CAMS.
Fasten LOWER ENDS (C2, D2) to SHELVES (G) and tighten HIDDEN CAMS.
Fasten BOTTOMS (F) to LOWER BACKS and ENDS using SCREWS (2S). Fasten BOTTOMS (F) to LEGS.
Fasten LOWER ENDS (C2, D2) to BOTTOMS (F) using SCREWS (2S). Fasten LOWER ENDS to SHELVES.
Fasten LEGS (K2, L2, N2, P2) to SHELVES (G) and BOTTOMS (F), tighten HIDDEN CAMS.
Fasten METAL BRACKETS (4G) to SKIRTS (Q) using SCREWS (1S). Fasten SKIRTS (Q) to BOTTOMS (F).
Stand unit upright. Fasten BACKS (J) to UPPER ENDS (A, B). Fasten LARGE BACK (H) to LEGS. Turn CORD CLIPS (9P).
Fasten CABINET RAILS (CC, DD) to UPPER ENDS (A, B) using SCREWS (3S).
Fasten TOP (E) to BACKS and ENDS. Turn CORD CLIPS (9P).
Assemble drawer sides to front. Slide drawer bottom into grooves. Fasten drawer back.
Insert SLIDE CAM (10A) into DRAWER SIDES. Fasten DRAWER SLIDES (35MC). Fasten PULL (176K).
Insert SLIDE CAM (10A) into SMALL DRAWER SIDES. Fasten DRAWER SLIDES (EE, FF). Fasten PULL (176K).
Push FILE GLIDES (15B) onto drawer sides. Slide FILE RODS (7B) into GLIDES and onto other side.
Push GROMMET (7P) and CAP (8P) into TOP (E). Insert small and large drawers into unit.
Tap CAM COVER (13P) onto each HIDDEN CAM.
Adjust drawers by loosening SCREW #3 and turning CAM for proper alignment.
Provides safety information on proper furniture use, overloading, moving, and placing TVs.
Details the terms, conditions, and exclusions of the limited warranty.
| Model Number | 424127 |
|---|---|
| Brand | Sauder |
| Category | Indoor Furnishing |
| Material | Engineered Wood |
| Style | Traditional |
| Assembly Required | Yes |
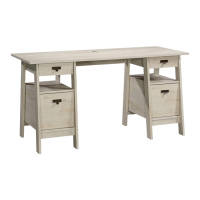
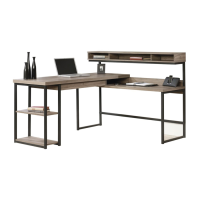
| Type | Desk |