5
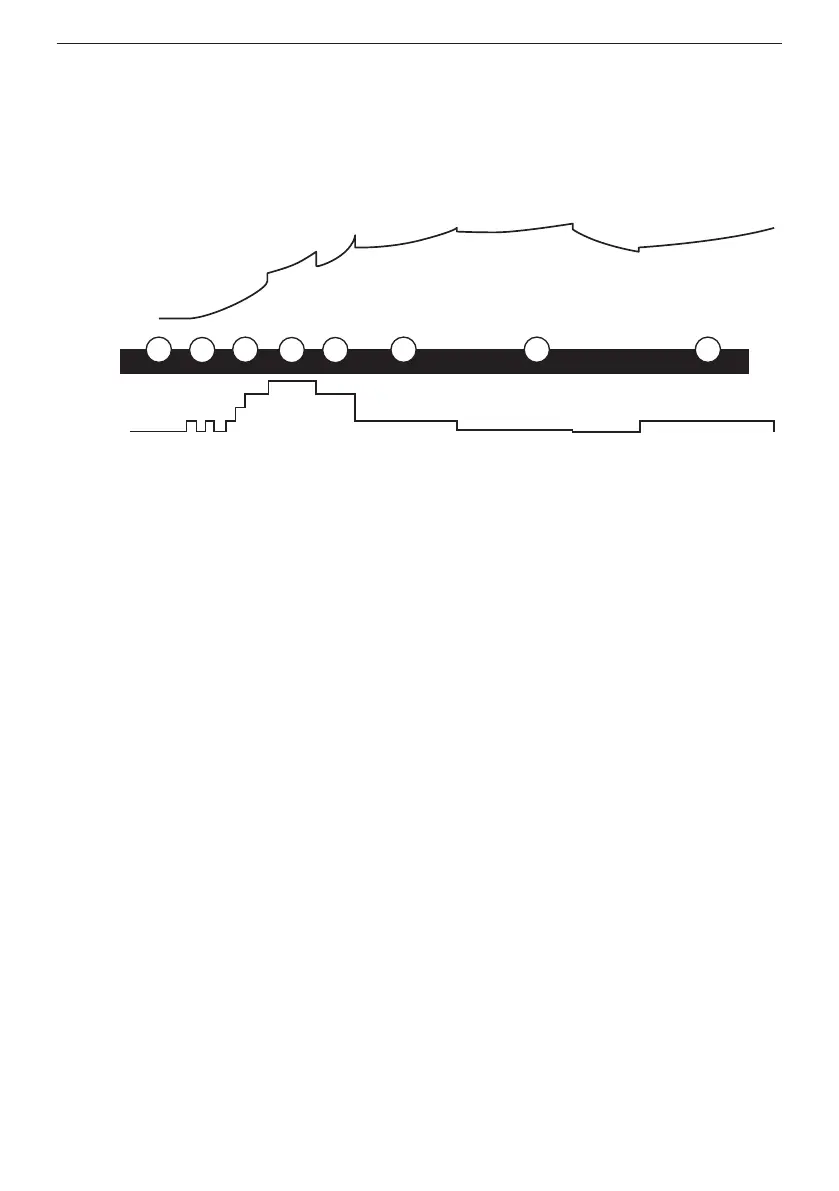
8 Stages of Charging
With the microprocessor-controlled charging steps of your AA Intelligent Battery
Charger, you are able to recharge your battery to almost 100 % of its original capacity. To
ensure that your battery is kept in an optimum condition, your Charger can be attached
permanently even for long periods. The correct charging step is selected automatically
by your Charger:
Step 1: Check
Checks the battery voltage to make sure battery connections are good and the battery is
in a stable condition before beginning the charging process.
Step 2: Recovery
Initialises a recovery process, if needed, for deeply discharged or sulphated batteries by
pulsing small amounts of current.
Step 3: Soft Start
A low charging rate protects deeply discharged or sulphated batteries.
Step 4-5: Bulk
The “Bulk” charging step uses both a high and medium charging rate until reaching
approximately 80% of the battery capacity.
Step 6: Absorption
The battery charger will deliver small amounts of current to provide a safe, efficient
charge and limit battery gassing.
Step 7 & 8: Maintenance 1 & Maintenance 2
The battery is fully charged and ready to use (the battery icon stops flashing). In this
step, the charger will only deliver enough current to keep the battery full. The battery
voltage is continuously monitored to check if a maintenance charge should be initiated:
If the terminal voltage falls below 6.4V (6V) or 12.8V (12V), the charger will start a main-
tenance cycle until voltage reaches 6.8V (6V) or 13.6V (12V). Switching between “trick-
le-charging” and “maintenance-charging” is repeated indefinitely to keep the battery
fully charged without the risk of overcharging. The battery charger can be left connected
to the battery for an unlimited amount of time.
Step
Current
Amps
Voltage
Volts
876
54
3
2
1