2
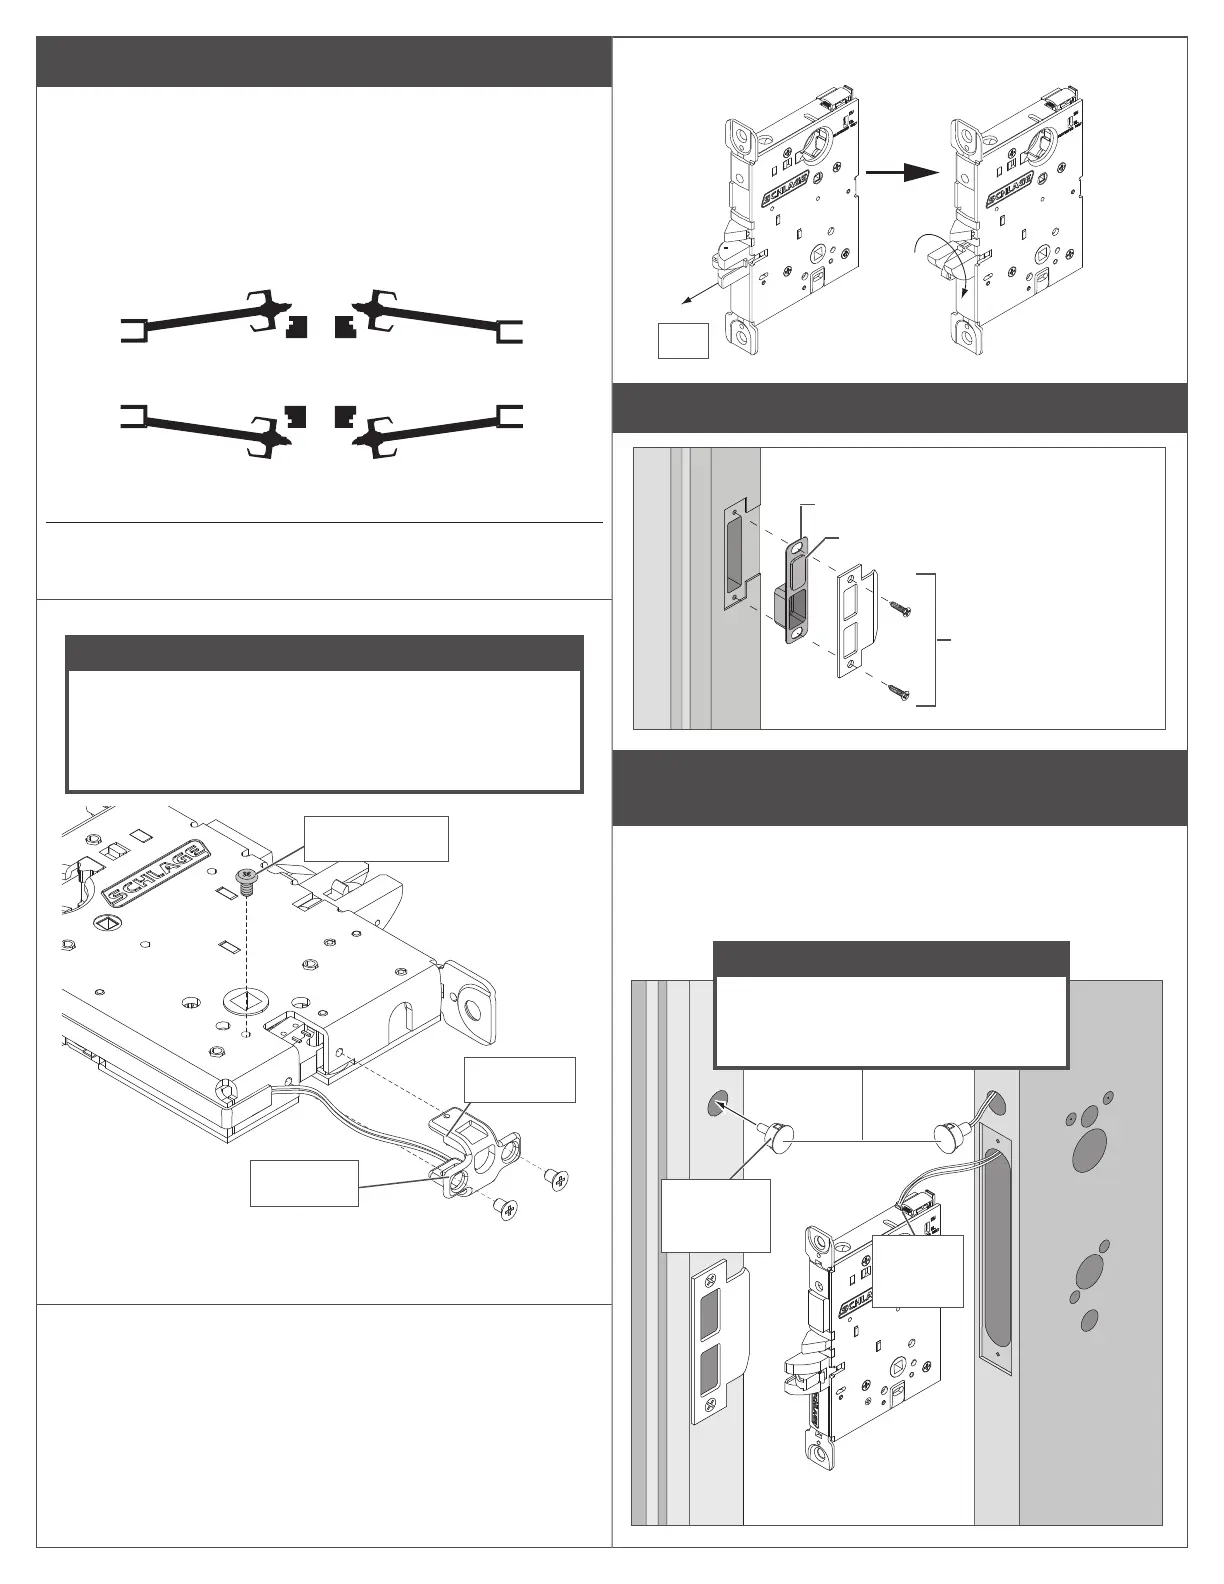
A Adjust door handing if needed.
RX (request to exit) utilizes a microswitch inside the lock case
to detect rotation of the inside knob/lever.
The RX is a removable module located on the bottom edge
of the lock chassis. The module must be properly positioned
to detect inside knob/lever rotation. If not properly positioned,
the lock and/or microswitch may be damaged.
LH
Left Hand
LRB
Left Hand
Reverse Bevel
RH
Right Hand
RRB
Right Hand
Reverse Bevel
INSIDE
INSIDE
OUTSIDE
OUTSIDE
If handing screw is NOT on the INSIDE of door
follow A1 and A2 steps.
A1 Carefully remove the RX module and handing screw.
NOTICE
Handing screw and micoroswitch must be on
the INSIDE of the door. If handing screw and
microswitch are already on the INSIDE
of the door, do not remove.
Image
shows RH
installation.
Handing screw
Microswitch
RX module
The RX module has a microswitch on one side and a
connector on the other.
A2 Reinstall the handing screw onto the inside of door, then
reinstall RX module with the microswitch also on the
inside of the door.
A3 Rotate the latch 180° (if necessary).
180˚
Pull
B Install strike.
DPS strike box
Strike
(10-136 shown)
Magnet (for non-deadbolt models only)
Deadbolt (LEMD) models will not have a
DPS magnet
C Deadbolt (LEMD) Only: Install door position switch and
magnet.
Feed the wires from the connector on the door position switch
into the long angled hole in the door. Plug the connector into
the chassis. Do not push in switch all the way, leave a little
slack until the chassis is installed after step 1.
Connect
cable to
chassis
Insert
magnet into
door jamb
NOTICE
Make sure the door position
magnet in the jamb is aligned with
the switch in the door edge!