Page 20
4iiii Crank Replacement
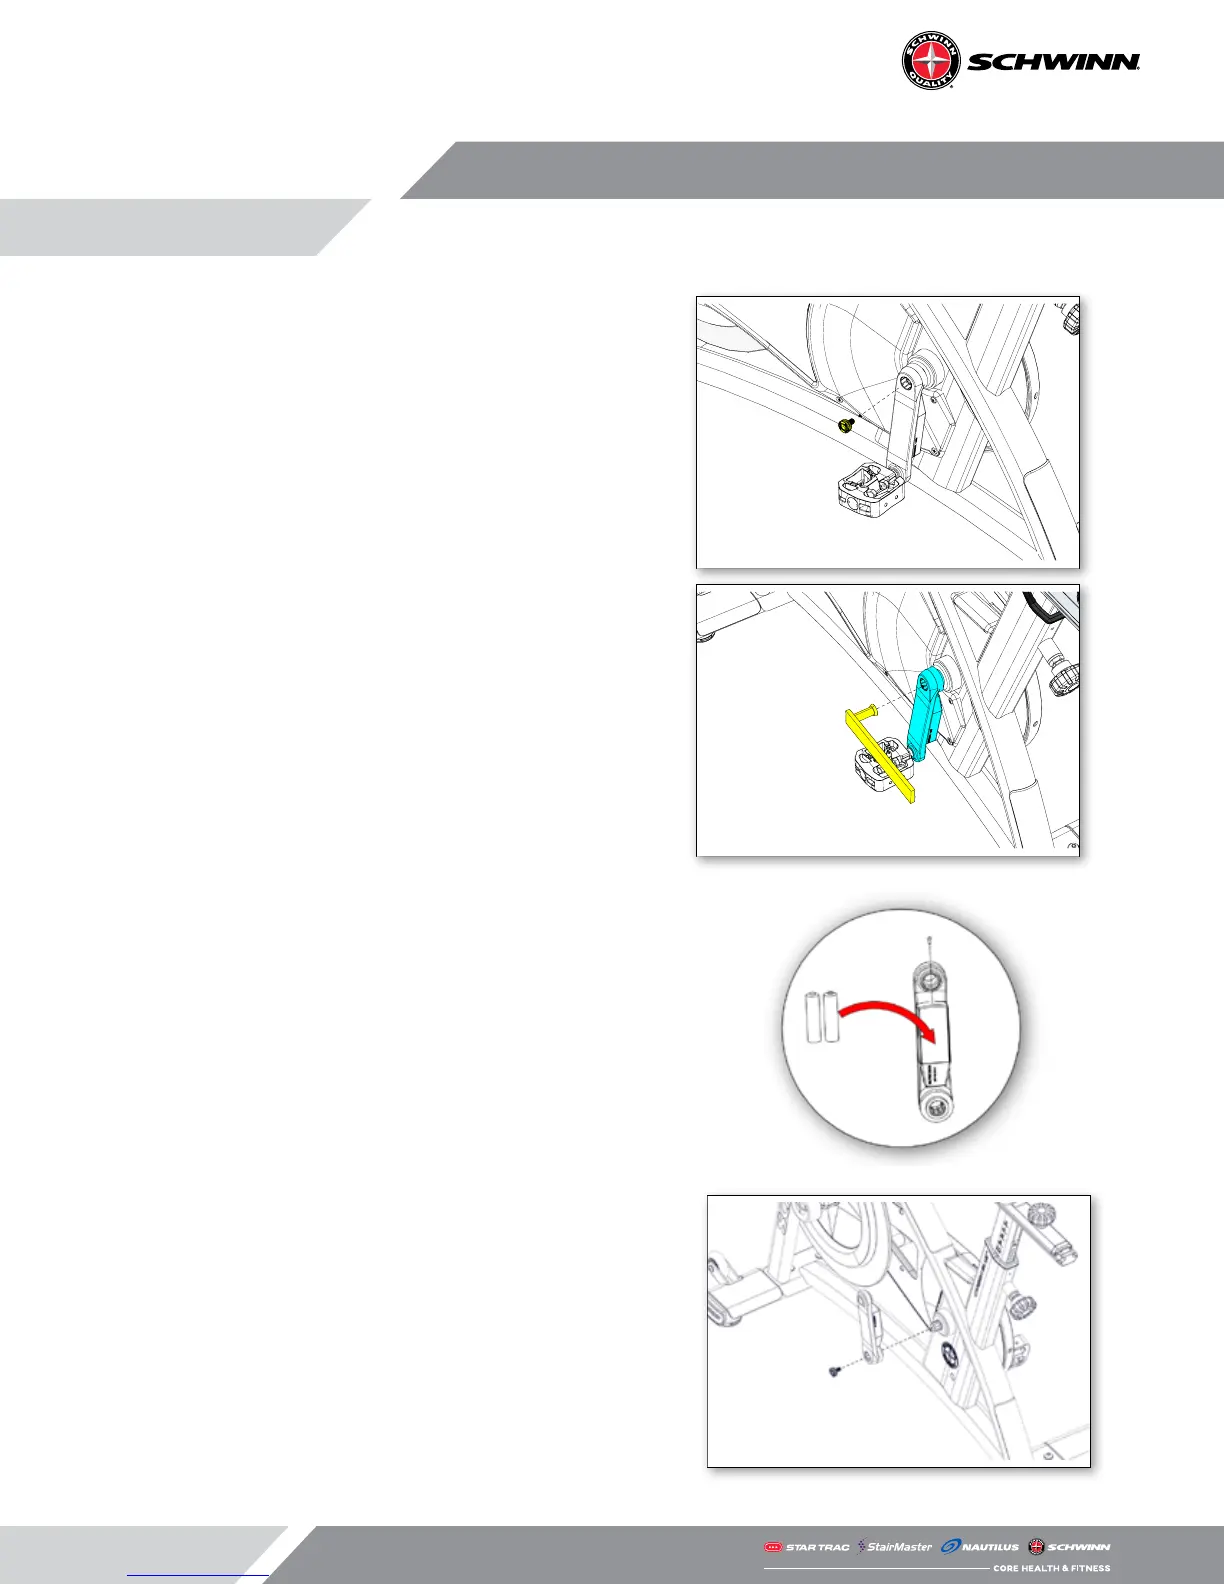
15. Use an 8mm allen key to remove the crank bolt.
16. Thread a crank puller tool with the larger 16.5mm tip into
the crank arm, then use the tool to pull the crank arm o
the bottom bracket.
17. Ensure the opposite side crank arm is at the 12 o’clock
position then push the new crank arm onto the bottom
bracket at the 6 o’clock position.
18. Use a torque wrench coupled with an 8mm allen socket to
reinstall the crank bolt and torque to the value below:
40-44 ft-lb / 55-60 Nm
19. Use a small phillips screwdriver to remove the screw
securing the battery cover, remove the battery cover,
then install the batteries. Once the batteries are installed,
replace the cover and screw.
20. Ensure that the rider’s right crank arm is at the 6 o’clock
position then push the crank onto the bottom bracket.
Finally, using a torque wrench with an 8mm allen socket
attached, torque the crank bolt to 40-44 ft-lb (55-60 Nm).

 Loading...