Page 9
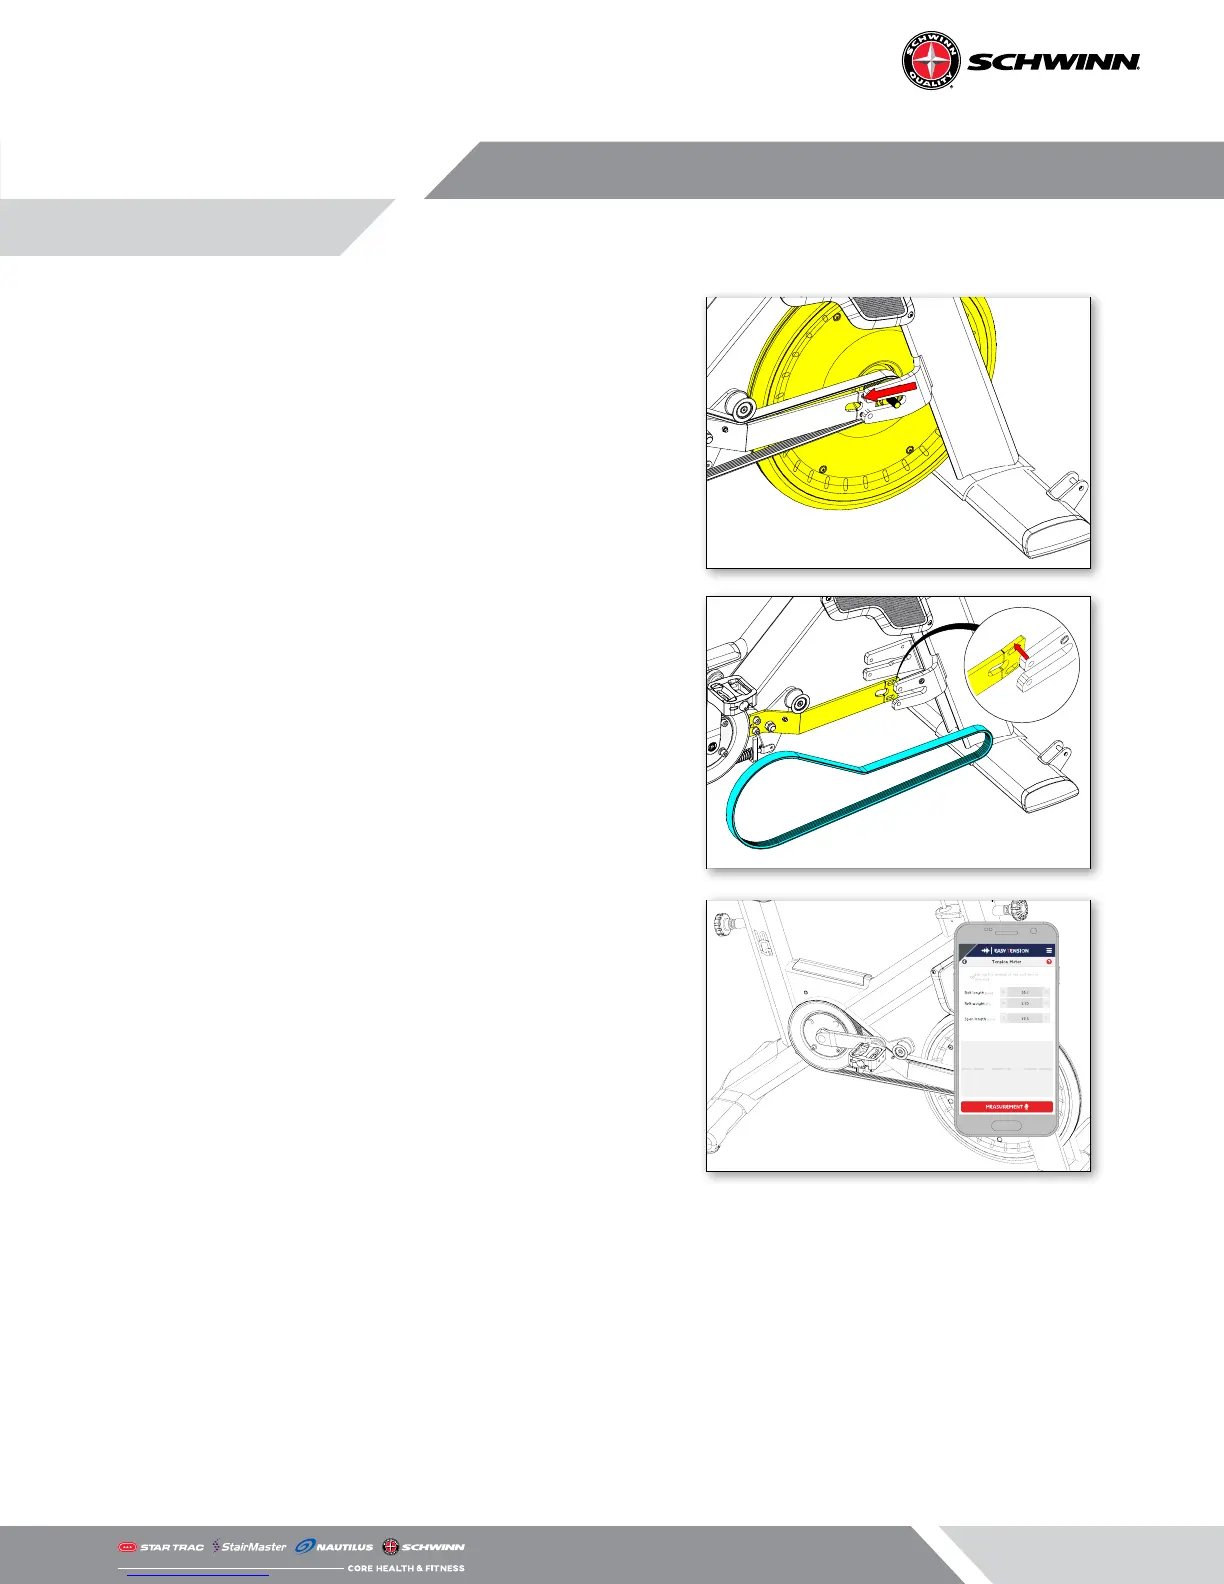
13. Walk the generator belt o the right-side ywheel pulley
then rotate the ywheel back and down to the remove the
ywheel from the frame.
NOTE: Take care as the ywheel is heavy.
14. Push the front of the cross brace away from right front fork
to create a gap then slide the old belt through the gap.
Slide the new belt through this same gap then follow the
directions in reverse to install the new belt.
NOTE: Remember to re-attach generator belt on user left
side ywheel pulley.
15. BEFORE TIGHTENING THE AXLE BOLTS: Use a 3mm allen
key to reinstall the left and right tension screws by turning
clockwise to tighten and counter-clockwise to loosen. Be
sure to adjust the bolts evenly so that the ywheel is not
angled between the forks.
16. Fine adjustment to the belt tension can be done using a
13mm open-endedwrench to loosen or tighten the ten-
sioner spring on the idler arm.
17. Check belt tension using a sonic tension meter in the cen-
ter of the belt span. The belt should measure ~84 Hz.
18. If you do not have a sonic tension meter, you can use a
tensioning app to measure the frequency.
NOTE: App settings are provided for convenience. Core
does not support third-party apps.







 To Next Page