WARNING
RETAINING RING MUST BE USED TO PROPERLY POSITION AND HOLD THE BODY
TENSIONER IN PLACE WHILE SECURING THE STEEL SCREW. FAILURE TO PROP-
ERLY POSITION THE BODY TENSIONER MAY RESULT IN LEAKAGE OF THE
BLOWER HOUSING. SUCH LEAKAGE MAY EXPOSE THE USER TO THE ATMO-
SPHERE THE RESPIRATOR WAS DESIGNED TO PROTECT AGAINST RESULTING
IN SERIOUS INJURY OR DEATH.
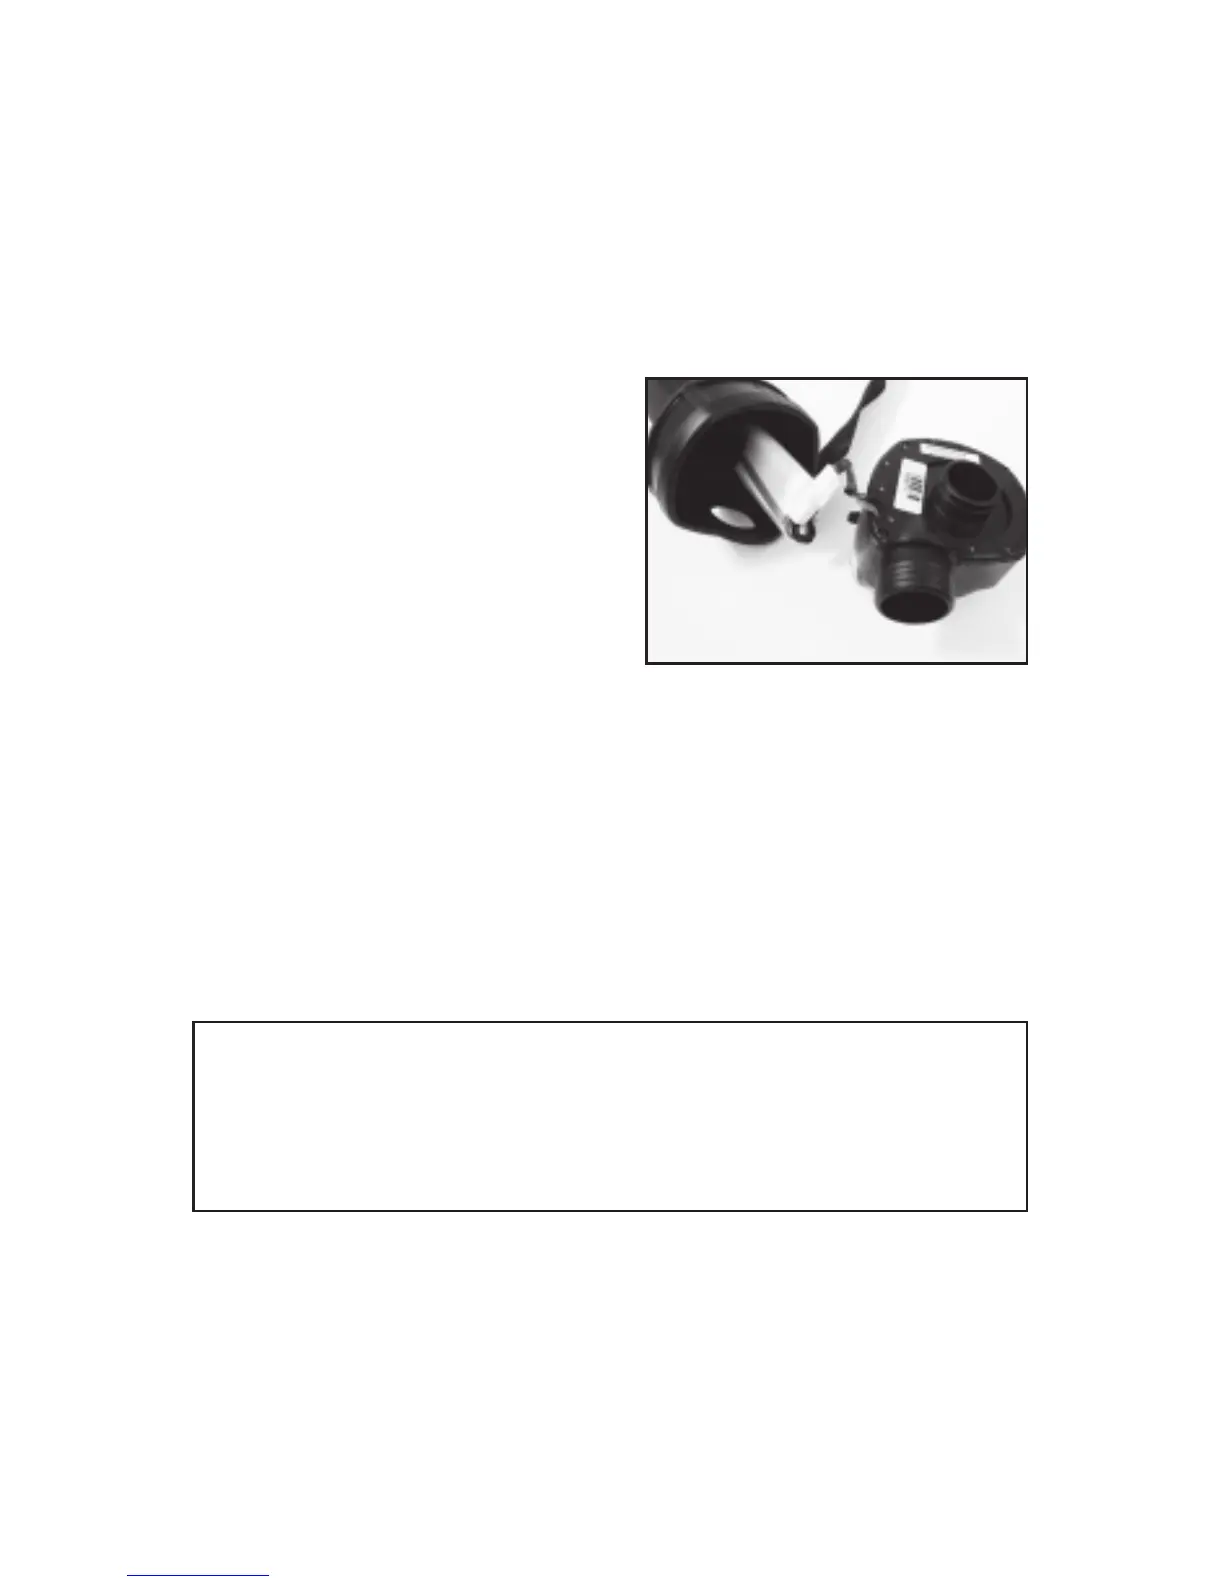
FIGURE 8
17
BATTERY REPLACEMENT
If the rechargeable battery should need replacement, remove and replace it according to the
following procedure.
1. Clean the respirator according to the INSPECTION, CLEANING AND STORAGE sec-
tion of this instruction.
2. Remove and dispose of used filter elements according to the DISPOSAL OF AIR
FILTRATION ELEMENTS AND BATTERIES section of this instruction.
3. Disconnect the breathing tube from the threaded coupling on the blower assembly.
4. Using a small Phillips screwdriver, loosen the steel screw and detach the body tensioner.
See FIGURE 8.
5. Remove the blower from the body by rock-
ing it out of the flexible body and removing
threaded coupling from the opening in the
flexible body.
6. Carefully pull the battery leads to draw the
battery out of the battery compartment.
7. Disconnect the old battery and replace with
new battery SCOTT P/N 063548. Align the
battery connectors and push together until
they lock.
8. Dispose of the used battery as directed in
the DISPOSAL OF AIR FILTRATION ELE-
MENTS AND BATTERIES section of this
instruction.
9. Slide the new battery into the battery compartment.
10. Inspect the O-ring on the blower inlet to verify that it is present and in good condition.
11. Reinstall the blower by first inserting the threaded coupling through the opening in the
flexible body and rocking blower back into position. Be sure wires are not pinched
during reassembly.
12. Verify that blower inlet is properly seated in blower housing by looking up through the
first filtration element port. Inlet must fit evenly within housing opening.
13. Use the Retaining Ring on the threaded coupling to secure the body tensioner in
position while reattaching the steel screw. Body tensioner must fit evenly in the recess
provided for it in the blower housing.
14. Tighten the steel screw until a gap of approximately 3 mm to 5 mm (.120” to .200”)
remains between the ends of the tensioner.
15. Recharge battery according to PREPARATION FOR USE section of this instruction.
16. After charging, test unit and check for leakage around blower housing before return-
ing to use.
 Loading...