Do you have a question about the ScreenBeam 750 and is the answer not in the manual?
Overview of methods for preparing the ScreenBeam environment for centralized or local management.
Instructions for enabling and setting a unique name for the ScreenBeam receiver.
Steps to modify the default administrator password for enhanced security.
Details on enabling PIN pairing and setting connection preferences for security.
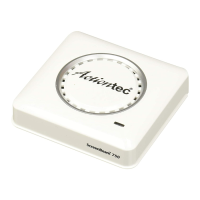
The ScreenBeam 750 Wireless Display Receiver is a device designed to facilitate wireless display connectivity, allowing users to project content from their Wi-Fi Miracast-enabled devices to a TV, projector, or monitor. This user guide provides comprehensive instructions for setting up, configuring, and deploying the receiver, making it suitable for various environments, from individual use to multi-unit corporate deployments.
At its core, the ScreenBeam 750 acts as a bridge, enabling a seamless wireless connection between a source device (such as a Windows 10 laptop) and a display. It eliminates the need for physical cables to transmit video and audio signals, offering flexibility and convenience in meeting rooms, classrooms, or any space where dynamic presentations or collaborative work are common. The receiver supports Wi-Fi Miracast technology, a standard for wireless display, ensuring compatibility with a wide range of modern devices. Once connected, the ScreenBeam 750 mirrors the content from the source device onto the larger display, allowing for presentations, video playback, or extended desktop functionality without the clutter of wires. The device is designed for continuous operation, providing a reliable wireless display solution.
The ScreenBeam 750 offers a straightforward setup process, beginning with connecting the receiver to a display via an HDMI cable and plugging in the power supply. For users preferring a VGA connection, the user guide references additional details in the ScreenBeam receiver's user guide. After power-up, the display will show a "Ready to Connect" screen, indicating the receiver is operational and awaiting a connection from a client device.
Connecting a client device, such as a Windows 10/8.1 system, involves using the device's built-in Wi-Fi Miracast functionality. Users can access an online tutorial at www.screenbeam.com/setup for detailed, OS-specific instructions. Typically, this involves pressing Windows + K on a Windows 10 device to open the "Connect" menu, selecting the ScreenBeam receiver's name from the list, and entering a PIN code if prompted. The default PIN is 12345670, which can be used if no PIN is displayed or if the PC still requests one. Once connected, the client device's screen will appear on the display, and users can utilize hotkeys like Windows + P to select a project mode, such as duplicate, extend, or second screen only.
For deployment in larger settings, the ScreenBeam 750 supports both local management and centralized management via the ScreenBeam Central Management System (CMS) software. Local management allows for configuring and updating a single receiver at a time. This is achieved by connecting a Windows 10 device in Wireless P2P Direct mode to the receiver and accessing the local management console through a web browser at http://192.168.16.1. Users will need to log in with the default username "Administrator" and password "screenbeam" to access the Device Configuration webpage.
The CMS software is a highly recommended tool for multi-unit deployments, enabling configuration, updates, and management of all receivers from a central location. The CMS software and its user guide are available at https://support.screenbeam.com/cms. This centralized approach simplifies the management of numerous ScreenBeam devices across an organization, ensuring consistent settings and efficient updates.
Customization options are available to tailor the receiver's behavior to specific needs. Users can assign a unique device name to each receiver (e.g., "Conference TV"), making it easier for users to identify and connect to the correct display. The administrator's password can also be changed from the default for enhanced security.
Wireless display settings can be customized under the "Features" page. The "Force PIN Pairing" option is enabled by default with a PIN code of 12345670, requiring users to enter this code to connect. This setting can be configured to "On" (requiring a PIN) or "Off" (no PIN required). If "On," users can choose whether the PIN is required for "Each connection" or only for the "First connection." The PIN code generation type can also be selected, including a "Static" option where administrators can define a custom PIN. It's crucial to note down new PINs for users, and if a Windows 10 Miracast device has previously connected with an old PIN, its profile might need to be removed to clear the old PIN.
The receiver also includes HDMI/VGA Port Power Management features to extend the life of the TV/projector's bulb. Users can select "ScreenSaver" or "Display Off" modes, specify a desired time period for these settings to take effect, and optionally select a "Wake up mode."
Once configured, the receiver can be placed at its permanent location, ensuring accessibility to both power and the HDMI/VGA input of the display. For CMS management, access to a wired (recommended) or wireless LAN is also required. The final step involves plugging in the HDMI cable and power supply, switching the TV/projector to the correct input, and verifying the "Ready to Connect" screen appears.
Maintaining the ScreenBeam 750 involves ensuring it runs on the latest firmware and has access to updated documentation. Before deployment, users are advised to check https://support.screenbeam.com/750 for the receiver's deployment guide, firmware upgrades, and release notes. Similarly, for the ScreenBeam Central Management System, the latest software and user guide can be found at https://support.screenbeam.com/cms. Regularly checking these resources helps ensure optimal performance, security, and access to new features.
The device's local management console provides an interface for individual receiver maintenance, allowing administrators to update settings and potentially firmware if not using CMS. For multi-unit deployments, the CMS software streamlines maintenance by enabling bulk updates and configuration changes across all managed receivers. This centralized approach significantly reduces the administrative overhead associated with keeping multiple devices up-to-date.
Troubleshooting tips and support, along with FAQs, are available at https://support.screenbeam.com, providing a valuable resource for resolving any issues that may arise during setup or operation. The inclusion of Open Source information at https://opensource.screenbeam.com also indicates a commitment to transparency and community engagement, which can be beneficial for advanced users or developers.
In summary, the ScreenBeam 750 Wireless Display Receiver is a versatile and user-friendly device designed to simplify wireless display connectivity. Its robust feature set, including flexible management options, customizable settings, and dedicated support resources, makes it a suitable solution for a wide array of professional and educational environments.
| Model | ScreenBeam 750 |
|---|---|
| Category | Receiver |
| Wireless Standard | 802.11ac |
| Wireless Frequency | 2.4 GHz and 5 GHz |
| Frequency Band | Dual-band |
| Maximum Resolution | 1080p |
| Connectivity | HDMI, USB |
| HDMI Output | Yes |
| USB | Yes |
| Ports | HDMI, USB |
| Wireless Technology | Miracast |
| Power Supply | 5V/2A |
| Compatibility | Windows, Android |
| Weight | 75g (2.65 oz) |