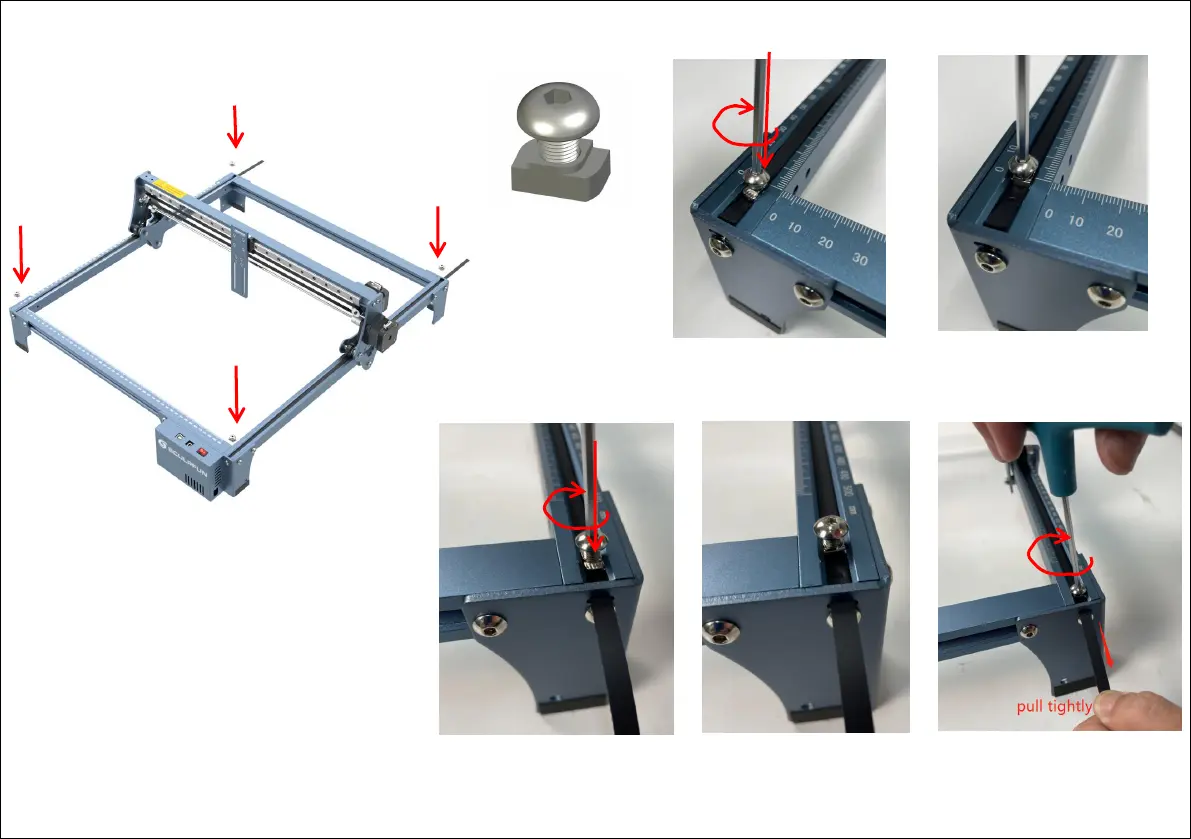
Step 4 Install T nut
1
1
2
2
1
2
Do not tighten the T nut, pull
the belt with your hand to
make the belt tight
With the belt tightened, tighten
the screws to keep the long side
of the T-nut perpendicular to the
groove.
Put the T nut into the groove, the long
side is parallel to the groove, Strongly
press the T nut while rotating the wrench
clockwise to make the long side of the T
nut perpendicular to the groove
Put the T nut into the groove, the long side is
parallel to the groove, Strongly press the T nut
while rotating the wrench clockwise to make the
long side of the T nut perpendicular to the groove
Tighten the screws and keep
the long side of the T-nut
perpendicular to the groove.
Installation steps:
1. First install the T-nut on one side as shown
in the figure.
2. Install the other end of the T-nut on the
other side, and note that the long side of the
T-nut is perpendicular to the groove after
installation. After the installation is complete,
the belt is in a tight state. For extra belts, if
you are not familiar with the use of belts, we
suggest that you do not cut off the extra belts
Do not screw
through the nut