18
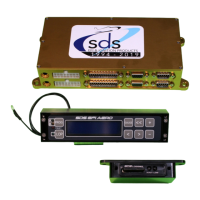
Programmer Cable(s)
These connect the ECU(s) to the programmer. If you have a single ECU, you
should have a programmer with a single serial port on the rear. If you have
dual ECU boards, you should have a programmer with two serial ports on the
back. Each ECU has a cable to plug into the programmer. Pay attention to
the labeling to be sure primary ECU is plugged into primary programmer port
and backup to backup.
Programmer Mounting, 3-1/8” Style Programmer unit
Most aviation installations use the SDS aviation, panel mount
programmer which mounts in a standard 3 1/8 instrument cutout.
Where there is insufficient panel space, the hand held model may be
used and stored elsewhere. Some people will mount it off-panel with
two-sided Velcro tape. You must have the programmer hooked up in
order to program the system and access features like fuel trim in flight.
The programmer does not need to be hooked up once programming is
complete however without it, you have no window into the system and
no diagnostics. Both programmers have internal backlighting of the
LCD. Programmer serial cables are available in 1, 3 and 6 foot
lengths. There is no option with the hand held programmer to access
2 ECUs.
If you have dual ECU boards, you should have a dual access programmer which has a second DB9
port in the rear. One serial cable will connect to each of these ports and each ECU port. The dual
access programmer also has a mini toggle switch which is panel mounted. This allows you to toggle
between ECUs with the single programmer. For maximum flight safety, we recommend all
aviation applications have a programmer connected in the cockpit.
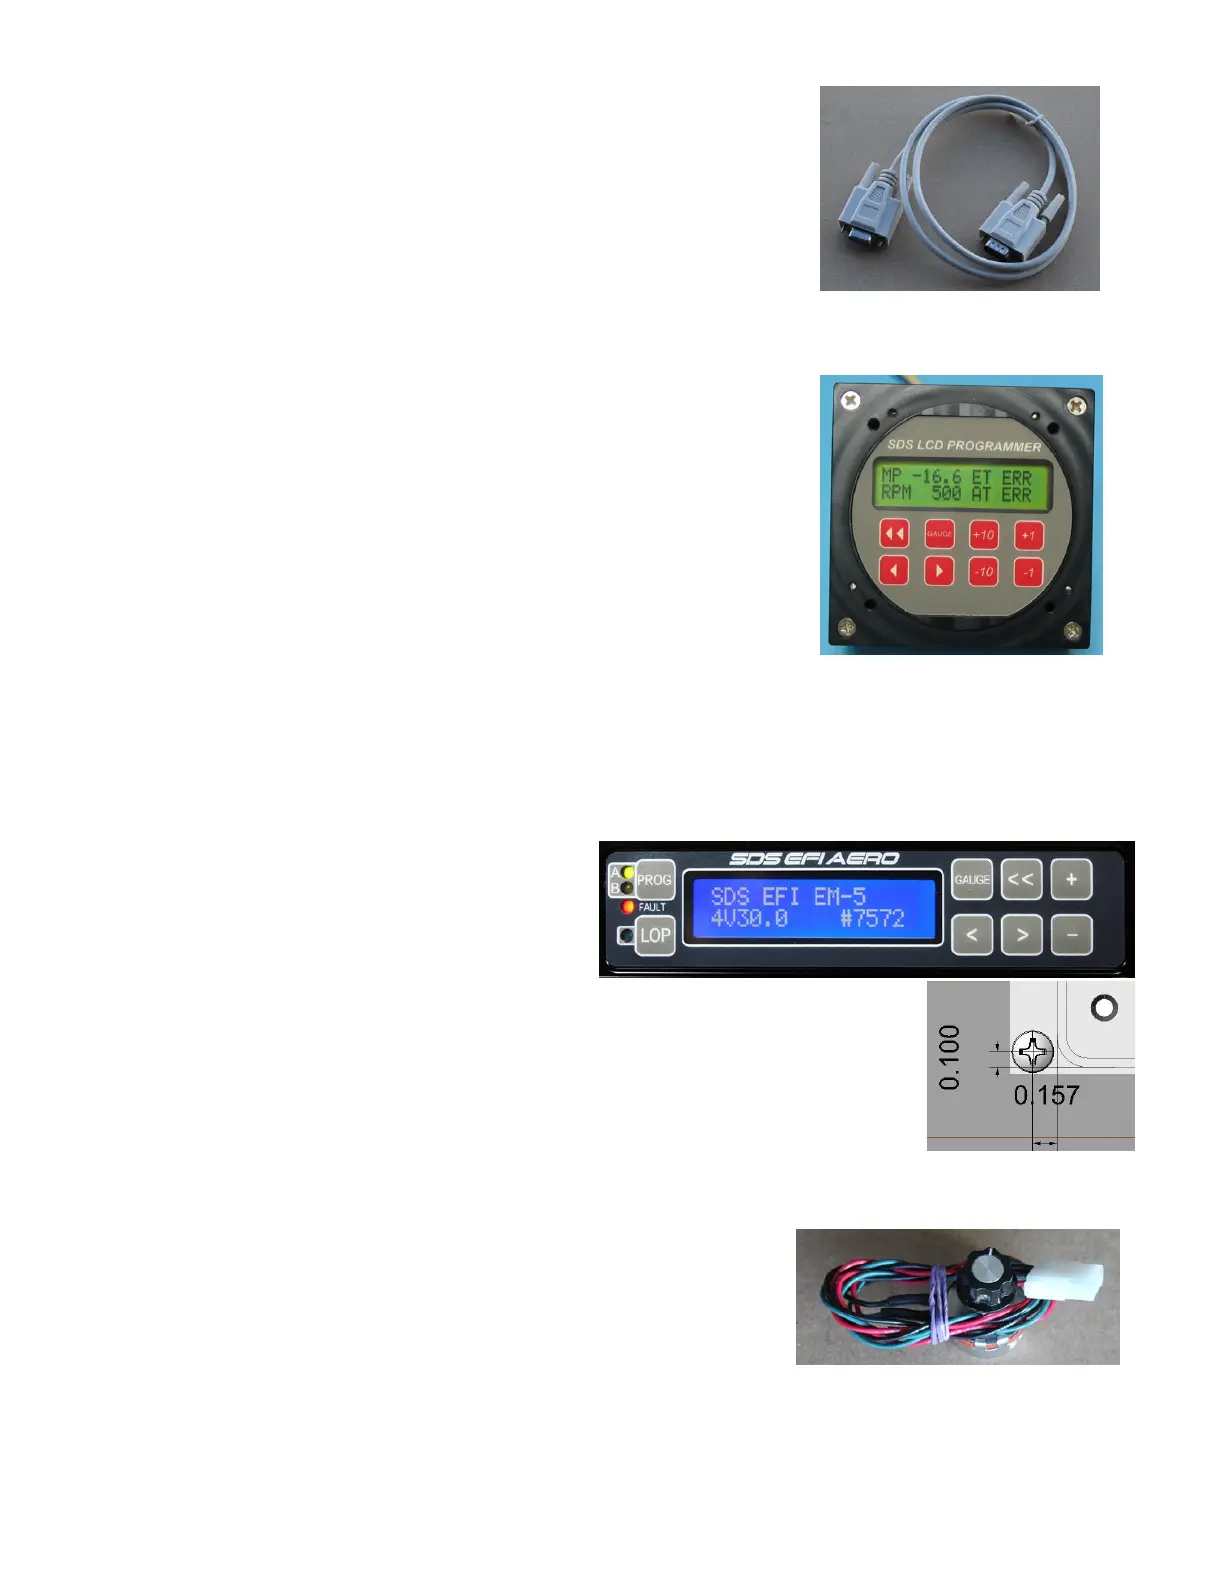
The new for 2020 SDS EFI AERO programmer
unit has two new keys, PROG AB and LOP
eliminate two toggle switches used with the 3-
1/8” programmer and works with single or dual
ecu’s. Designed to mount mid –panel where
radio and intercom are mounted.
Cutout opening is 5.636” wide by 1.366” high, with .195” corner radii. Cutout
dimension are zero gap so expand opening by desired amount. Mount holes
need to fit #6 screws. Mounting hole spacing is 5.95” x 1.166”. Use #6-32 x 3/8”
long screws to mount. Mounting hole dimensions from cutout opening are .157”
to sides of cutout and .100” up from bottom of cutout and .100” down from top of
cutout.
Mixture knob Mounting
The mixture knob allows quick leaning and richening of the mixture
without any reprogramming. It is used to lean the engine in cruise if
you run LOP. Think of it as a conventional mixture control. We
recommend that it’s always permanently installed as it gives
the user important override control in the event of some
sensor and fuel system malfunctions. Try to mount it in such a
way and location where it cannot be inadvertently be bumped. The tang should engage a 1/8 inch
hole vertically above the main 3/8 inch diameter mounting hole in the panel. This indexes it properly
for full range control (+/- 50%).
 Loading...